Improve the eyes in portraits, Gimp tutorial
Tutorial on how to improve the appearance of the eyes with Gimp. Change the color, add brightness and reflections.

In this Gimp tutorial we will explain how to improve the appearance of the eyes with Gimp, changing theyr color, increase the brightness, darken the eye contour and add reflections. The eyes are one of the most important points of interest of portrait photography. The step "Change color" of this tutorial to improve your eyes with Gimp is optional, the guide would be very useful even avoiding the "color wheel".

Change the color of the eyes
Obviously this step is absolutely optional. If you prefer to keep the original color of the eyes, you can simply skip this step and jump to the next, where we'll increase of the saturation.
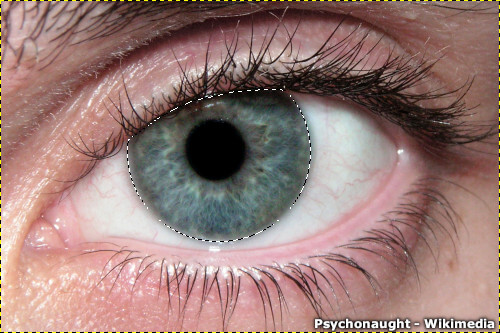
Anyway you need to select the iris even if you don't want to change the color.
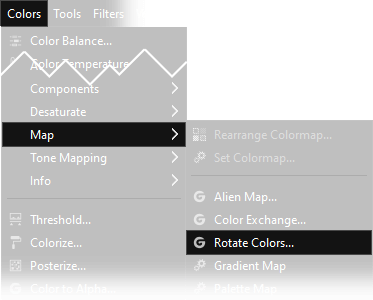
We need to use the Rotate Colors tool, of which we have already written an in-depth tutorial here to replace
the color of the iris. We want the blue to be replaced with an emerald green.
First of all we have to select the contour of the iris: using any selection tool you prefer,
create a selection around the iris, so that we'll only affect the part that interests us. I suggest you to apply a softness of some pixels to the selection opening
Select → Feather....
Ok, now open Colors → Map → Rotate Colors..., and set it as you like. In my case I replaced all blue tones with green. Don't worry if there is a reflection that takes strange colors, we will eventually fix it later. Don't delete the selection, we'll need it in the next steps.
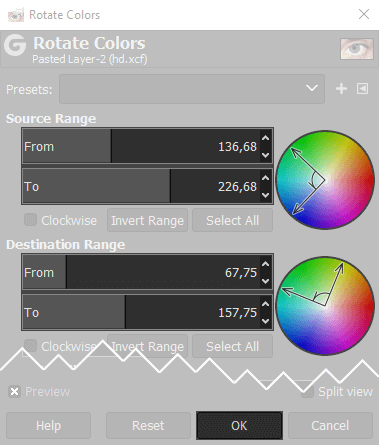
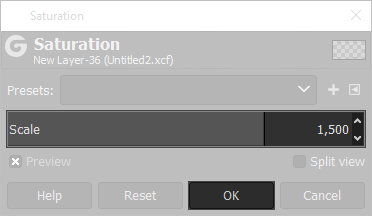
Now we need to raise the saturation, we have opted for a value of 1,500 but you can choose the one that best suits your photography. To raise the saturation of the colors open Colors → Saturation....
Highlight the iris
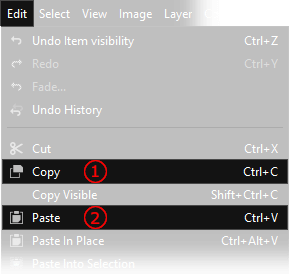
We want to increase the high lights to give more presence to the iris patterns. Keeping the previous selection, copy and paste only the iris as a new layer. You can proceed in tho ways: with the menus Edit → Copy and then Edit → Paste, or with the keyboard shortcuts, in this case you need to press CTRL+C to copy and CTRL+V to paste. Once done, a new floating selection will appear on the levels window, press the right mouse button above it and select To New Layer, at the end we will have a second copy of the iris alone.
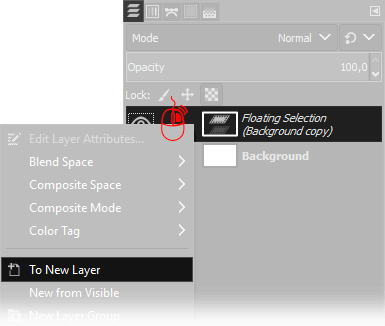
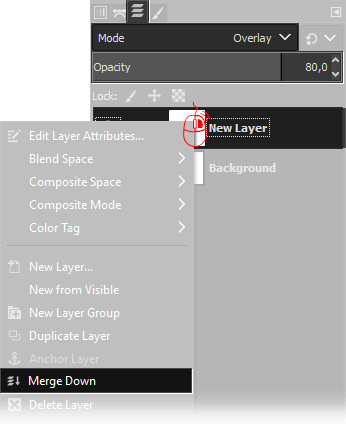
Now we need to select the upper layer, then choose Overlay
as Blend mode, and set opacity to 80%. If you are happy with the result you can click with the right mouse button on the layer on the top
and choose Merge down.
Remember to choose the opacity that you think better suites the eyes of your subject. In case of very dark or black eyes, it might be interesting to experiment with other blending modes, such as
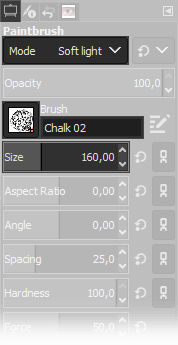
Multiply to further darken the colors or Soft light for light brown eyes.
Setup a brush as the one below and paint a brushstroke over the iris to simulate additional reflections. For the position and size of the brush we need to
make a few attempts, I've set the size of the brush similar to the iris and I've done only one click. To make you better understand
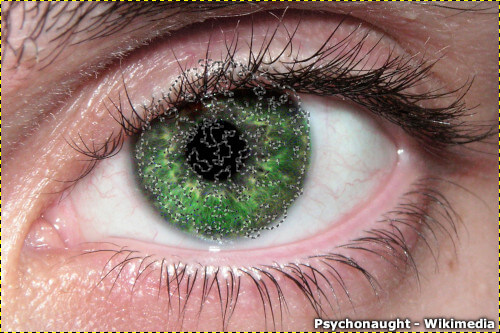
what I've done to add the reflection, I've captured the screen before clicking, so that you can see the contours of the brush.
At the end of the tutorial you'll see that I've also added a couple of reflections on the pupil with a traditional white brush.
I suggest you to look at some fashion photographs, to see the different shapes that can take reflections on the eyes, as it is something that
is rarely observed, but it's very interesting and could be an inspiration. Surely it would be better to try to have nice reflections while you
take the picture, but if you can't, you can also consider adding them. If you want to manually add reflections with a brush, probably you'll have to do
several tests because it's hard to make a good work on the first try. Save the file before you start trying or work on a copy of the layer.
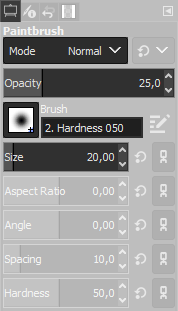
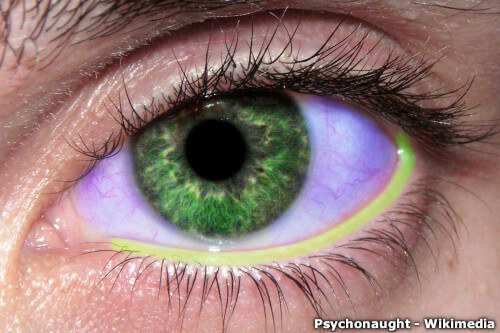
Last step is recommended with female portraits, if she has not used makeup. The same effect can be applied to male faces, but it is not always a good idea. Let's configure a brush in a more traditional way, with smaller size and lower opacity. As always you'll have to choose the right parameters for your photo. Change the color to black, increase the zoom and with a little patience and precision, apply the "black pencil" to the eyelid of our model. Be careful not to darken too much and do not pass over the same spot twice. In the example, the "black pencil" was made in green, to allow you to see it easier, you have to do it with black color. Optionally use the same brush, change color to white, increase the size and lighten the sclera (the white part of the eye, here has been coloured in purple to highlight the stroke, but you have to use white).
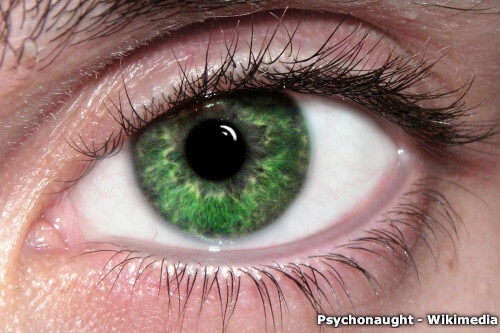
Here below you can see the final result. As mentioned at the beginning of the tutorial, changing the color of the eyes is absolutely optional. Also remember to do several tests with reflections and always edit both eyes at the same time, so as to have the same identical result.
If you liked this tutorial here you can find all the tutorials we wrote about editing with Gimp, or you can all the guides we have written about photography in general. If you liked our work, you could consider to ❤support us: by clicking here you can see how.