GND simulation, Gimp tutorial
How to use Gimp to better balance the exposure of the sky, faking a Gradient ND Filter.

GND filters are very useful in photography and can be easily faked with Gimp. The name is an abbreviation of Gradient Neutral Density Filter, they are a smoked glass, that is placed in front of the lens, that gradually becomes more and more dark. They are used to smoothly darken the sky, that is brighter than the ground, to better balance the overall exposure of the photo.
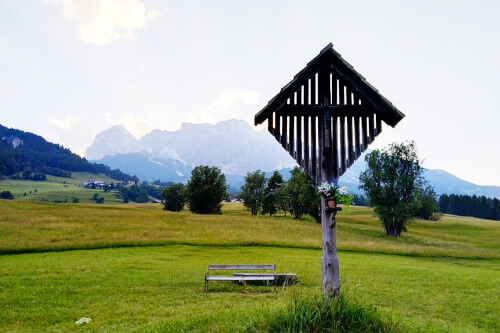
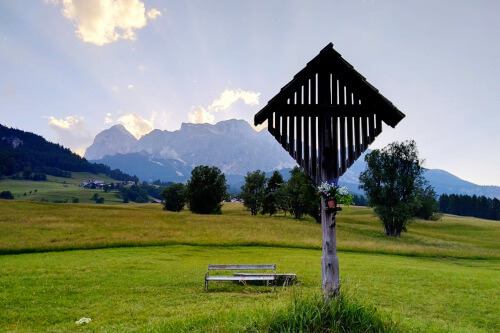
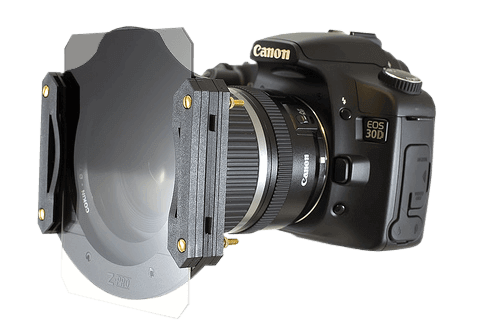
If you shoot with a real GND filter, as the one that you can see in the picture below, the dark part of the filter must be placed over the sky, with the gradient over the horizon. It is really easy to simulate a GND filter with Gimp, and the results are great. The real filters, such as the simulated ones, have different degrees, for each light situation you could find.
Simulate a GND filters with Gimp is really easy, the first step is create a rectangular selection a little bit over the horizon line, if you have an irregular horizon, consider a medium point or the higher one, I suggest you to try both options and choose your favourite. If you are not confortable with selections you can read this tutorial.

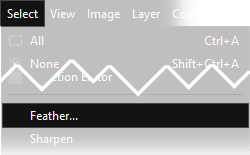
Feather the selection by clicking on Select 🠞 Feather.. and choose a large value: the intensity of the feather should be about the 20-30% of the height in pixel of the image. You can read the value of the ruler on the left of the image, or open Image → Scale Image, and read the height value.

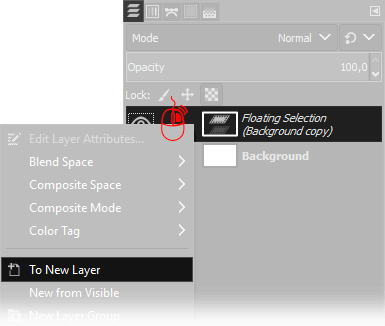
Now we want to copy the sky in a new layer: press Ctrl+C, then Ctrl+V. A new Floating selection will appear in the Layers Window, Right Click on it and select To New Layer. Another way to get the same result is click Edit → Copy, and then Edit → Paste As → New Layer.
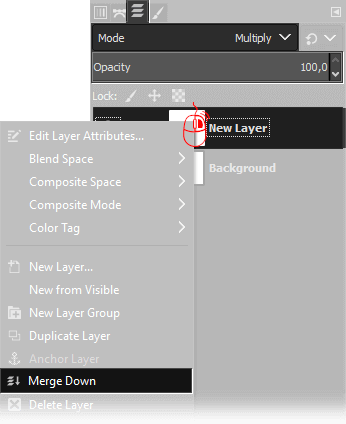
Set Multilply as blend mode, leave the opacity to 100%, then Right Click on the
Pasted Layer → Merge Down.
If you prefer a lighter effect, you can change the opacity value with a smaller one, if you prefer an heavier effect you can duplicate the floating selection.
As I promised you, simulate GND Filters with Gimp is really easy to do, and the results are great. Another way to get a similar result is the exposure blending, if you are interested you can read this tutorial.
If you liked this tutorial here you can find all the guides we have written about gimp, from the simplest to the most advanced, or you can all the guides we have written about photography in general. If you liked our work, you could consider to ❤support us: by clicking here you can see how.