How to scan slides without a scanner
In this tutorial we will explain how we digitized 2,000 35mm film slides without buying a scanner, looking for the best quality possible.

For a long time my father, like many others I think, archived his memories in slide collectors. Over the years the advent of digital has changed our way of relating to photography and slides have become obsolete. Because of the deterioration (the oldest were from 1980) we decided to convert all the old slides to digital, for a total of about 2,000 images. The only problem is that we didn't have a slide scanner.

Surfing on the internet we found different solutions, more or less cheap. Scanning through specialized studios was too expensive for so much photos, with only a sentimental value.
The purchase of a slide scanner didn't make much sense, both because it would take a long time to acquire the photos and because, at the end, it would become a useless object.
We were sure there was an alternative way, but we didn't want to do thing half-ass. Those were pictures of our parents when they were young, of our relatives, of us as children,
we wanted to obtain the best result possible. So we made several attempts to see which one offered the best results.
We tried some solutions to modify a traditional scanner, but the quality were very disappointing. We tried to illuminate the slide with a backlight panel and photograph it
with a macro lens, the result was not bad, but thinking about doing it two thousand times was exhausting for a result that was only acceptable.
In the end the solution that combined good quality and speed seemed to be the photographing the projected slides. But how do you achieve the highest possible quality?
After several tests, we want to propose you our solution.
"Scan" the slides
The projector:
For the projection we used my father's slide projector, a Perkeo R2500 with Zeiss lens, remote control and autofocus. Personally, I was unable to
do tests with different projectors, but I can bet that the quality of the lens directly affects the quality of the shots. I could tell you that I suggest you use
a good brand-name projector with good lenses, but given the difficulty in finding them, make anything you can get your hands on a good solution.
The projection cloth:
Finding the ideal projection surface was not easy. The texture must be perfectly smooth, as the texture of the projection cloth or the wall can be noticed too much
in the uniform parts of the photos, as the clear skyes. We thought of a white enamelled metal panel, but you could see the reflection of the projector lamp. On the internet
someone recommended a panel in a specific type of opaque plexiglass, which in technical jargon is defined "rear projection panel". Strangely enough, we had one
(sometimes is amazing to work in an electronic shop), but there was a noticeable lost of sharpness.
After several tests we found the right product: a sheet of white opaque paper, with a high grammage. Size was 50x70cm (something like 27x19 inches), bought in typography.
I recommend you to buy different types of paper, since they are relatively cheap, and then find the smoother, duller, cleaner one. Try both sides (front and back),
to see if one of the two sides is more opaque. Before buying, check with a flashlight, or the phone flash, that the paper does not make any kind of reflection and that
the paper is as smooth as possible.
Camera Setting:
We mounted a 90mm macro lens on the camera. Then we tried with the Canon 70-200 f/4 without noticing big differences in the results.
We chose the 70-200 because of the greater flexibility of positioning due to the variable zoom. We used a telephoto lens both to avoid distortion and to position
ourselves behind the projector.
The camera has been set in manual mode:
- Shoot with remote control
- Manual focus
- RAW file
- ISO 100
- f/5.6
- 1/20th of a second
- Automatic white balance
Although the choice of automatic white balance may seem an error, after several tests we verified that it brought the best results. Some slides had a strong variation in color, due both to old age and the different types of film used. In this way it has been possible to correct those differences automatically. So many years of technological advancement was helpful. If you don't clearly know what is a RAW file, here you can read our tutorial, if you are interested in an insight into white balance in photography, we recommend you read this dedicated guide
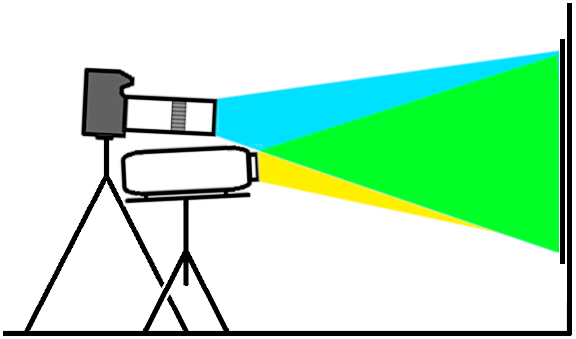
Camera and Projector Positioning:
We glued the 50x70 (27x19 inches) sheet of paper to the wall with some paper tape, the one for painters, being careful not to make folds.
We have positioned the projector with his support at about 2 meters from the wall (3.3 ft), to project a very bright and defined image,
with a size of more or less 50 centimeters (1.65 ft) on the long side.
The camera was placed on a tripod, just behind the projector: we tried to stay as low as possible above the projector,
to avoid distortions due to a shot taken too high, which would have distorted the photograph with a trapezoidal distortion.
We moved the zoom until we filled the shot with the projected slide. This step is extremely important, in order
to get a straight slide scan, which fills the frame and will save you a lot of work in the post production.
The representation below should clarify the positioning, although it is very schematic and emphasized.
Now comes the boring part: the slides were already all placed in the carousels, so we started to insert them and press the two remotes two thousand times. Scanning slides without the scanner is a bit boring, but we took the opportunity to see our childhood photos again, to make a pleasent experience of something that would otherwise be a sleeping pill. We divided the work into a few evenings, after dinner, being careful not to move anything from one day to the next, expecially the projector while we were changing the carousel.
Final touches to the "scans"
After photographing all the slides we moved on to photo editing. The RAW turned out to be very useful, as always,
as it allows a number of necessary corrections. The white balance, even with the automatic setting, messed up on some photos,
thankfully few. Automatic correction helps a lot, but it doesn't make miracles. Unfortunately, the exposure also changed a lot between some photos,
alternating many almost correct images with few under-exposed or over-exposed, this is because we preferred to shoot in manual.
The reason is simple: correct half stop of exposure in post production is faster than changing the settings from photo to photo.
Also, from our tests, the correction margin left by the RAW format was more than enough to discard automatic settings.
If you decide to shoot in .jpg instead, you could consider to leave the camera fully automatic, but I suggest you to do a test with one carousel before.
Personally I would never renounce to the advantges of RAW, with its ability to fix exposure or a poor color balance, but
you may not have a professional camera, so let's consider that possibility too.
If
you are interested in knowing why to shoot in RAW, read this tutorial.
For the photo editing I worked on 50 photos at a time, applying some standard corrections:
- Sharpness +5
- Saturation +1
- Contrast -1
- Shadows +1
- Lens distortion correction
- Peripheral lens illumination correction
The last two points were not so necessary, because we have a good lens, but certainly are not a bad thing. Once the standard correction has been applied to all the scans, you need to quickly correct the individual RAWs, just in case some are under or over exposed. Fortunately, it only takes a few seconds to adjust the exposure, and in some rare cases the white balance.
Of course there is one very important thing to say: the work only takes a few seconds with each photo if the "standard" editing is done "in batch". What does this mean? Most programs to process RAW have a function that allows you to apply a retouch to "a batch" of photos. In practice you modify the first image and the program applies the same corrections to all the opened images, automatically. We have written a tutorial for Canon program, if you use another one you will have to search how to do it in another location. The batch processing part is towards the end of the tutorial, in the sections "Copy recipe" and "Convert and save one or more photos". If you need it, you can read the tutorial for Canon DPP to develop Canon CR2 files.
We finally exported the "scans without scanners" in .jpg, scaling the resolution to 3000x2000 pixels, because more would have been useless.
The final quality is certainly not the same of a professional scanning, but it is more than enough.
For those who want to use the .jpg from the beginning I suggest to apply the post production with Gimp, with an
automatic or manual white balance
and a little of Sharpness (Unsharp Mask) the results are very good, as you can see on the images at the endo of the tutorial, where I published some examples.
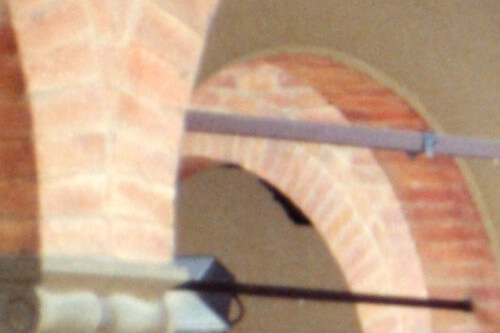
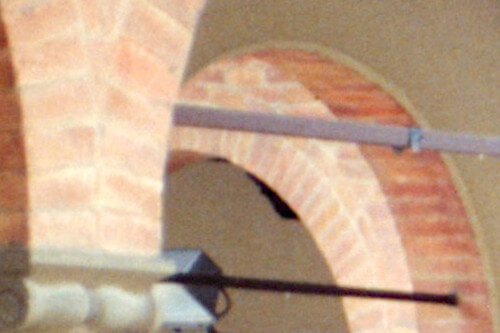
Before deciding that scanning slides without a scanner was an interesting solution, we asked the local photographer to scan with a medium quality one of our slides, and we did a comparison. Below there is the result, in which the scan performed by the photographer is compared to our scan of the slide, as you can see the result is quite good, even with a 100% crop. With a little of post production, as described in this tutorial, you can obtain results almost comparable to a professional scan in average quality. Attention: the following is not the whole photo, but just a crop of a much larger photograph, which you can see below.
Next there are some photographs taken with this technique, but processed in Gimp with a little of Sharpness (Unsharp Mask) and automatic white balance. By clicking on the images you can see the high resolution version.
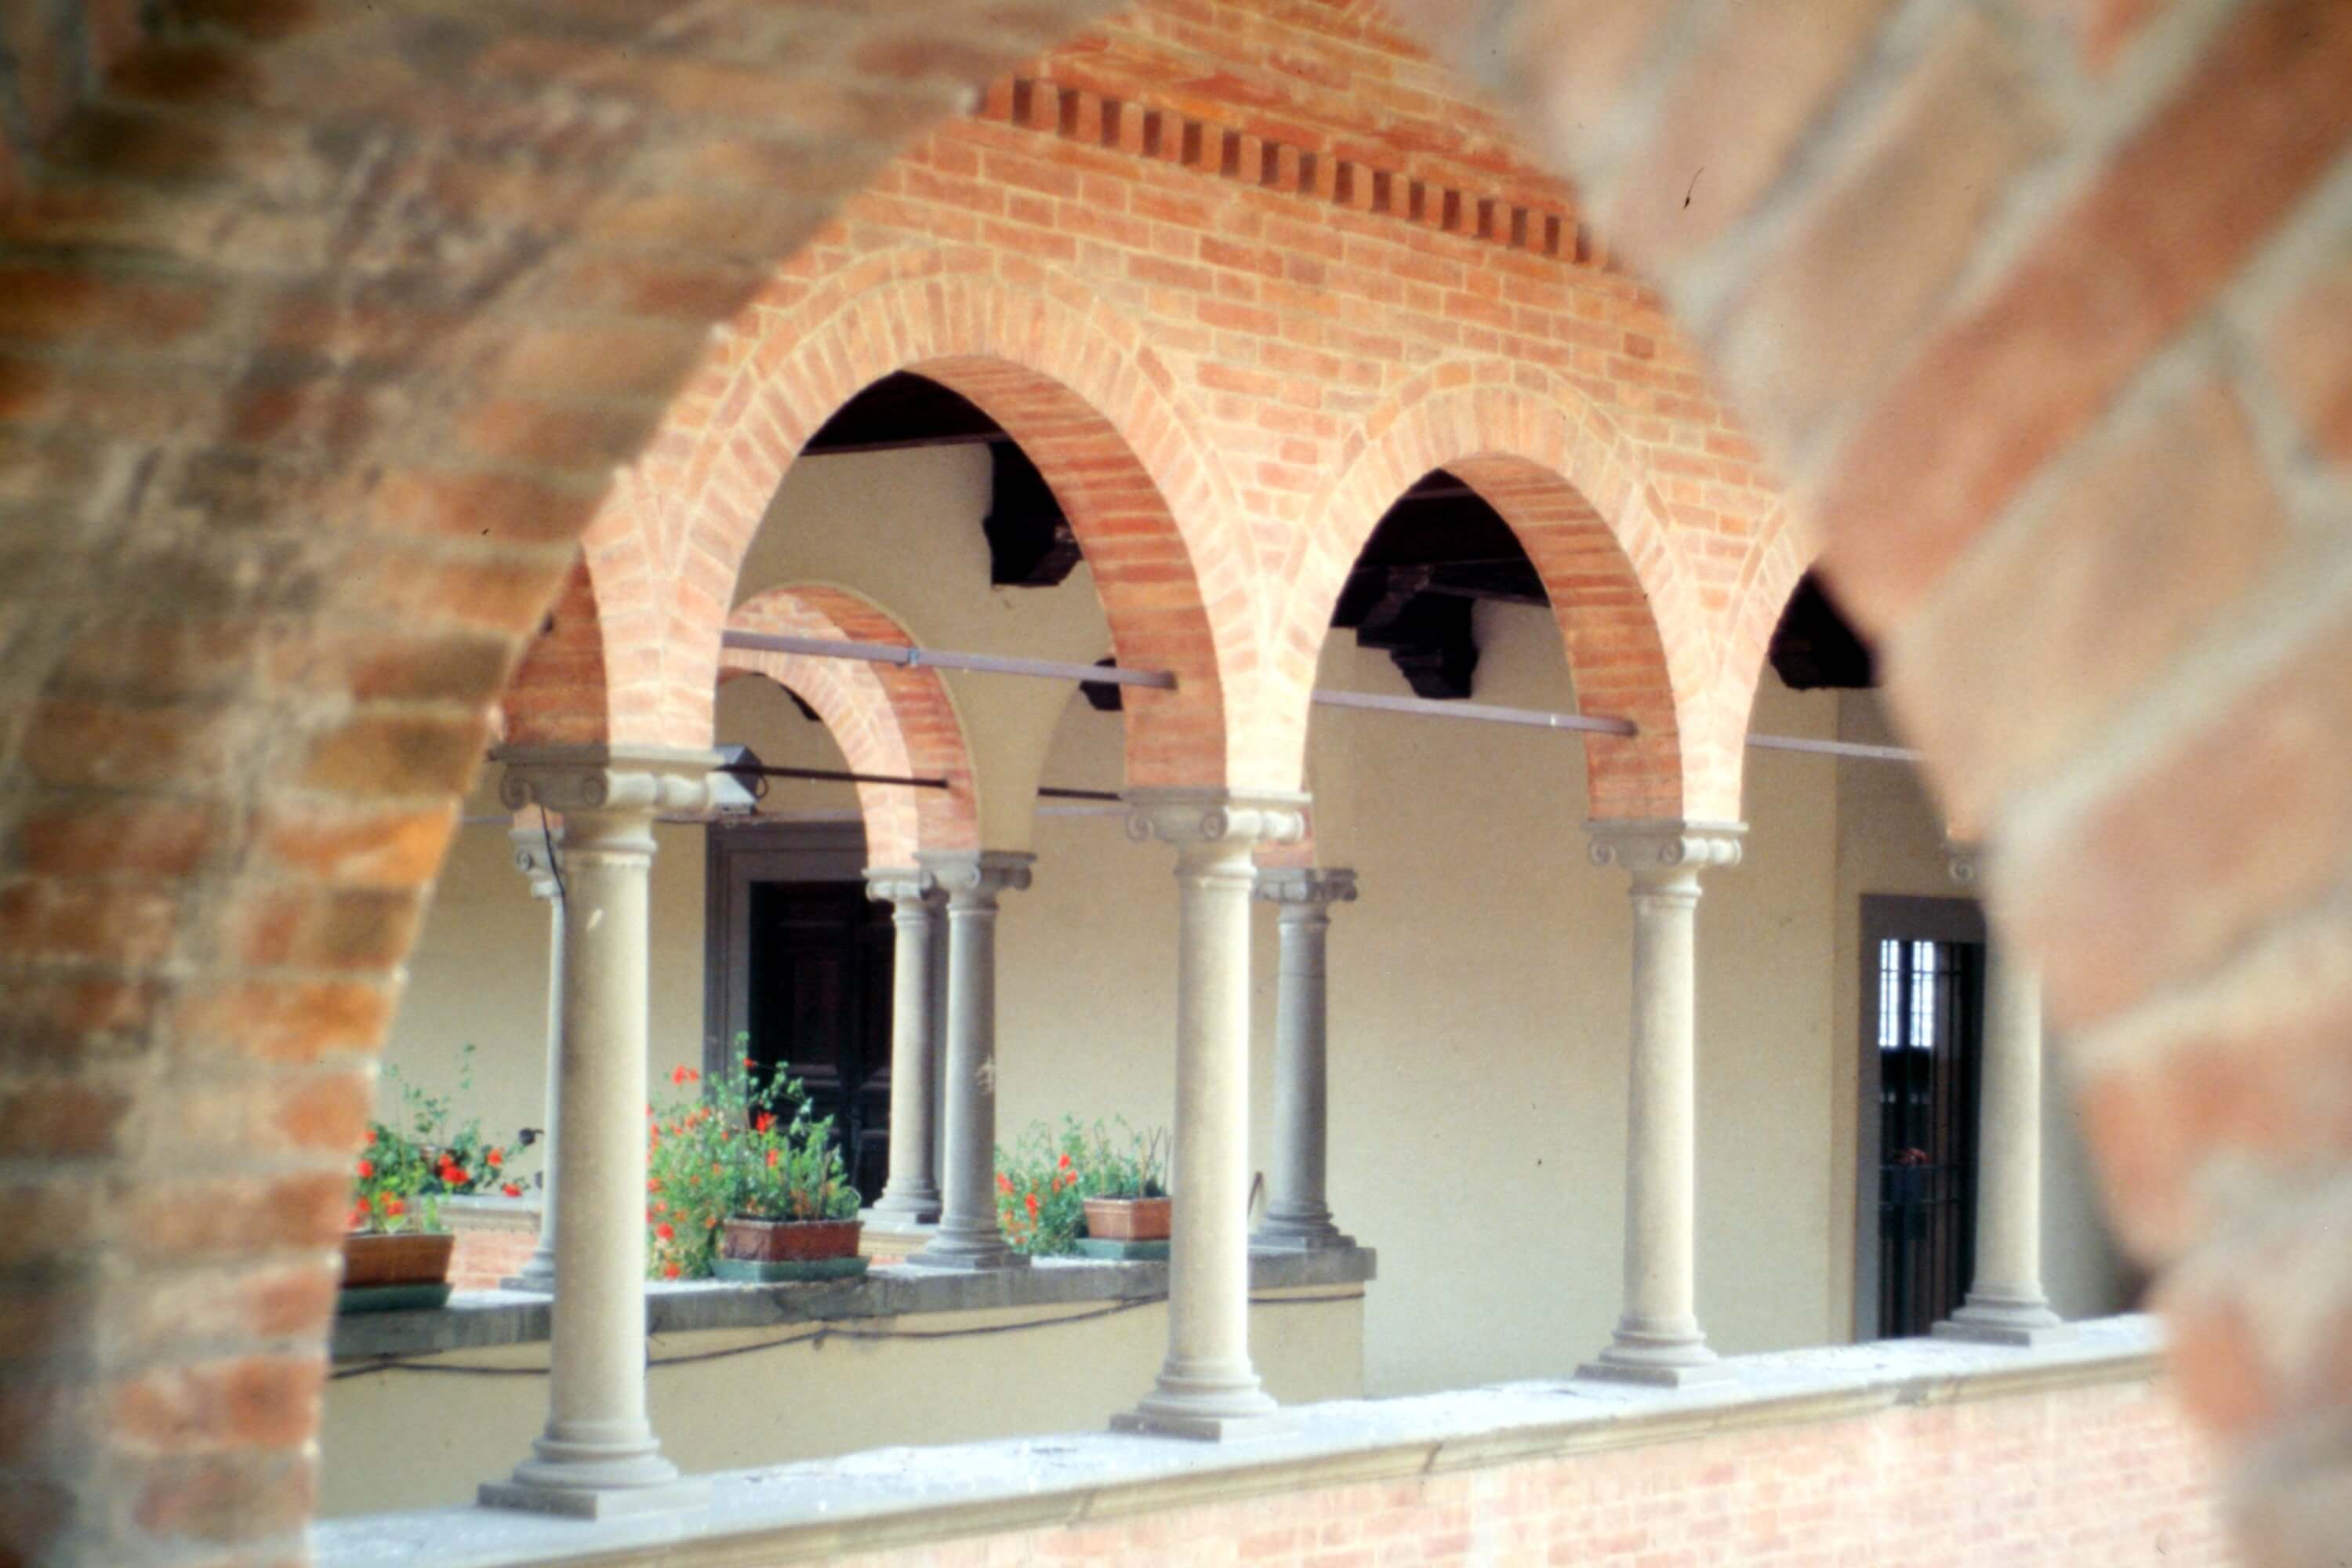

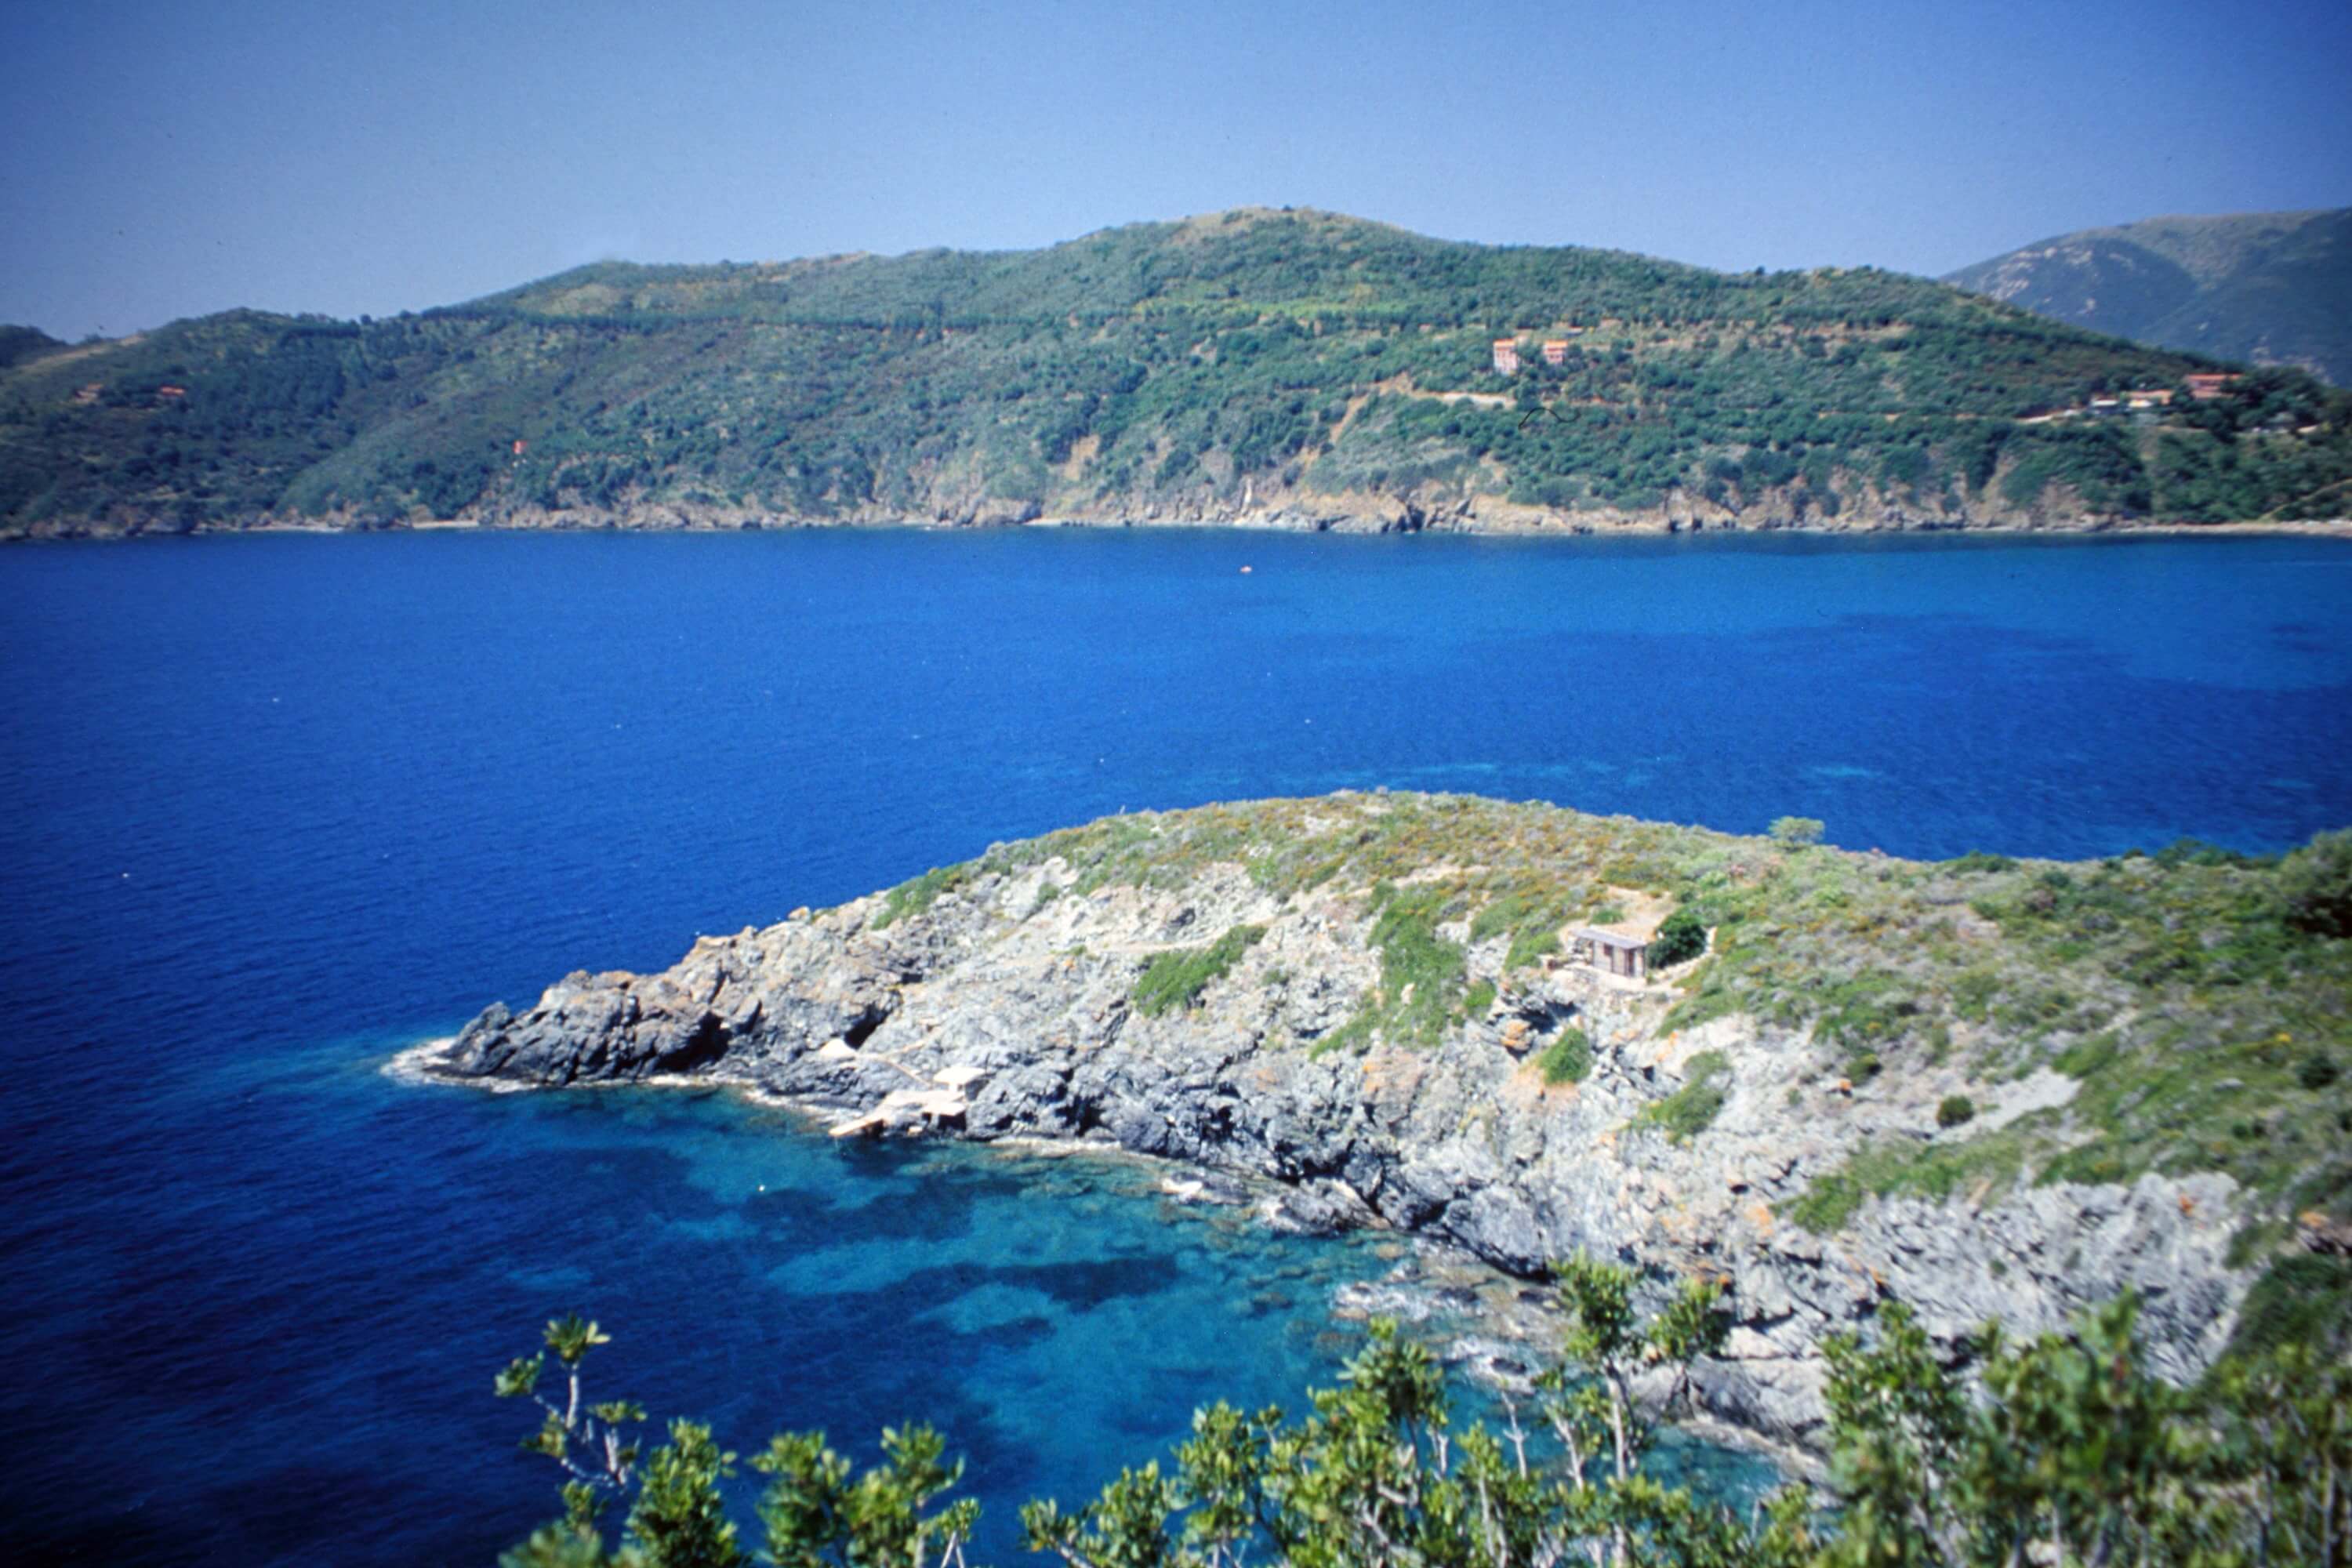
Of course using this technique the results are not perfect, some shots are slightly less sharp and the overall quality is lower.
compared to professional solutions, but with a relatively low investment of time the results are more than satisfactory.
In our case it took about 25 hours of work for 2000 slides, including the post production, which is less than a minute for each photo.
The main purpose of this technique is not the search for the highest possible quality, but to quickly scan many slides
without a scanner, in the best amateur quality possible, to have our memories more easily accessible.
In our case we took the opportunity to view some photographs that we hadn't seen for years, then we made a selection
of the most beautiful photos, and we had them scanned by the photographer, but we took less than 100 photos instead of 2,000.
The savings were considerable, we also have all the two thousand slides digitized in good quality and we spent some
evenings immersed in the memories of our parents and our childhood.
If you liked this tutorial here you can find all the other tutorials we wrote about photography, or you can go there to take a look to our tutorials for post production with Gimp. If you liked our work, you could consider to ❤support us: by clicking here you can see how.