Gimp Tutorial: Bleach Bypass
How to use Gimp to create the Bleach Bypass. In this tutorial we will learn how to give a dramatic effect, increasing contrast and reducing saturation with Gimp.

In this Gimp tutorial we will create Bleach bypass effect. It is also known as silver retention.
It's a chemical effect that were used during the processing of a color film. The silver in the film was
retained in the emulsion while the color dyes.
The result is a black-and-white image over a color image, that usually have reduced saturation and exposure,
but with increased contrast and graininess. Better results are in conjunction with a one-stop underexposure of the photo. Next you can see a sample:
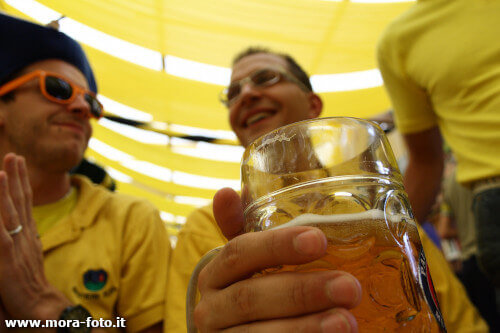
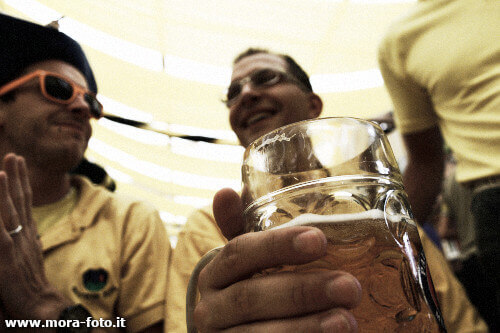
I'll use a photo taken during a tour in the Oktoberfest in Munich (Germany). I think this subjects fits well with the bleach bypass, even if I don't know why. It could be also a good effect for cars photography, portraits, or any photo you could like.
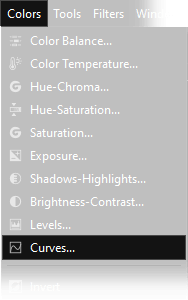
First of all we need to darken the image using Gimp's curves tool. Open Colors → Curves and set a curve similar to the next one. You should darken the photo, so take inspiration from the following one, but feel free to change the curve as you prefer. If you want to better know how curves works you can read this Gimp's curves tutorial.

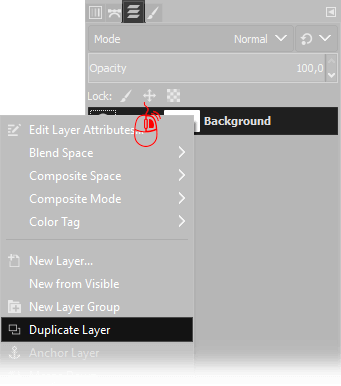
After that, you need to duplicate the current layer. You have to move the mouse cursor over the actual layer on the Layers window (press Ctrl+L if you can't find it) then click Right Mouse button and choose Duplicate Layer.
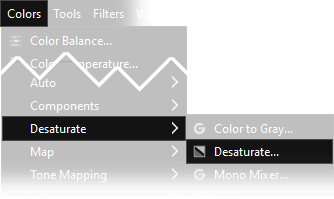
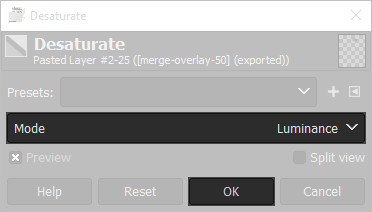
Now you have to desaturate the colors by clicking Colors → Desaturate → Desaturate.., Select Luminance as Mode, then press Ok. Be sure you are working on the copied layer, that is above.
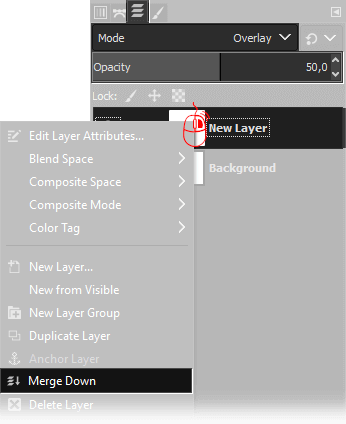
Now we need to merge down the layer on the top: on the Layers Window select the upper layer, then choose Overlay as Blend mode, and set opacity from 50% to 80% as you prefer, then click with the right mouse button on the layer on the top and choose Merge down.
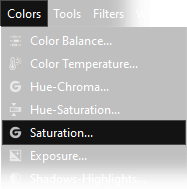
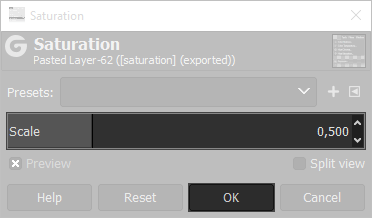
An optimal Bleach Bypass is achieved with a photo with pale colors. To do so, open Colors → Saturation, and set the scale to 0,500 then press Ok.
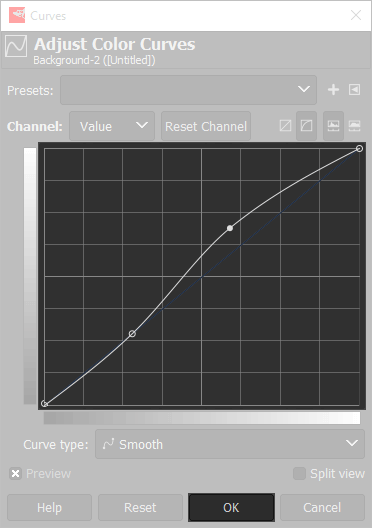
At this point we need to brighten the image using Gimp's curves tool. Open Colors → Curves and set a curve similar to the next one. You should brighten the photo as needed, so take inspiration from the following one, but feel free to change the curve as you prefer. If you want to better know how curves works you can read this Gimp's curves tutorial.
One last optional step is to add a noise to the picture. I used Filters → Noise → HSV Noise, then tune the settings as you prefer. Here you can see another pictures with Bleach Bypass applyed, is a picture of a frend in a party.
If you liked this tutorial here you can find all the other guides we wrote about photo editing with Gimp, or you can go there to take a look to our photography tutorials. If you liked our work, you could consider to ❤support us: by clicking here you can see how.