Gimp Tutorials for photo editing
Many tutorials for post procution with Gimp for beginners and advanced users. Everything you need to know to enhance, correct and apply effects to your photos.
>
In this page you can find dozens of tutorials for photo editing with Gimp. Every tutorial on mora-foto is original and has been written by us. All our tutorials should be easily understandable and are explained step by step, to allow also the beginners to undestand how Gimp works with practical examples instead of too much theory. We will concentrate on post production and photo editing. Our Gimp tutorials are intended for all the photographers that want to learn how to use Gimp for the post production of their photos without having to buy expensive licenses. (intro continues after the tutorials...)
Basic Gimp tutorials
 Gimp Interface and main tools: Gimp, like all professional softwares, at first glance can be a little scary. It is full of icons and options that might
alarm those who see it for the first time, but don't worry. One step at a time you will see that Gimp, is...
(Click to continue...)
Gimp Interface and main tools: Gimp, like all professional softwares, at first glance can be a little scary. It is full of icons and options that might
alarm those who see it for the first time, but don't worry. One step at a time you will see that Gimp, is...
(Click to continue...)
 Straighten and crop a photo with Gimp: Gimp is a faithful companion when it comes to straighten a crooked photo or change the framing.
Two of the most common mistakes when you shoot a photo in a hurry are the crooked horizon and an...
(Click to continue...)
Straighten and crop a photo with Gimp: Gimp is a faithful companion when it comes to straighten a crooked photo or change the framing.
Two of the most common mistakes when you shoot a photo in a hurry are the crooked horizon and an...
(Click to continue...)
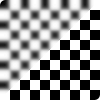
 An overview on Gimp selections and masks: In this tutorial we will explain all the difference between the select tools of Gimp.
Selections are also known as masks, and we will see how to use or combine all the different Gimp's selections to...
(Click to continue...)
An overview on Gimp selections and masks: In this tutorial we will explain all the difference between the select tools of Gimp.
Selections are also known as masks, and we will see how to use or combine all the different Gimp's selections to...
(Click to continue...)
 Gimp Layers tutorial: What are, how to use them and how do they differ from masks? The Layers are a fundamental tool, almost
as much as the selections, to make advanced photo editing with Gimp. Since not everyone is familiar...
(Click to continue...)
Gimp Layers tutorial: What are, how to use them and how do they differ from masks? The Layers are a fundamental tool, almost
as much as the selections, to make advanced photo editing with Gimp. Since not everyone is familiar...
(Click to continue...)
 Gimp Text Tool: Among the many Gimp tools we can also find the text tool, a powerful tool that allows you to add text over an image.
Inserting text over a photograph can often be very useful or fun, for example to write a comment on a photo, create...
(Click to continue...)
Gimp Text Tool: Among the many Gimp tools we can also find the text tool, a powerful tool that allows you to add text over an image.
Inserting text over a photograph can often be very useful or fun, for example to write a comment on a photo, create...
(Click to continue...)
 Create a new Gimp brush: Gimp brushes are several very useful tools for painting an image or over it. They can be used in many different ways:
draw, erase, copy, fade, lighten or darken. The five available brushes are: Paintbrush, Pencil, Airbrush, Eraser...
(Click to continue...)
Create a new Gimp brush: Gimp brushes are several very useful tools for painting an image or over it. They can be used in many different ways:
draw, erase, copy, fade, lighten or darken. The five available brushes are: Paintbrush, Pencil, Airbrush, Eraser...
(Click to continue...)
 Clone Tool: The Gimp's Clone Too is a special brush that allows you to copy a portion of the image on top of another part,
in order to eliminate an undesired element from the photography in a very controllable way, and with very good results.
(Click to continue...)
Clone Tool: The Gimp's Clone Too is a special brush that allows you to copy a portion of the image on top of another part,
in order to eliminate an undesired element from the photography in a very controllable way, and with very good results.
(Click to continue...)
Light and exposure
 Brightness-Contrast and Hue-Saturation: With Gimp it is possible, in a really easy and immediate way, to balance the exposure of a photograph,
increase or decrease the contrast and adjust the hue and saturation of the color. These steps, that are...
(Click to continue...)
Brightness-Contrast and Hue-Saturation: With Gimp it is possible, in a really easy and immediate way, to balance the exposure of a photograph,
increase or decrease the contrast and adjust the hue and saturation of the color. These steps, that are...
(Click to continue...)
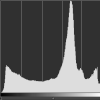 Gimp Levels Tool and histogram: Histogram is one tool that any photographer should know. This is a Gimp tutorial, but histogram exists also
outside Gimp, and is extremely useful. If you like photography, you should definitely know how to read a level...
(Click to continue...)
Gimp Levels Tool and histogram: Histogram is one tool that any photographer should know. This is a Gimp tutorial, but histogram exists also
outside Gimp, and is extremely useful. If you like photography, you should definitely know how to read a level...
(Click to continue...)
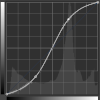 Curves tool: Curves tool, in my opinion, is the most powerful and helpful tool that Gimp offers. Knowing how to setup a curve should be
a mandatory skill for anyone who wants to edit a photo. I'm not exagerating, it's a game changer tool. This tutorial has...
(Click to continue...)
Curves tool: Curves tool, in my opinion, is the most powerful and helpful tool that Gimp offers. Knowing how to setup a curve should be
a mandatory skill for anyone who wants to edit a photo. I'm not exagerating, it's a game changer tool. This tutorial has...
(Click to continue...)
Manage colors
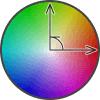 Gimp Rotate Colors Tutorial: The color wheel tool of Gimp, if used with the correct image, can do miracles. The purpose of this tool
is to transform a certain range of colors into another, obviously chosen by us. The reason why it is called rotate...
(Click to continue...)
Gimp Rotate Colors Tutorial: The color wheel tool of Gimp, if used with the correct image, can do miracles. The purpose of this tool
is to transform a certain range of colors into another, obviously chosen by us. The reason why it is called rotate...
(Click to continue...)
 Manual and automatic White balance: The white balance is the correction of the color dominants of the light source in a photograph.
Gimp, allows us to balance the colors of an image automatically or manually. If you are interested in this topic...
(Click to continue...)
Manual and automatic White balance: The white balance is the correction of the color dominants of the light source in a photograph.
Gimp, allows us to balance the colors of an image automatically or manually. If you are interested in this topic...
(Click to continue...)
 High-Key and Low-Key, Gimp tutorial: This tutorial will teach you how to simulate High key and Low key photography with Gimp, those effects are also called
"High-Light" and "Low-Light". The high key photography is based on high lights, so...
(Click to continue...)
High-Key and Low-Key, Gimp tutorial: This tutorial will teach you how to simulate High key and Low key photography with Gimp, those effects are also called
"High-Light" and "Low-Light". The high key photography is based on high lights, so...
(Click to continue...)
 Better Black and White: Gimp offers a really powerful tool to create black and white photos. With Gimp is possible to easily simulate the coloured
filters that photographers puts in front of the camera lens to get the right contrast and mood in theyr photos...
(Click to continue...)
Better Black and White: Gimp offers a really powerful tool to create black and white photos. With Gimp is possible to easily simulate the coloured
filters that photographers puts in front of the camera lens to get the right contrast and mood in theyr photos...
(Click to continue...)
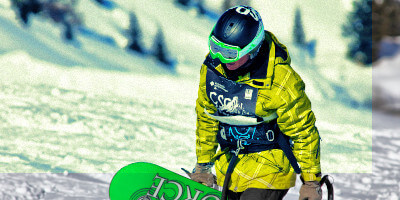
 Selective black and white: Selective black and white is really easy to get with Gimp: it is a post processing solution that is suggested when you need to
highlight a subject from the background (expecially if the background is too...
(Click to continue...)
Selective black and white: Selective black and white is really easy to get with Gimp: it is a post processing solution that is suggested when you need to
highlight a subject from the background (expecially if the background is too...
(Click to continue...)
Enhance a photo
 Noise reduction with G'MIC: Have you ever noticed a disturb in your photos? That is noise, and can be reduced with Gimp and its great G'mic plugin (that exists
also as standalone). In digital photography, noise is generated by the electric current passing through...
(Click to continue...)
Noise reduction with G'MIC: Have you ever noticed a disturb in your photos? That is noise, and can be reduced with Gimp and its great G'mic plugin (that exists
also as standalone). In digital photography, noise is generated by the electric current passing through...
(Click to continue...)
 Sharpen a photo with Gimp: Blurred photographs can cause serious frustration. Gimp offers different tools to try to sharpen a photo, but two of them offer better results than
the other: Unsharp Mask and High Pass filter. The use of an economic lens, too...
(Click to continue...)
Sharpen a photo with Gimp: Blurred photographs can cause serious frustration. Gimp offers different tools to try to sharpen a photo, but two of them offer better results than
the other: Unsharp Mask and High Pass filter. The use of an economic lens, too...
(Click to continue...)
Improve eyes looking
 Remove flash red eyes with Gimp: Red eyes is a classic defect of photography with flash. As it's so common Gimp comes in help with a tool specifically designed to solve
this problem. Red eyes are caused by the light that bounces in the retina. Gimp, as...
(Click to continue...)
Remove flash red eyes with Gimp: Red eyes is a classic defect of photography with flash. As it's so common Gimp comes in help with a tool specifically designed to solve
this problem. Red eyes are caused by the light that bounces in the retina. Gimp, as...
(Click to continue...)
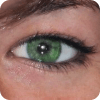 How to use Gimp to improve looking of the eyes: In the photographs of people, the eyes are one of the major points of interest. In this tutorial for Gimp I will explain how to give a
better looking to the eyes of your subject, starting with color change...
(Click to continue...)
How to use Gimp to improve looking of the eyes: In the photographs of people, the eyes are one of the major points of interest. In this tutorial for Gimp I will explain how to give a
better looking to the eyes of your subject, starting with color change...
(Click to continue...)
Improve the panoramas
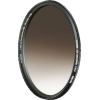 Gnd Filters simulation with Gimp: GND filters are very useful in photography and can be easily faked with Gimp. If the sky is overexposed, compared to the ground
the result with a GND filter will be way better, and it is incredibly easy to get with Gimp...
(Click to continue...)
Gnd Filters simulation with Gimp: GND filters are very useful in photography and can be easily faked with Gimp. If the sky is overexposed, compared to the ground
the result with a GND filter will be way better, and it is incredibly easy to get with Gimp...
(Click to continue...)
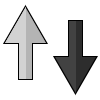
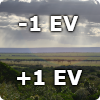 Exposure Blending: Photo blending is one of the most important Gimp tutorials in this website. If you know how to do it, you will use this technique countless times.
Photo blending is a photographic tecnique that consists (as the name says) in merging two or...
(Click to continue...)
Exposure Blending: Photo blending is one of the most important Gimp tutorials in this website. If you know how to do it, you will use this technique countless times.
Photo blending is a photographic tecnique that consists (as the name says) in merging two or...
(Click to continue...)
Artistic Use of Blur
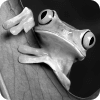
 Flou Effect (Soft Focus): The Flou effect (also known as soft focus) is really raccomended in portrait photos, whether of humans or animals and is really easy to get with
Gimp. The Flou effect softens the details and reduces the imperfections. Applied on a...
(Click to continue...)
Flou Effect (Soft Focus): The Flou effect (also known as soft focus) is really raccomended in portrait photos, whether of humans or animals and is really easy to get with
Gimp. The Flou effect softens the details and reduces the imperfections. Applied on a...
(Click to continue...)
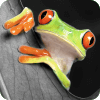
 Bokeh Simulation with Gimp: The bokeh is the Blur in the out of focus areas of an image. Generally this low details areas are in the background of the picture and are typical
of telephotos and low aperture lenses. This effect is really easy to simulate with Gimp...
(Click to continue...)
Bokeh Simulation with Gimp: The bokeh is the Blur in the out of focus areas of an image. Generally this low details areas are in the background of the picture and are typical
of telephotos and low aperture lenses. This effect is really easy to simulate with Gimp...
(Click to continue...)
Gimp Plugins
 How to edit a batch of photos with Bimp: As an old time Gimp user, the biggest issue I've always had is the impossibility to work on more than one photograph at the same time.
You may have been in a situation where you had to edit a lot of...
(Click to continue...)
How to edit a batch of photos with Bimp: As an old time Gimp user, the biggest issue I've always had is the impossibility to work on more than one photograph at the same time.
You may have been in a situation where you had to edit a lot of...
(Click to continue...)
 How to install a Photoshop plugin on Gimp with PSPI: In this tutorial we'll explain how to install and run many Photoshop plugins directly inside Gimp with a plugin called PSPI,
in order to increase the possibilities and tools that Gimp provides us for...
(Click to continue...)
How to install a Photoshop plugin on Gimp with PSPI: In this tutorial we'll explain how to install and run many Photoshop plugins directly inside Gimp with a plugin called PSPI,
in order to increase the possibilities and tools that Gimp provides us for...
(Click to continue...)
Advanced Gimp tutorials
 Dodge and burn with Gimp: Dodge and Burn is a photo editing technique, mainly used in portraits, that can be easily achieved in Gimp. It is used to lighten and darken some areas
of the skin, to increase the three-dimensionality of the face. Dodge and Burn...
(Click to continue...)
Dodge and burn with Gimp: Dodge and Burn is a photo editing technique, mainly used in portraits, that can be easily achieved in Gimp. It is used to lighten and darken some areas
of the skin, to increase the three-dimensionality of the face. Dodge and Burn...
(Click to continue...)
 Restore an old photo: If you have some old and ruined photos and you need to restore them, Gimp is a perfect software for repairing and old photo.
Recovering an historical photo is a precision job, and it could be a demanding work, but with...
(Click to continue...)
Restore an old photo: If you have some old and ruined photos and you need to restore them, Gimp is a perfect software for repairing and old photo.
Recovering an historical photo is a precision job, and it could be a demanding work, but with...
(Click to continue...)
 Colorize a black and white photo: In this tutorial for Gimp we'll see how to turn an old black and white photo into a color photo. Before preoceeding
consider that coloring a photograph with Gimp could be a long and tedious work if you want to have a good result...
(Click to continue...)
Colorize a black and white photo: In this tutorial for Gimp we'll see how to turn an old black and white photo into a color photo. Before preoceeding
consider that coloring a photograph with Gimp could be a long and tedious work if you want to have a good result...
(Click to continue...)
 Make an animated GIF with Gimp: In this tutorial for animated GIF with Gimp we'll explain how to create or edit animations with Gimp and then how to export them in GIF format.
The 256 colors animated GIFs were very popular at the dawn of the...
(Click to continue...)
Make an animated GIF with Gimp: In this tutorial for animated GIF with Gimp we'll explain how to create or edit animations with Gimp and then how to export them in GIF format.
The 256 colors animated GIFs were very popular at the dawn of the...
(Click to continue...)
Effects
 Cyanotype effect with Gimp: In this Gimp tutorial we will recreate the Cyanotype (also known as blueprint). It was one of the first printing processes that were massively used.
That process were low cost and simple, so it were...
(Click to continue...)
Cyanotype effect with Gimp: In this Gimp tutorial we will recreate the Cyanotype (also known as blueprint). It was one of the first printing processes that were massively used.
That process were low cost and simple, so it were...
(Click to continue...)
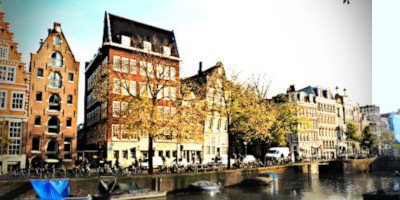
 Orton effect with Gimp: In this Gimp tutorial we will recreate the Orton effect. It is an effect that gives something "magic" to the photos. It has been been used mainly
in the 80's and has been named after Michael Orton...
(Click to continue...)
Orton effect with Gimp: In this Gimp tutorial we will recreate the Orton effect. It is an effect that gives something "magic" to the photos. It has been been used mainly
in the 80's and has been named after Michael Orton...
(Click to continue...)
 Cross Processing with Gimp: In this Gimp tutorial we will create the Cross Processing. It is also known with the name X-Pro. Cross Processing is a technique that has born in
traditional photography. It has been...
(Click to continue...)
Cross Processing with Gimp: In this Gimp tutorial we will create the Cross Processing. It is also known with the name X-Pro. Cross Processing is a technique that has born in
traditional photography. It has been...
(Click to continue...)
 Dragan effect with Gimp: In this Gimp tutorial we will recreate the Dragan effect. It is named after a talented young Polish photographer, Andrzej Dragan, with a PhD in
quantum physics, who has become famous for the dramatic...
(Click to continue...)
Dragan effect with Gimp: In this Gimp tutorial we will recreate the Dragan effect. It is named after a talented young Polish photographer, Andrzej Dragan, with a PhD in
quantum physics, who has become famous for the dramatic...
(Click to continue...)
 Bleach Bypass effect with Gimp: In this Gimp tutorial we will create Bleach bypass effect. It is also known as silver retention. It's a chemical effect that were used during
the processing of a color film. The silver in the film was...
(Click to continue...)
Bleach Bypass effect with Gimp: In this Gimp tutorial we will create Bleach bypass effect. It is also known as silver retention. It's a chemical effect that were used during
the processing of a color film. The silver in the film was...
(Click to continue...)
 Split Toning effect with Gimp: In this Gimp tutorial we'll recreate the Split Toning. It is an artistict effect that is similar to black and white, but with a large difference:
the highlights and the lowlights will have two different...
(Click to continue...)
Split Toning effect with Gimp: In this Gimp tutorial we'll recreate the Split Toning. It is an artistict effect that is similar to black and white, but with a large difference:
the highlights and the lowlights will have two different...
(Click to continue...)
 Infrared effect with Gimp: In this Gimp tutorial we will simulate the infrared photography. It is an experimental tecnique of the film cameras, where the film used is sensitive
to infrared light. The right name should...
(Click to continue...)
Infrared effect with Gimp: In this Gimp tutorial we will simulate the infrared photography. It is an experimental tecnique of the film cameras, where the film used is sensitive
to infrared light. The right name should...
(Click to continue...)
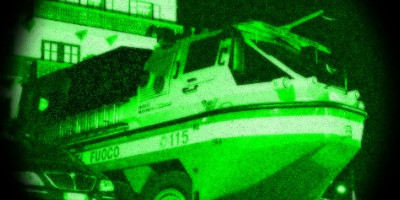 Night vision effect with Gimp: A funny editing that we can get in a few steps with Gimp is the night vision effect. What we're going to try to get is an image that looks like
those which can be seen through the infrared...
(Click to continue...)
Night vision effect with Gimp: A funny editing that we can get in a few steps with Gimp is the night vision effect. What we're going to try to get is an image that looks like
those which can be seen through the infrared...
(Click to continue...)
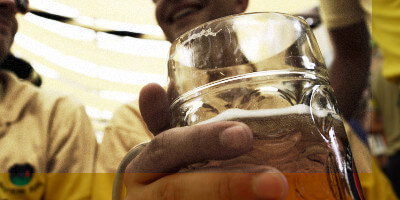
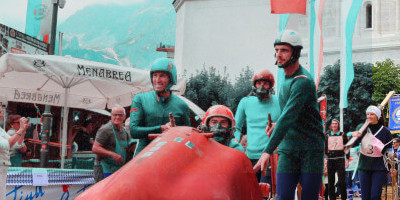
 Lomo effect with Gimp: In this Gimp tutorial we will recreate the Lomography. Lomo is a school of thought as well as a photographic technique. There are ten "Golden Rules", but
the motto is only one: "Don't think! Just Shoot"...
(Click to continue...)
Lomo effect with Gimp: In this Gimp tutorial we will recreate the Lomography. Lomo is a school of thought as well as a photographic technique. There are ten "Golden Rules", but
the motto is only one: "Don't think! Just Shoot"...
(Click to continue...)
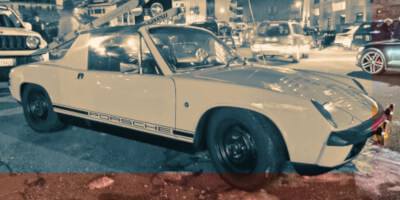
 Two strip technicolor with Gimp: In this Gimp tutorial we will recreate the Two Strip Technicolor. It is the wrong, but widely used, name of "Two-color Technicolor Process 2 Bi-pack"
that was one of the many technologies that were...
(Click to continue...)
Two strip technicolor with Gimp: In this Gimp tutorial we will recreate the Two Strip Technicolor. It is the wrong, but widely used, name of "Two-color Technicolor Process 2 Bi-pack"
that was one of the many technologies that were...
(Click to continue...)
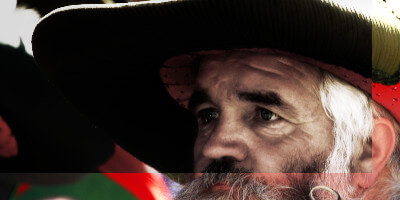
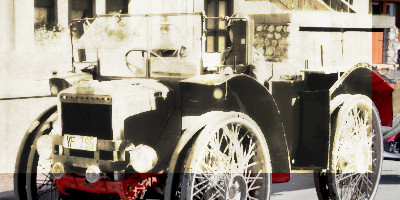 Ancient photo with Gimp: In this Gimp tutorial we will see how to Age a photo. The result will be a realistic antique photograph, with an effect that is really easy to achieve.
I choosed this pic, that has been taken during...
(Click to continue...)
Ancient photo with Gimp: In this Gimp tutorial we will see how to Age a photo. The result will be a realistic antique photograph, with an effect that is really easy to achieve.
I choosed this pic, that has been taken during...
(Click to continue...)
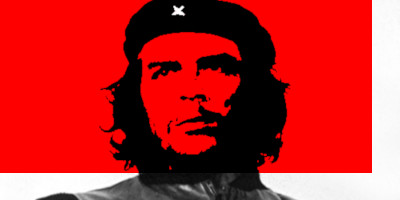 Che Guevara effect with Gimp: Replicate the "Che Guevara" effect with Gimp is really easy, and could be a funny idea for a T-shirt, a joke or simply as a nice post production effect.
If you change the red color with...
(Click to continue...)
Che Guevara effect with Gimp: Replicate the "Che Guevara" effect with Gimp is really easy, and could be a funny idea for a T-shirt, a joke or simply as a nice post production effect.
If you change the red color with...
(Click to continue...)
Gimp is absolutely the best solution for amateur photographers that are looking for the best free software, that allows you to reach almost professional results. We really believe that Gimp can substitute Photoshop on almost everything, for non professional photographers. It lacks some hyper advanced tools, but it's free. We hope that our Gimp tutorials will help you to understand the functionality and potential of Gimp. There are many other programs that works fine, but no one of them is as much flexible and advanced as Gimp. Maybe it could be a little bit hard to begin with, but when you'll learn how to use it, you'll be completely satisfied. This is why we created this website: to let you easily understand the basics of Gimp and become a better photographer everyday. With our Gimp tutorials you will learn how to use all the tools that Gimp offers for the post production of your photographs.
We firmly believe that using Gimp allows anyone to achieve more than satisfactory results in photo editing for both domestic and professional use.
If you are not a professional photographer, or you don't want to pay for licenses for any reason, or worse you are still using and downloading pirated software
(with all the risks that follow), then consider Gimp as a solution of all your problems. If you need to edit some photos, Gimp is surely the most advanced free solution available
today. Gimp allows you to crop photographs, add texts, increase contrast and saturation, correct the colors, as make advanced photo editing, without the need to pay nothing.
We suggest you to roll up your sleeves and start learning how to use Gimp, that is an amazing software, with the help of our Gimp tutorials. We have decided to divide this page into different categories,
to allow a better consultation of the many Gimp tutorials present, so it will be easier for you to search for the tutorial you need to deepen.
Compared to Photoshop, Gimp could be considered less intuitive, it does not have the perfect management of batches, it has not hyper advanced artificial intelligence tools, it has "only" 8 bit of color depth, it needs some external plugins to open "raw" files, or to create a panorama using different photos, but despite all, Gimp will allow you to get amazing results without having to spend money and, above all, without having to download non-original software that, especially for professional use, could make you have a bad fine. GIMP is distributed under terms of General Public License v3 and later. In a nutshell, this means: You are free to use GIMP, for any purpose.
If you never used Gimp before, and you are new to photo editing software, we suggest you to do try all our tutorials in the same order in which they have been published.
Starting from the basic tutorials on the top, about Gimp interface and tools, going on to light and color correction, the masks, the layers and what they are used for.
Once you understand how to use Gimp's masks and layers to edit only a single portion of the image, you could put the knowledge acquired on Gimp basics,
going on the more complex tutorial, such as the Dragan effect or the exposure blending.
When you start to understand what you are doing, you can try to modify your photos with all the effects, so you can better understand the various tools of Gimp and maybe
find out your favourite style. If you have no experience it is just a game, where you try to become more friendly with Gimp interface.
When you have reached a discreet familiarity with Gimp tools and all the concepts of our tutorials, you will be able to use Gimp for a perfect post production or photo editing.
Knowing how to fix and edit a photograph with Gimp is much more useful than you think. You will be able to create impressive images for your social networks,
but it will also increase your productivity at work or in any voluntary activities, for example you could use Gimp to create a poster for an event, or a menu of a restaurant.
It's always useful to have a friend who can draw a meme or make a cover photo for an event. Then, when you will be good, nobody stops you from trying to earn something with your
new knowledge.
We believe that Gimp is an excellent photo editing program, not perfect, but which can replace Photoshop in almost any amateur use.
We also hope that all our Gimp's tutorials can help you to better understand the functioning and potential of Gimp which is, without a doubt,
the best free photo editing program available on the market.
If you liked our work, you could consider to support us: by clicking here you can see how. If you liked our Gimp tutorials you could consider to go there to take a look to our photography tutorials.