Gimp Tutorial: infrared photography
How to use Gimp to simulate the infrared photography. In this tutorial we'll recreate the traditional photography on infrared films with Gimp.

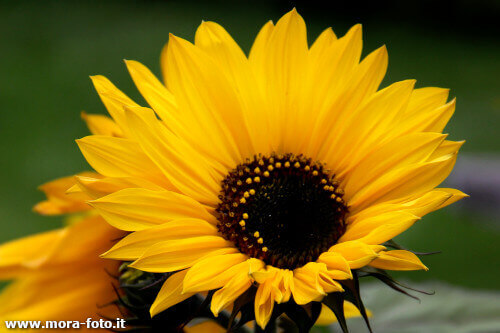
In this Gimp tutorial we will simulate the infrared photography. It is an experimental tecnique of the film cameras, where the film used is sensitive to infrared light. The right name should be near-infrared to distinguish it from far-infrared, which is the domain of thermal imaging. Near infrared wavelenght is from 700 nm to about 900 nm. The particular looking of IR photos can be faked with Gimp easily. Infrared light has very different behaviors respect to classical light, first of all is less affected by the haze, so the results will be correct only if you start from a clean photo, without fog.
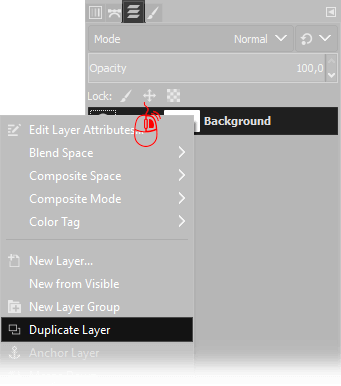
For infrared photography (IR) simulation with Gimp, first of all, you need to duplicate the current layer: you have to move the mouse cursor over the actual layer on the Layers window (press Ctrl+L if you can't find it) then click Right Mouse button and choose Duplicate Layer.
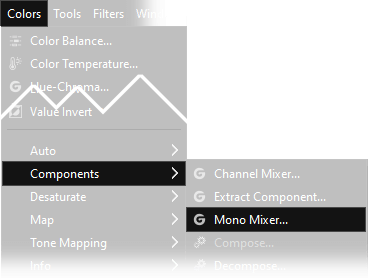
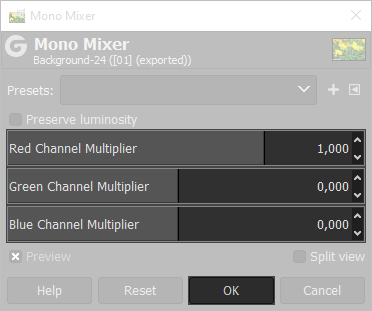
Now you need to desaturate the Background layer with channel mixer. Be sure that you click with the left mouse button on the bottom layer before proceeding. Open Colors → Components → Mono Channel and setup all the parameters like the following. Remember that you will not see any change, image will still look colored: this is because you have selected the bottom layer, so there is a colored layer above hiding the preview of the Mono Channel filter. If tou are unhappy with the result, you should try different parameters for channel mixer, and remember that the photo should not be too bright nor too dark, and you must avoid areas that are completely white or black.
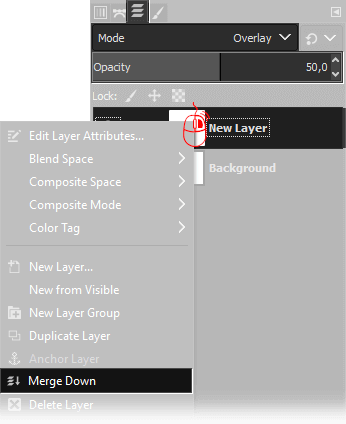
The last step for infrared (IR) simulation with Gimp is to merge down the layer on the top: on the Layers Window select the upper layer, then choose Overlay as Blend mode, and set opacity to 50%, then click with the right mouse button on the layer on the top and choose Merge down.
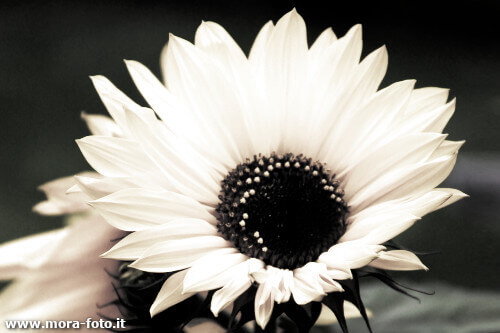
The result should look similar to the image below, where the colors of the sunflowers are completely unrealistic, with higher contrast and desaturated.
If you liked this tutorial here you can find all the guides we have written about gimp, from the simplest to the most advanced, or you can all the guides we have written about photography in general. If you liked our work, you could consider to ❤support us: by clicking here you can see how.