Gimp Tutorial: Orton effect
How to use Gimp to create the Orton Effect. In this tutorial we'll create a soften blur that creates a magical aura on photos with Gimp.

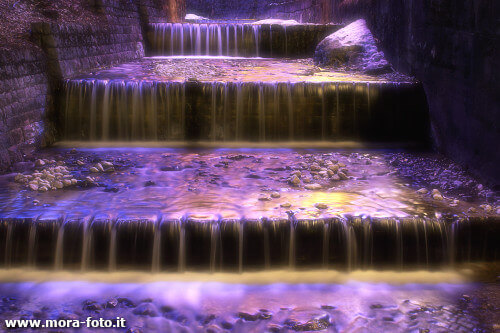
In this Gimp tutorial we will recreate the Orton effect. It is an effect that gives something "magic" to the photos. It has been been used mainly in the 80's and has been named after Michael Orton, that is the first photographer that mainly used this technique. The original idea is to take two photos, one perfectly focused and another one blurred, but with modern softwares is easier to digitally blur the second shot. Everything gets a glowing aurea and a soft focus. With a few steps you will easily get the Orton effect with Gimp. This tutorial is specific for Gimp, but with a little bit of imagination you can adapt it to any other photo editing software.
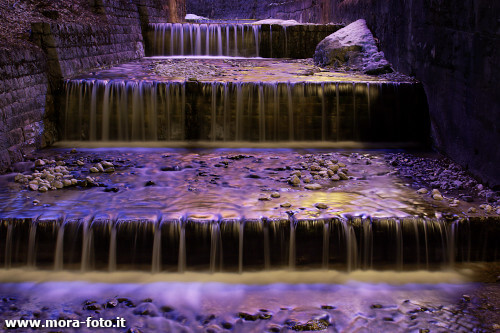
First of all you have to choose the right photo, something that can look good with a softness filter, as a girl or children portrait, a landscape, or anything else you like. For this Gimp Orton effect tutorial I choosed a long exposure of an artificial waterfall, with a particular light.
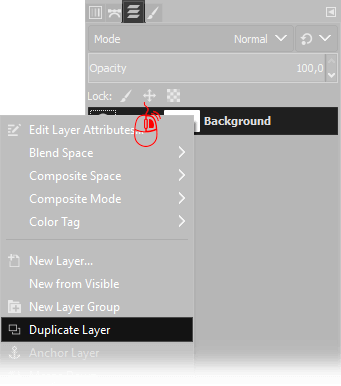
First of all open your photo in Gimp. After that, you need to duplicate the current layer. You have to move the mouse cursor over the actual layer on the Layers window (press Ctrl+L if you can't find it) then click Right Mouse button and choose Duplicate Layer.
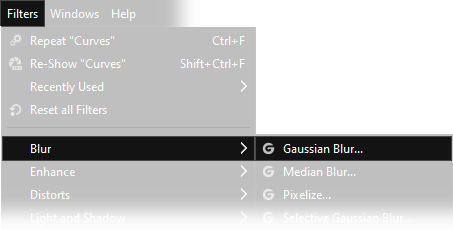
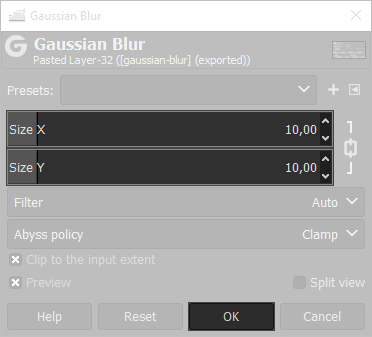
Now we need to apply a blur, open Filters → Blur → Gaussian Blur and set a correct amount. The number you have to write depends on the image resolution, you should be able to distinguish the main shapes, but any detail has to be indistinguishable, for medium/high resolution images 10/15 pixels should be correct, feel free to try different settings: Orton effect is fast to achieve, so you can try different versions.
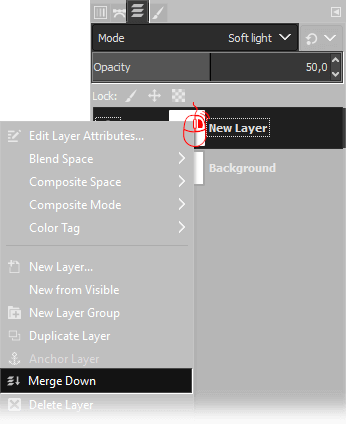
Now we need to merge down the layer on the top: on the layers window select the upper layer, then choose Soft Light as Blend mode, and set opacity to 50%, then click with the right mouse button on the layer on the top and choose Merge down.
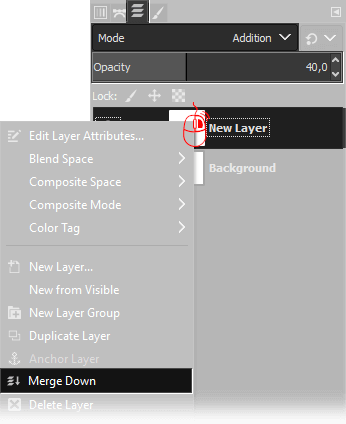
After that, you need to duplicate the current layer again. You have to move the mouse cursor over the actual layer on the Layers window then click Right Mouse button and choose Duplicate Layer, then choose Addition as Blend mode, and set opacity to 40%, then click with the right mouse button on the layer on the top and choose Merge down.
Last step is optional, and should be used only on dark photos. First you have to right click with the Right Mouse button on the layers window and choose Flatten Image, then Open Colors → Brightness-Contrast and set Brightness → 20 and Contrast → 10 to enhance a little bit the image.
If you liked this tutorial here you can find all the guides we have written about gimp, from the simplest to the most advanced, or you can all the guides we have written about photography in general. If you liked our work, you could consider to ❤support us: by clicking here you can see how.