Gimp Tutorial: Dragan Effect
How to use Gimp to create the Dragan effect. In this tutorial we'll create dramathic portraits with strong contrasts, cold colors and gloomy atmosphere with Gimp.

In this Gimp tutorial we will recreate the Dragan effect. It is named after a talented young Polish photographer, Andrzej Dragan, with a PhD in quantum physics, who has become famous for the dramatic intensity of his portraits. Strong contrasts, cold colors and characters with sculpted faces are the features of his style, which today has many followers. You can make it really strong, you can make it barely noticeable, I think the secret is to make it look natural, as if there had been no elaboration.
This is my personal Dragan Effect tutorial for Gimp, but feel free to experiment different settings. Sometimes draganized pictures could be amazing, I suggest you to try this dramatic effect on portrait photos. Draganize a portrait could be a really long work, anyway with the help of this tutorial, you will find it very easy. How much time you want to invest in the process, is up to you. A funny thing to know about Andrzej Dragan is that he doesn't like to shoot photos, he likes to work on them. Each one of Dragan's portraits has taken many hours in post production, in some cases a month of work. So you can't hope to get the same result in half an hour.
This effect, remotely similar to the bleach bypass, is the digital manipulation of an image, to make it more dramatic. The main features of a draganized portrait is an important increase of the contrast on the subject, high sharpness of small details such as wrinkles and hair, and skin color altered, usually toward the greenish or grayish tones.
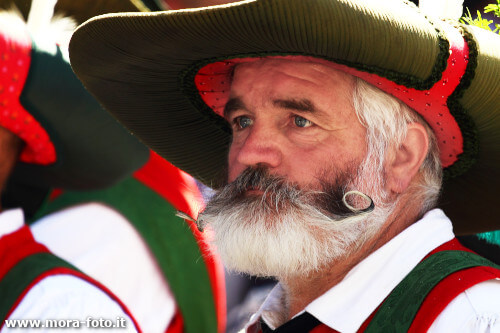

First of all you have to choose the right photo, something that can look good with a dramatic filter, as an old man, or anything else you like. For this Gimp Dragan effect tutorial I choosed a portrait of an old man in traditional suite.
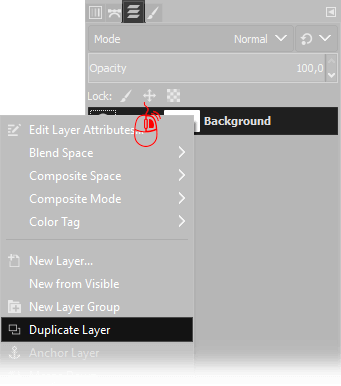
Open the photo in Gimp, after that, you need to duplicate the current layer. You have to move the mouse cursor over the actual layer on the Layers window (press Ctrl+L if you can't find it) then click Right Mouse button and choose Duplicate Layer.
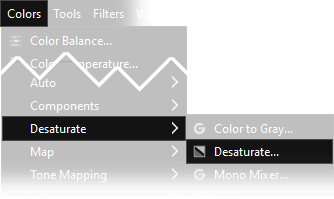
Now we need to desaturate the colors by clicking Colors → Desaturate → Desaturate.., Select Luma as Mode, then press Ok. Be sure you are working on the copied layer, that is above.

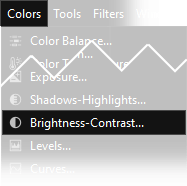
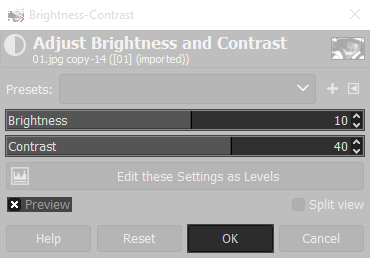
Now we need to ehnance the contrast: open Colors → Brightness-Contrast then increase Brightness to +10, and Contrast to +40. Change the settings as you prefer.
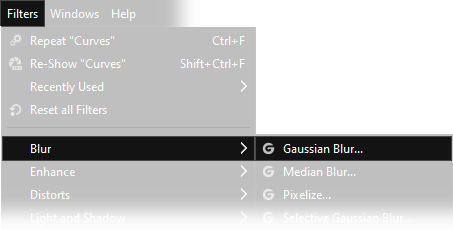
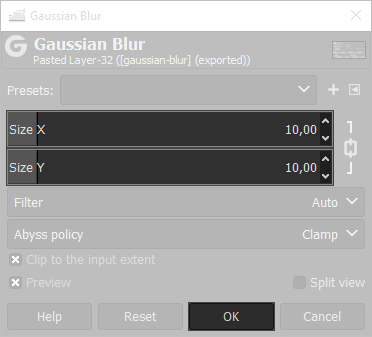
Now we need to apply a blur: open Filters → Blur → Gaussian Blur and set a correct amount. The value you have to choose depends on the image resolution. You should be able to distinguish the main shapes, but any detail has to be indistinguishable, for medium/high resolution images 10/15 pixels should be a correct amount, feel free to try different settings.
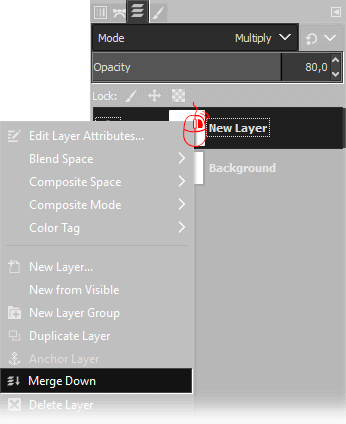
Now we need to merge down the layer on the top: on the Layers Window select the upper layer, then choose Multiply as Blend mode, and set opacity to 80%, then click with the right mouse button on the layer on the top and choose Merge down.
After that, you need to duplicate the current layer again. Move the mouse cursor over the actual layer on the Layers window (press Ctrl+L if you can't find it) then click Right Mouse button and choose Duplicate Layer.
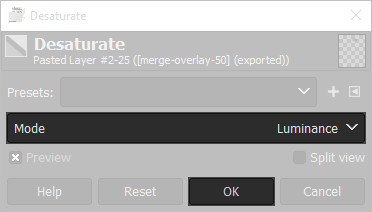
Now you have to desaturate the colors again by clicking Colors → Desaturate → Desaturate.., but this time select Luminance as Mode, then press Ok.
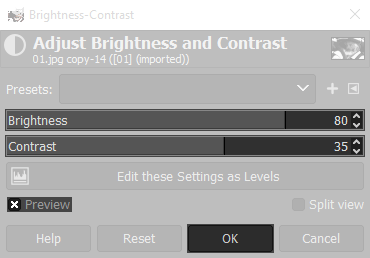
Now we need to ehnance again the brighntess and the contrast: open Colors → Brightness-Contrast then increase Brightness to +80, and Contrast to +35. If you want, you can change the settings as you prefer.
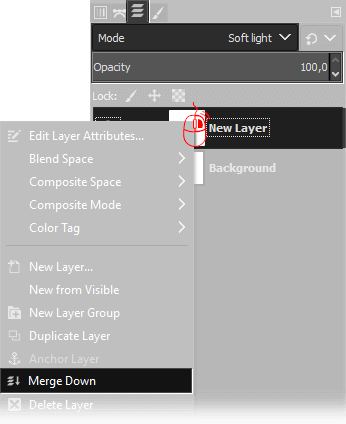
Let's Merge down the desaturated layer, but this time select Soft Light as blending mode, and leave opacity to 100%, the image now has the perfect contrast, but colors are still too bright.
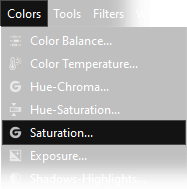
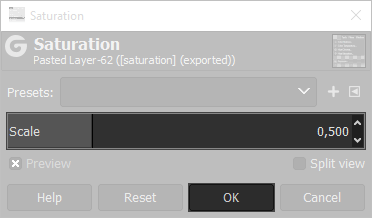
An optimal Dragan effect is achieved with a photo with pale colors. To do so, open Colors → Saturation, and set the scale to 0,500 then press Ok.
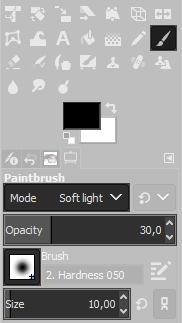
At this point your image should appear as an old and faded photo. Now you need to enhance the wrinkles and skin defects of the subject with the brush tool darkening and brighting as much as possible the portrait. Remember to brush all the details carefully, it may take some time, but is probably the most important step to get a realistic Dragan effect with Gimp. Setup a brush as you can see below.
Before proceeding, you need to duplicate the current layer. You have to move the mouse cursor over the actual layer on the Layers window (press Ctrl+L if you can't find it) then click Right Mouse button and choose Duplicate Layer.
Ok, now brush it. Remember that you have to constantly change brush size according to the size of the details that you have to paint, if a stroke is bad, simply undo it using Ctrl+Z. You have to use white color for light enhancement, and swap to black color for the shadows.
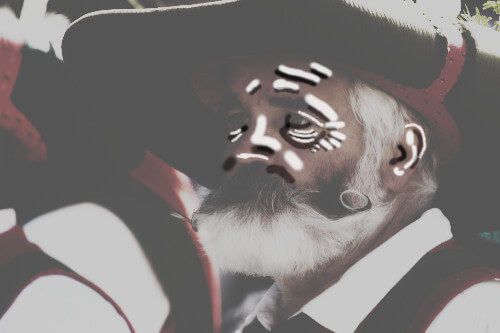
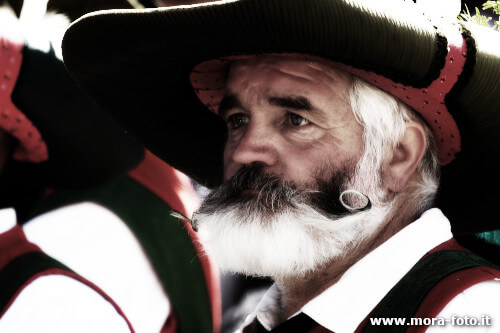
For a better understanding, you can refer to the left image below. The backround has been grayed out to let you better undestand, and I painted with plain white and black colors the parts, to allow you to better view what I've done, but you don't have to do that: you have to brush as you see on the right image, with brush opacity at 30% and Soft light as brush mode. I made it pretty fast, only for this Dragan effect tutorial, but for a real photo I'd put a lot more effort on this stage. It's really important and remember that Dragan himself invests many hours on this step.
Now you need to merge down the layer on the top: on the Layers Window select the upper layer, this time leave Normal as Blend mode, and set opacity as you like, then click with the right mouse button on the layer on the top and choose Merge down. The reason we made you duplicate the layer is because you can reduce the opacity of the painted layer if you exaggerated with the paintbrush.

Now you need to duplicate the current layer for the last time. You have to move the mouse cursor over the actual layer on the Layers window then click Right Mouse button and choose Duplicate Layer.
Now we need to brighten and increase contrast: open Colors → Brightness-Contrast then increase Brightness to +10, and Contrast to +40. If you don't like the result, change values as you want.
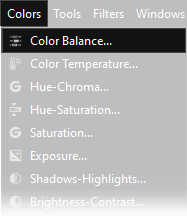
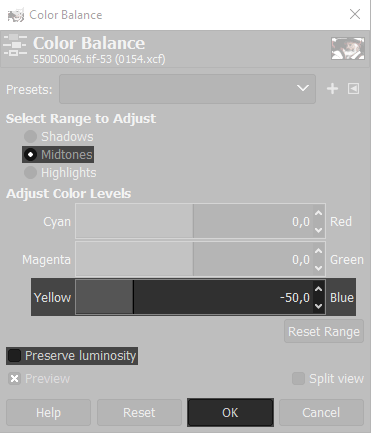
One of the last steps of this Gimp's Dragan effect tutorial is to Setup color balance: open Colors → Color Balance select only midtones and set to -50 Yellow/Blue, remember to uncheck preserve luminosity then press Ok.
Now we need to merge down the layer on the top: on the Layers Window select the upper layer, then choose Darken Only as Blend mode, and set opacity to 40%, then click with the right mouse button on the layer on the top and choose Merge down.

The work is almost finished but, if you want, you could darken the background. There are different ways to get the right result: You can use a Gimp's mask to select the subject, then open Select → Invert and feather it choosing Select → Feather and choosing a correct radius. Now you have to change the Brightness until you are satisfied going on Colors → Brightness-Contrast.
Another way, that I prefer, is to duplicate the layer, darken it using Colors → Brightness-Contrast or using Gimp's curves
and then proceed to erase the parts you don't need with the eraser tool, as deeply explained on this Gimp's photo blending tutorial.
If you are not completely happy with the result, could be a good idea to give a final correction to the overall looking of the Dragan portrait tuning the brightness and contrast with
Gimp's curves and saturation with Colors → Hue-Saturation.
Obviously any one of the parameters of this tutorial can be varied as you desire. If you like the dramatic photos, you may be interested also to Gimp's bleach bypass tutorial.
If you liked this tutorial here you can find all the tutorials we have written for photo retouching with Gimp, or you can all the guides we have written for photographic technique. If you liked our work, you could consider to ❤support us: by clicking here you can see how.