Gimp Tutorial: night vision googles
How to use Gimp to simulate an oldschool military night vision device.

A funny editing that we can get in a few steps with Gimp is the night vision effect. What we're going to try to get is an image that looks like those which can be seen through the infrared googles generally supplied to the army and can also be purchased from the private, which allow you to see clearly even at night.
These devices are really sensible to low light and also uses a source of infrared light to lighten in the complete dark. This light, invisible to the human eye, can be recorded by a video camera without being noticed. A nice experiment that you can to do to understand what I'm referring to is to look through the display of your mobile phone in camera mode the infrared led in front of the TV remote control. When you press a button, you'll find that even if with your eyes you don't see anything, your phone will show you the led light up. In the last years some remotes uses bluetooth or other technologies, so use the older and lowtech remote you have.
Let's get back to the subject and try to figure out how we can proceed to get a night vision effect with Gimp.
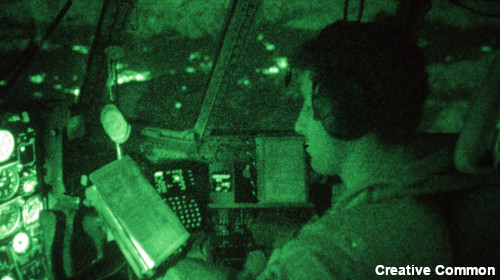
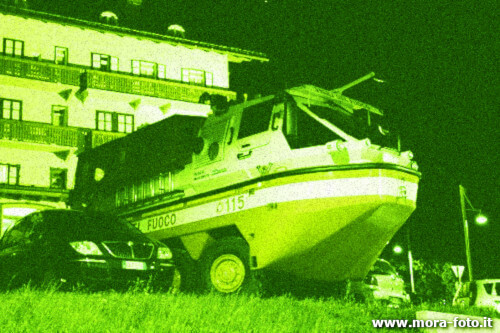
Here on the right we can see a photo taken with a real nightvision device. On the high lights we see a very marked overexposure.
There is no black at all, because low lights are greenish.
Everything has a green dominance and there is a not of noise. The three effects can be recreated in a very simple way with a few steps.
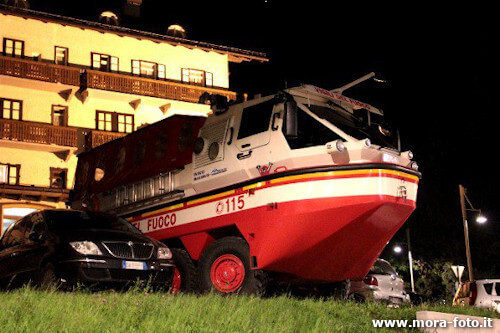
First, we're looking for a photograph that will go well; consider that we can get the best results only with night photos,
or images taken with clouds; logic dictates that a night-time photograph should have absolutely no shadows other than the shadows
generated by artificial light or even better from the camera flash.
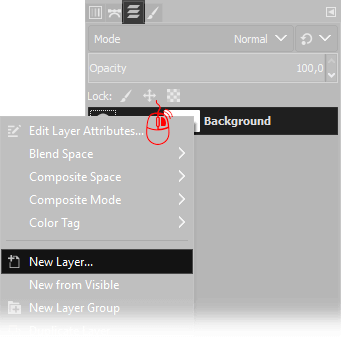
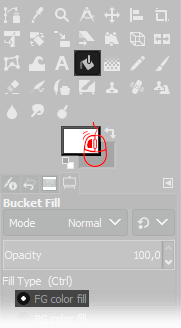
First step is to create a new blank layer: place your cursor on the Layer window, (press Ctrl+L if you can't find it) then click Right Mouse button and choose New Layer. Default settings are perfect, so simply press Ok when you have to choose the new layer properties.
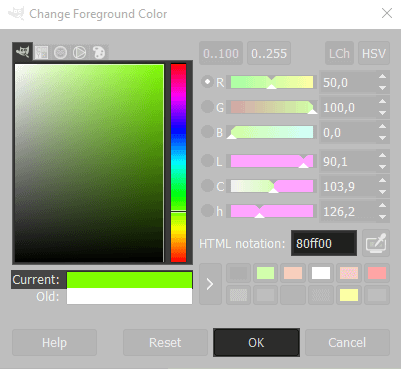
Select the Bucket Fill Tool, then click on the active foreground color to change it, and write 80ff00 in the HTML notation, press Ok and click anywhere in the image to fill the New Layer with a plane green color.
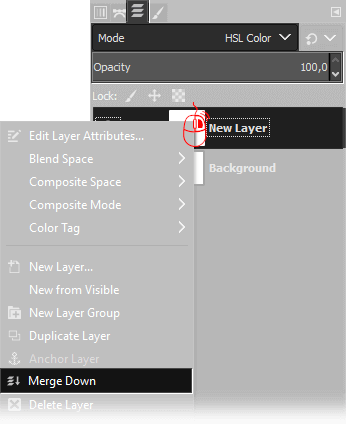
Now we need to merge down the layer on the top: on the Layers Window select the upper layer, then choose HSL Color as Blend mode, and set opacity to 80%, then click with the right mouse button on the layer on the top and choose Merge down.
Now we need to make the black as a dark green: create a new blank layer again: place your cursor on the Layer window, (press Ctrl+L if you can't find it) then click Right Mouse button and choose New Layer. Default settings are perfect, so simply press Ok when you have to choose the new layer properties.
Select the Bucket Fill Tool, then click on the active foreground color to change it, and write 80ff00 in the HTML notation, press Ok and click anywhere in the image to fill the New Layer with a plane green color.
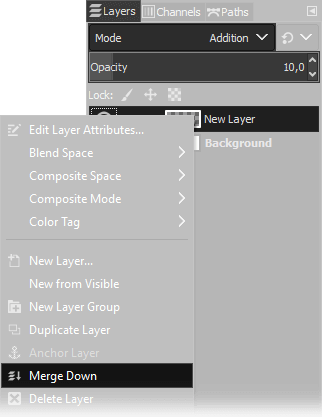
Now we need to merge down the layer on the top: on the Layers Window select the upper layer, then choose Addition as Blend mode, and set opacity to 10%, then click with the right mouse button on the layer on the top and choose Merge down.
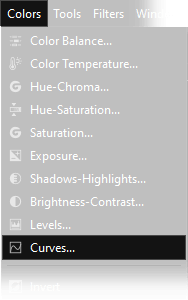
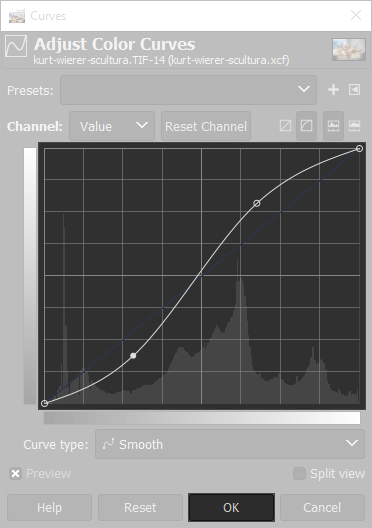
At this point we need to increase the contrast using Gimp's curves tool. Open Colors 🠞 Curves and set a curve similar to the next one. You should increase contrast, take inspiration from the following one but feel free to change the curve as you prefer. If you want to better understand how curves work, you can read this tutorial
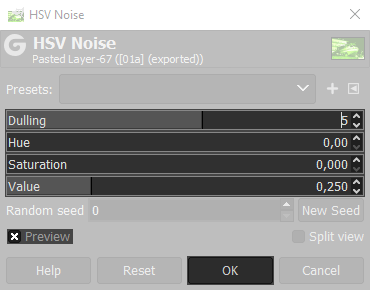
Now is time to add a lot of noise. Open Filters 🠞 Noise 🠞 HSV Noise... and setup all the parameters as you prefer, or you can copy mine.

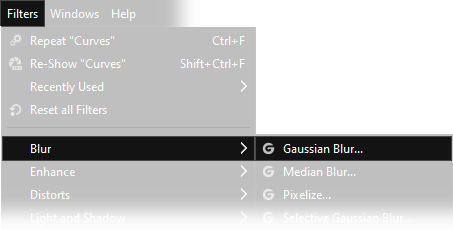
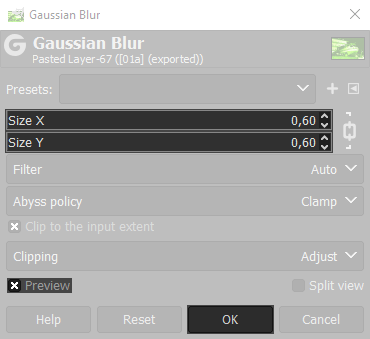
Now we need to apply a gaussian blur: open Filters 🠞 Blur 🠞 Gaussian Blur and set a correct amount. The value you have to choose depends on the image resolution. You should be able to perfectly see all the shapes, we only want to smooth the noise. for medium/high resolution images 0,6 pixels should be more than enough, but feel free to try different settings.
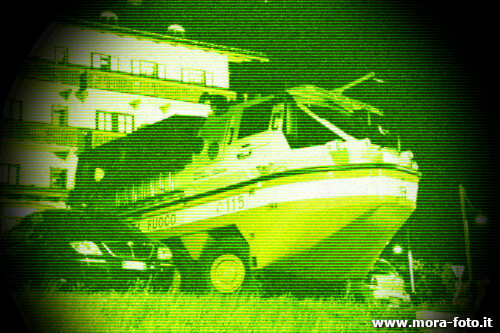
As last step we added a strong vignetting to simulate the image taken through a monocular, but this last step is absolutely optional.
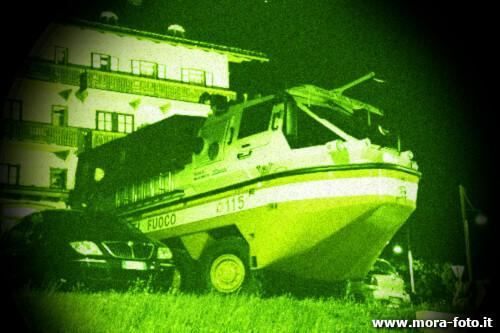
For those who want a more analog effect, you can apply video distortion. Open Filters → Distortions → Video Degradation. and apply a striped pattern. This step is also absolutely optional. Let's see the image again before and after applying the effect.
If you liked this tutorial here you can find all the guides we have written about gimp, from the simplest to the most advanced, or you can all the guides we have written about photography in general. If you liked our work, you could consider to ❤support us: by clicking here you can see how.