Tutorial: restore an old photo
Step by step tutorial on how to use Gimp to repair an old photograph.

If you have some old and ruined photos and you need to restore them, Gimp is a perfect software for repairing and old photo. Recovering an historical photo is a precision job, and it could be a demanding work, but with the help of this Gimp tutorial it will be, at least, an easier thing. This tutorial is divided into two parts, in the first part, this one, we'll see how to restore an old photograph, while in the second part, that you can read clicking here, we'll see how to color a black and white photo.
The most likely problems we may encounter during the restoration of a vintage photograph are: yellowing, fading, grain, loss of some pieces, stains, cracks and consumed paper. In this tutorial we'll see how to solve these problems individually, then we'll see a summary with a sample photograph. To realize this guide I used some Creative Common license photographs, because I don't have a photo that is old or ruined enough to allow me to analyze how to proceed with the restoration. For the example picture I would like to thank the Flickr user Giopuo, who made this and many other historical photographs available for free.
The first thing to do is to use a scanner to digitize the image: if you have a scanner at home, set the highest resolution possible and then digitize the document, otherwise you can ask a photographer or a graphic studio to scan the photo for you.
Remove yellowing
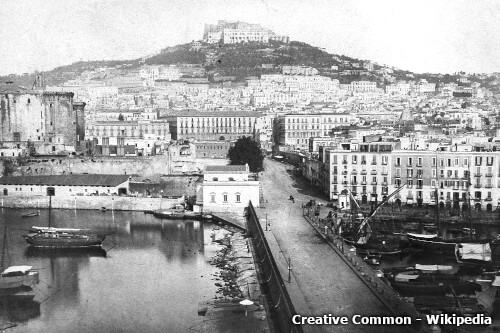
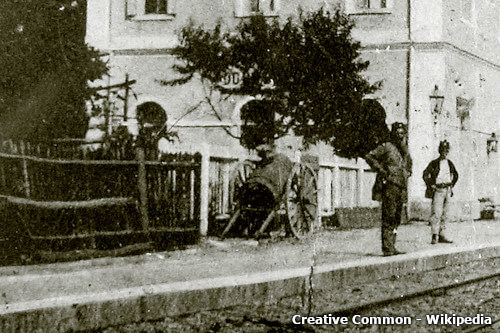
The degradation of halides, a not optimal conservation and the low quality of the first photographic papers can give several problems, first of all the yellowing of the photograph due to the oxidation and dirt, as in the case of this old photograph of the Naples pier in Italy in Creative Common License (Wikipedia).
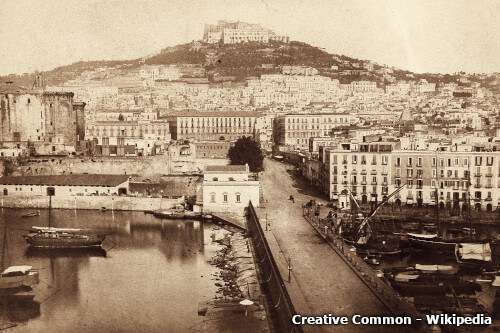
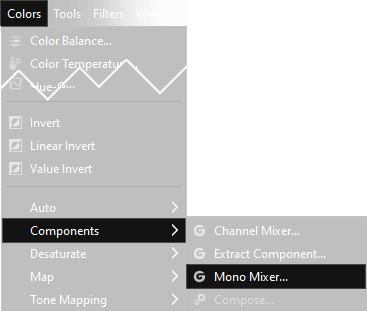
The first step we may do in order to repair an old photo is to apply desaturation, to eliminate any color dominance given by the paper or the scanner. Instead of using the classic tool Colors → Desaturate → Desaturate... we'll use a different tool: the Mono Mixer, that allow us to have the maximum control over the operation. Open the menu Colors → Components → Mono Mixer... and move the blue slider until the image becomes bright, but not so bright to lose detail in the highlights, in our case both the sky and the walls of the houses. If you want to learn more about the Mono Mixer tool, you can read this tutorial for the perfect black and white.
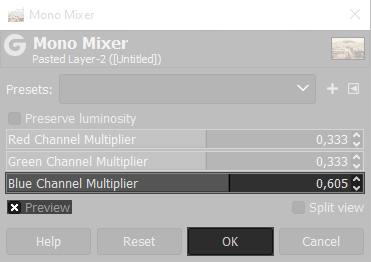
As you can see with a few seconds of work the look is already better. Obviously this step is optional and should only be done if you like it, many times the patina of the years could also be an added value, which does not have to be eliminated.
Add contrast
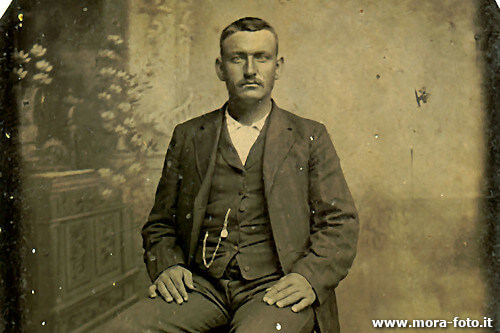
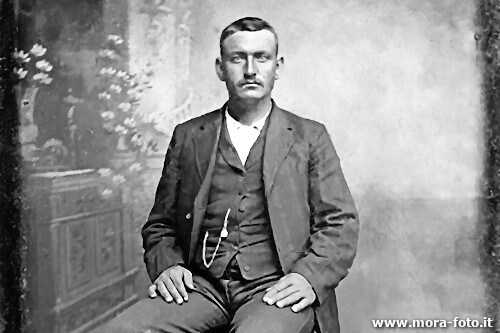
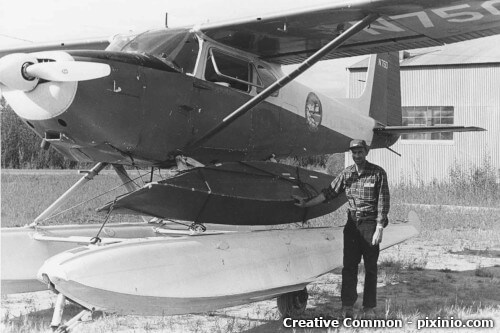
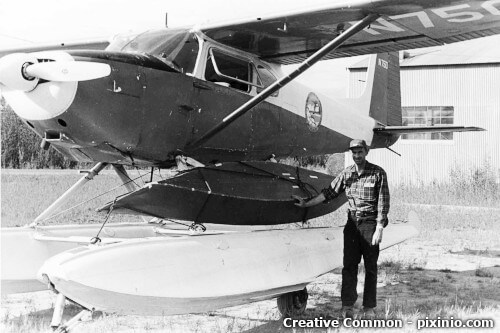
Once the photograph has been whitened, we need to proceed the restoration to make it reach modern standards. If you feel that the image is weak, as the photo of a man next to his plane below, it could be a good idea to increase the contrast.
The quickest way to do this, without any control over the final result, is to use Colors → Auto → Equalize menu. Alternatively you can have more control by using Colors → Brightness-Contrast.... Moving the sliders you can change the amount of contrast, but the result that would be possible to get with the method that we'll see in the next lines is definitely better.

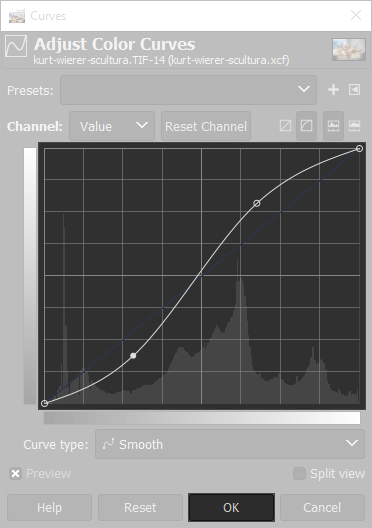
The best way to increase the contrast of a photo is using color curves. Open Colors 🠞 Curves and set a curve similar to the next one. You should increase contrast, so take inspiration from the following one but feel free to change the curve as you prefer. If you want to better understand how curves work, you can read this tutorial.
The grain of the film
Very often old photos are characterized by a strong grain, due to the low quality of the old films. You can see a clear example of this issue in this detail of a photo of the train station of Cornuda, a town in north east of Italt, taken from Wikipedia.
To solve this problem I did several tests, and the best tool is absolutely G'mic, a plugin for Gimp that we've already deepen in this tutorial. G'mic includes very advanced tools for digital grain reduction. Personally I had very good results using the filters Smooth (Mean-Curvature) and Smooth (Anisotropic).

As you can see the filter Smooth (Mean-Curvature) creates a strong loss of sharpness, but the digital grain disappears completely.
It might be useful to use this tool when you have higher resolution images or when details are not essential, as in the case of portraits on uniform backgrounds.
The alternative tool Smooth (Anisotropic) allows a greater preservation of details, but tends to be less useful than the first solution.
For both examples I used the default settings on an image 500 pixels wide.
The best results can be obtained duplicating the photograph and applying one filter to the lower layer and the other on the top layer, merging down the two layers with the right opacity (eg 50%) in normal mode. Of course it could also be a good idea to try different G'Mic settings and filters. I repeat what I stated above: if you need to learn more about the G'Mic plugin for Gimp and out how to install it, read this tutorial.
Stains, cracks and old paper
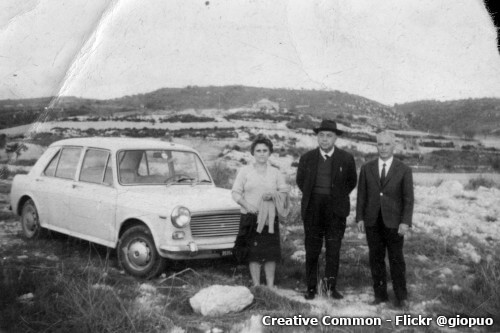
Old photographs have not always been preserved properly, many times the manipulation or storage in messy drawers can lead to the appearance of cracks, defects and the loss of some pieces. To correct these problems we'll use again an image of Giopuo, a family photo with a strong bending in the upper left corner and a tear in the upper right corner.
To delete the small defects the best solution is to use Clone and Heal tools. Basically these two tools do the same work, but the results with the Heal tool are much softer. To better understand the difference, look at the image below.
The "copy source" is positioned in the center, at the intersection of the four colored rectangles. On the left the Clone tool creates an exact copy of the portion with sharp borders, while on the right the Heal tool applies a huge blur on the borders, to have a less defined overlap. If you you have no idea on how a brush or these two tools works, I suggest you to read our tutorial to Gimp clone tool before proceeding.

In our case it's better to use the Heal Tool. So select the tool and set all the parameters according to our needs:
Opacity (Transparency) is normally left at 100.0 to completely replace the background, can be lowered for small shading operations. The smaller the number, the more transparent the brush will be.
The brush with the soft edges is used to make the intervention as softe as possible. The result must be invisible and with a clean edge you would clearly see the brushstrokes. If you use a too blurred border you risk to lose too much sharpness. This parameter is more important if you decide to use the Clone Tool.
The Size is the size of the brush. Initially work with large scale, then reduce it for precision corrections. It must be proportionate to the image resolution of the image.
Once the heal/clone tool is correctly set, proceed to work on the image. Holding down the CTRL button on the keyboard
select the part from which you want to clone, the release the button and click on the point that you want to overwrite.
Try with Gimp opened, as it is very intuitive when done in practice. Holding down the left button and moving the cursor
the two points (original and clone) will be "locked", copying the content of the origin point to the destination point.
Repeat this operation for all the parts of the photograph where it is needed, starting from the cracks to the missing corners.
I'll repeat again, if you need to better understand
how the clone/heal tools works, click here to read this tutorial.

The last step, optional, is cropping. If the photograph has edges that need to be removed, you can use the Rectangular Selection Tool to crop the image of the exact size. Once the correct selection is applied, simply go to Image → Crop to selection to confirm. If you want to learn more about this topic, you can read the tutorial Straighten and crop a photo with Gimp.
Conclusion
Now that you know all the techniques described above you will be able to do your digital restoration of a vintage photograph. Let's see another example. In this case I followed all the steps described above. First I reduced the yellow tint using the Mono Mixel, then I removed the grain with the filters of G'Mic and I used the Heal tool to remove all the stains and tears and the Clone tool to reconstruct the corners of the photograph. The last step has been to use the high pass filter to increase the sharpness of the photograph, as explained in this tutorial.
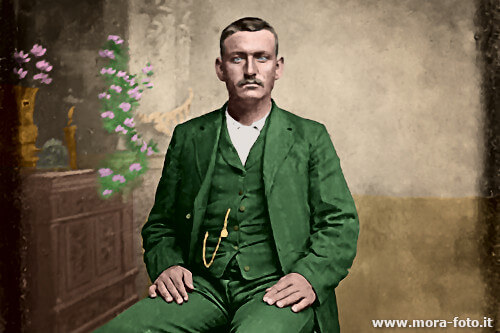
As previously mentioned, each step of this tutorial is optional: you can decide to leave the grain or maybe a torn corner, because it could be associated with a memory. As last thing I would like to point out that this tutorial can also be used with old color photographs, maybe to restore an old scanned slide, click here to know how to digitalize it without a scanner. If instead you have a black and white photo, maybe you might be interested in the second part of this tutorial: how to color a black and white photograph, to achieve the result you can see below.
If you liked this tutorial here you can find all the tutorials we wrote about editing with Gimp, or you can all the guides we have written about photography in general. If you liked our work, you could consider to ❤support us: by clicking here you can see how.