Gimp tutorial: clone tool
Tutorial for the deletion of unwanted parts of the photo with Gimp's Clone Tool.

The Gimp's Clone Tool is a special brush that allows you to copy a portion of the image on top of another part, in order to eliminate an undesired element from the photography in a very controllable way, and with very good results. You might need a little practice for a perfect result, but with the help of this tutorial and some exercise you will master the art of deleting unwanted parts of the photo.
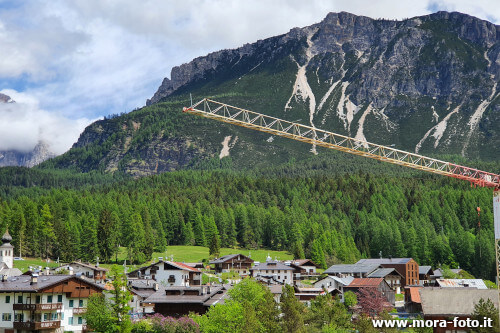

To write this tutorial on the clone tool I went for a walk and looked for the most classic disturbance situations that you can find while you're taking a picture. So I took two photographs with disturbing elements: the first is a panorama ruined by a crane, the second, that we'll see in the second part of the tutorial, is a stone in the middle of a road for the creation of a texture. Anyway this tutorials can be easily adapted to different situations: a light pole, a graffiti on a wall, a person walking in the middle of your photo or whatever you want to erase from your photographs.
How to proceed
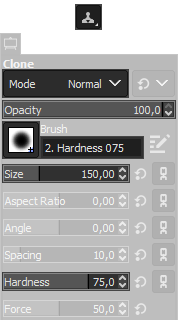
From the Gimp toolbar select the Clone Tool
 and change the settings as in the image below.
Consider that you should change the parameters according to your needs: the Size has to be set proportionally to the
resolution of your photograph, and you could also prefer a different Hardness setting.
and change the settings as in the image below.
Consider that you should change the parameters according to your needs: the Size has to be set proportionally to the
resolution of your photograph, and you could also prefer a different Hardness setting.
Let's quickly see what the various parameters of the clone tool are used for:
Mode: it is the blending mode of the brush. It is a rather advanced thing, which in this case is absolutely useless. Simply leave it as Mode: Normal.
Opacity: it has to be considered as a synonym of transparency, for this type of editing it is normally left to 100,0 because we want to completely replace the background, we are not interested in seeing the crane in transparency. It can be lowered for small interventions but it's pretty unlikely in this situation. The smaller the number, the more transparent the brush will be.
Brush: we have chosen a brush with soft edges. This is because we want the cloning intervention to be the as "soft" as possible, the result must be invisible and with a clean edge the brushstrokes would be too visible. If we choose a brush that is too soft, we would lose too much sharpness, so the Hardness 075 brush is a good middle way.
Size: is the size of the brush. You have to work with large scale in the first steps, then you have to reduce it for precision corrections. It must be proportionate to the resolution of the image.
Aspect Ratio, Angle and Spacing: these are parameters that allow you to change the brush stroke. Definitely great for those who hand draw with pen tablet, but are absolutely useless in this context.
Hardness: is the same value we saw in the Brush part. We have chosen a brush type Hardness 075, so the value of Hardness is 75. If you want more defined edges raise the value, if you prefer softer edges then lower the value.
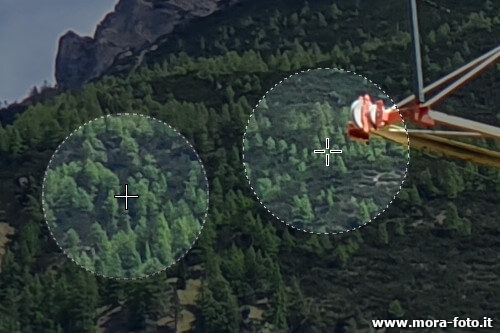
The first thing to do is very important, we must select the point of the image from which we will go
to pick up the content. Holding down the CTRL key
on the keyboard, click with the Left button the source part, the one from which you want to clone,
then release both the buttons and click on the point we want to overwrite.
Try with Gimp open, as it is much more easy to understand if you try it pratically.
The important thing is to remember that as first thing you need to define the point from which to copy by clicking
with the Left mouse button, holding down the CTRL key on the keyboard.
Once this is done you can go and click with the left mouse button
where we want to clone the contents. If we'll make a simple click we will only create a "dot", if instead we draw
holding down the left mouse button we can go to draw a stroke, where the two points
(original and clone) are linked and follow each other, copying the content from the point of origin to the point of destination.
To make it easy, the clone tool behaves like a normal brush that, as colour, uses another part of the photograph.
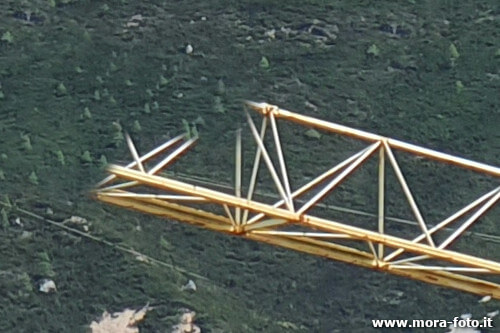
To go to erase the crane I used a compination of long brush strokes and some clicks where I was not happy of the blending.
It's pretty difficult to explain what I mean in words, so I suggest you to watch our youtube clip, just below the photograph, to understand what I mean.
Remember that the "source" point is moved several times during the cloning, clicking with the Left mouse button,
but also holding down the CTRL key on the keyboard.
It's hard to explain what I mean in words, so I suggest you watch the movie below to better understand. While watching you will see that the "source" point changes continuously, I remind you that it is set using the CTRL key on the keyboard. Click here to see the video on Youtube
At this point, if you have done some tests with Gimp and your photographs, it should be clear how to use the clone tools with all its limitations. Let's go to point out some important points anyway:
- You need to be very careful to use the right starting point, the colors and texture must be extremely similar to the area you want to delete, otherwise the result will be very bad
- The first few times it is better to try with small corrections and, while you get better, go cloning increasingly complex areas. Choose to repair too big or difficult areas should always be to avoid, when possible, because the clone tool rarely offers good results with very large areas
- In case of very large subjects, or on non-repetitive backgrounds, cloning will probably lead to bad and very visible results, so be careful when shooting the photo, in order to not put yourself in these situations
- In order to use the clone tool there must be some repetitiveness or at least a starting point from which to clone a detail as close as possible to what we need to overwrite. This is not always possible and often, due to differences in perspective or colours, the result could be very bad
- Remember that this tool should be considered as an emergency solution, when it is not really possible to take a picture without incorporating a disturbing element. You'd have to use it to correct small details, where the intervention would be unnoticeable
- I want to repeat it to be clear: if there is a disturbing element in a photo you should always try to move youself, to change the framing, and try to avoid photograph it. The clone instrument should be used as a last resort, not as a solution to the laziness of not wanting to look for the best possible shot
Don't get discouraged if initially the results will not be perfect, the only way to improve is with practice, because you learn which are the limits of the tool. The next time you'll find a beautiful panorama, but with a transmission tower in the middle, remember the Gimp clone tool and shoot the photo without hesitation!
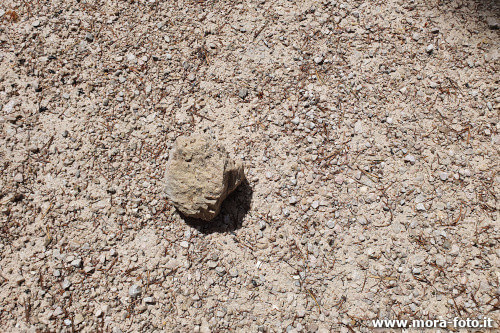
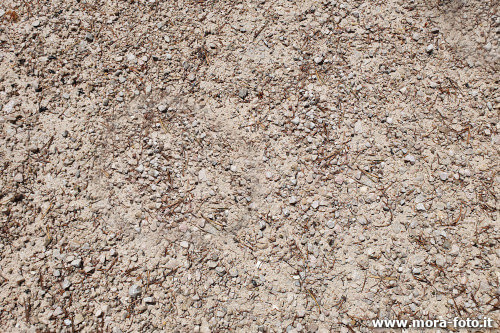
Next you can see another example: a photograph of a gravel ground. It might be useful for you to create for example a texture for a video game or a 3D application. In this case the clone tool was used to erase the stone, but it could have been be any unwanted element: a graffito, a crack on a wall, a poster etc..
If you liked this tutorial here you can find all the tutorials we have written for photo retouching with Gimp, or you can all the guides we have written for photographic technique. If you liked our work, you could consider to ❤support us: by clicking here you can see how.