Gimp tutorial: add text
How to use Gimp to add text in a picture: in this tutorial we'll see how to use Gimp's text tool to create a meme. We will also see the Gimp text tool options and usage.

Among the many Gimp tools, the Gimp text tool allows us to add a text over an image. Inserting text over a photograph can often be very useful or fun, for example to write a comment on a photo, create a business card, insert your watermark over an image, create a meme or a website...
In short, the possibilities with Gimp text tool are countless. In this tutorial we will create a simple (and a little crappy) Meme, adding a text over a picture, and we will see all the different Gimp text tool options.
How to add text with Gimp
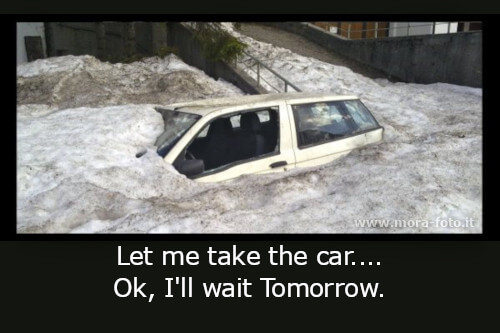
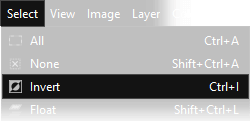
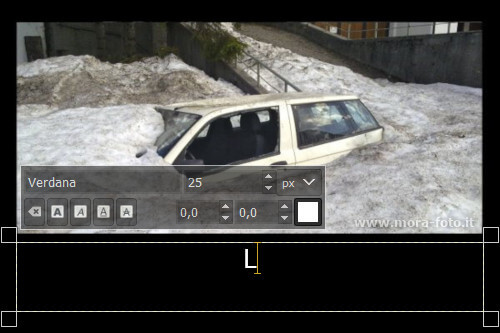
Let's start by opening with Gimp the image where we want to add the text. In this case it is a car, completely submerged by snow. For greater readability, we have created a black border, which you can make in many different ways. In this case the framing of the photo was wide, so it was possible to simply color a part of the photography in black. To do this we used the Rectangle select tool to select a part of the photo, then we inverted the selection from the menu Select → Invert, we deleted the content pressing CANC on the keyboard and finally we colored the outside of the image with the Bucket Fill Tool and a black color. If you don't know how to proceed to create a rectangular selection, you can read our tutorial on Gimp selection tools here.
Before proceeding, we need to deepen the knowledge of the Gimp Text Tool. The description says "Create or edit text layers" this is because Gimp consider
texts as new layers, this allow us to edit them, move them around the canvas, duplicate them and so on. Anyway the text tools simply allows us to add a text in Gimp.
First thing to do is to select the Text Tool from the Toolbar, the icon is a capital A and you can see it next.

In order to add a text in Gimp we need to draw an area for the text itself, so with the Text Tool selected, you have to draw a rectangle over your image, in the place where you want the text to be added, clicking and holding the Left mouse button. After the creation of a Text Layer of a determinate dimension, you can write a text. Remember that we can change the text area dimension and position in any moment, so don't be too precise. You can also simply click anywhere in the canvas with the Left mouse button and start typing, without draw any text area, in that case Gimp will add the text where you'll click, and will make the size of the Text area automatically fit to the text you'll write.
Text tool options
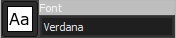
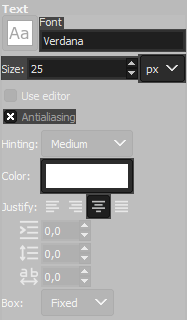
Font: here you can change the aspect of the added text. You can press the Aa button to open a list of all the fonts available, or you can also write the name that you need in the text box, after you type the first letter, the corresponding fonts will start to appear. You can choose any font that is installed in the Windows folder. If you install a new font with Gimp opened, you need to restart Gimp before being able to use it.

Size: here you can change the dimension of the added text. You can write any number. You can also improve or reduce the value, clicking one the two tiny arrows on the right of the box. Gimp default size unit is Pixels (px), if you prefer to use a different measure for your text, you can change the font size unit in the dropdown menu on the right. There are many different options, but the most of the times pixels is the best one.

Use editor: this option is unselected by default. If you leave the box unticked, you will add the text directly inside the text layer, and you can change the settings in this menu as usual. If you tick the checkbox, a new Gimp floating window will appear. In the floating window will be possible to write the text in an esasier way if the canvas is really crowded. You can also change some options. If you are used to an old version of Gimp you could prefer to activate this option because it will be the same as it was used to be in the past.

Antialiasing: this option is enabled by default. When is enabled, it makes the borders of the added text appear smoother and better looking. Every curve and angle appears softer, not jagged and seems to have more resolution. This option should always be checked, but if for any reason you need a really sharp and pixelated border, you can disable it.

Hinting: in this dropdown menu you can change the hinting value. Hinting alters the font outline to produce a crisp bitmap at small sizes, to make it simple, it means that change this setting could give better results with tiny texts, that could appear easily readable. If you need to add a tiny text, I suggest you to try all the different Gimp hinting options, to see which one do you prefer.

Color: here you can change the color of the added text. Remember that you always need to change the color from this menu, because if you simply change the foreground color of Gimp, it doesn't affect the color of the added Text. After you click, the usual color window will appear, where you can change the color in many different ways: typing a value, using sliders or choosing the tone you like from the color palette.

Justify: this option works exactly in the same way of any word processor. You have four icons, and you can choose how the added text has to align respect to the text area. First option is Left justified, so Gimp will align the text on the left. Second option is Right justified and it's simply an alignment on the right side. The third and default button is Centered, that align every line of the text in the center. The fourth and last button is Filled. In this case Gimp will improve the space between the single words, in order to keep the text aligned both on left and right side of the Text area.
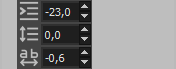
Indentation, line and letter spacing: This three options are used to define the spacing of the text. First line is the Indentation of the first line, it is the used to separate a paragraph from the left or right margins. If you write a positive or negative value, the first line of the text will be differently aligned compared to the other lines. It works only with left and right alignment and after you press the enter key. Second option is Line spacing, you can choose how much space Gimp has to leave between one line of text and the next. The third option is Letter spacing, that is simply the distance between each letter. In both cases you can use positive and negative values.

Box: this parameter affects the Gimp text area. If you simply click in the canvas with the mouse, and then you write something, the text box will be Dynamic because, without a defined size, the shape and dimension of the text box will be dynamic, and will automatically fit to the text you add. If you need to contain the text within a specific area, you can draw a rectangle with the text tool. In this case the Box will automatically become Fixed, because the added text will fit inside the fixed text box you have drawn.
You could have noticed that we miss two really important buttons, they are Bold and Italic. The reason is simple, when you choose the font from the Gimp dropdown menu, you will find different versions of the same font. For example Verdana exist in other three different versions: Verdana Bold, Verdana Italic and Verdana Bold Italic, so you simply have to choose the font you want from the dropdown menu instead of choosing later if you want it bold or italic. Here you'll notice a tiny limitation of Gimp text tool: the added text can have only one style. If you need to make a single word bold, it will not be possible. In this case I simply add spaces, then I create a second text layer with the bold word, and I place it in the right position.
Add the text to create the meme
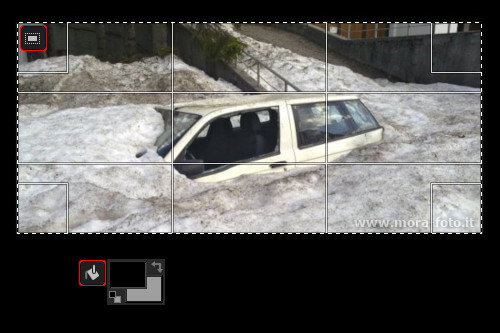
Now that you know all the different options of the Gimp Text tool is time to add the text to create the meme. We want the text to be aligned with the photo, so we need to create a fixed text area. First of all select the Text tool in the toolbar, then drag a rectangle the same size of the photo, a little bit lower, as in the next image. Then change the color of the text to white, the font and the other parameters as you like, and finally write the text to add.
If you want you can watch this youtube video where we show how to proceed. There are some tiny differences, because it has been made with the old version of Gimp, but the concepts are the same. Click here to see the video on Youtube
If you liked this tutorial here you can find all the other guides we wrote about photo editing with Gimp, or you can go there to take a look to our photography tutorials. If you liked our work, you could consider to ❤support us: by clicking here you can see how.