Gimp Tutorial: Two-Color Technicolor
How to use Gimp to simulate Two-Strip technicolor. In this tutorial we'll create an effect that simulates the first technicolor movies with Gimp.

In this Gimp tutorial we will recreate the Two Strip Technicolor. It is the wrong, but widely used, name of "Two-color Technicolor Process 2 Bi-pack" that was one of the many technologies that were used in Hollywood from 1922 to 1952 in order to get color movies. Gimp allows you to recreate the Two-Strip Technicolor effect in two ways; Red/Cyan and Red/Green. The effect is more realistic with Red/Cyan tones even if the original technique involved Red/Green filters.
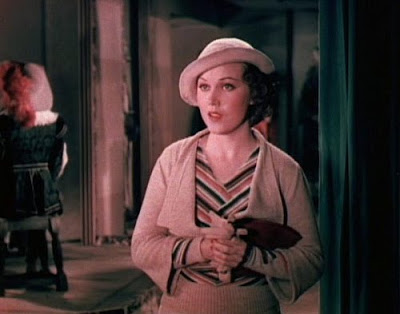
The result we want to get is a loss of most of the color tones of the image, something similar to the next screen capture of an original movie by Michael Curtiz of 1933, called "The Mystery of the Wax Museum".
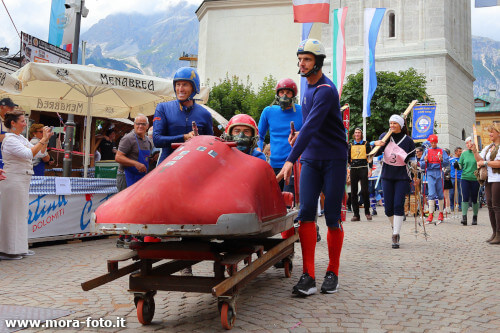
The two-strip technicolor gives the best results if your photo looks an old one, so I decided to use this photo of a commemoration of an old bobsleigh team, taken during a traditional parade here in Cortina d'Ampezzo.
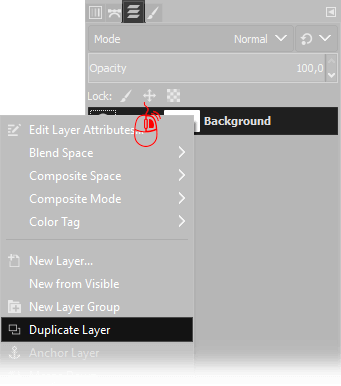
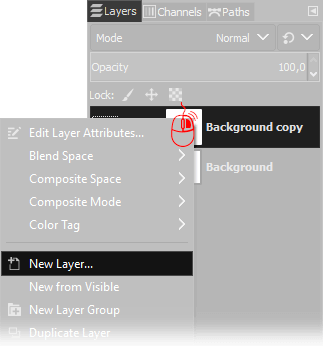
First of all, you need to duplicate the current layer. You have to move the mouse cursor over the actual layer on the Layers window (press Ctrl+L if you can't find it) then click Right Mouse button and choose Duplicate Layer.
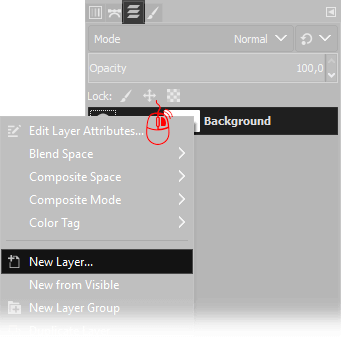
Next step is to create a new blank layer: place your cursor on the Layer window, (press Ctrl+L if you can't find it) then click Right Mouse button and choose New Layer. Default settings are perfect, so simply press Ok when you have to choose the new layer properties.
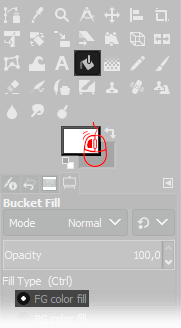
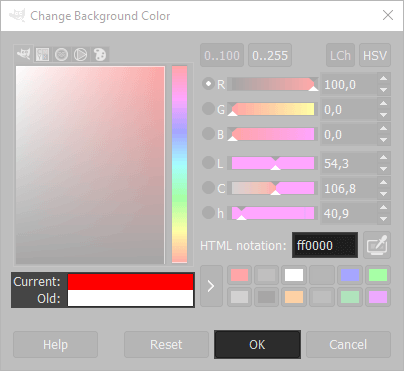
Select the Bucket Fill Tool, then click on the active foreground color to change it, and set ff0000 in the HTML notation, press Ok and click anywhere in the image to fill the New Layer with a plane red color.
Now we need to merge down the layer on the top: on the Layers Window select the upper layer, then choose Multiply as Blend mode, and leave opacity to 100%, then click with the right mouse button on the layer on the top and choose Merge down.

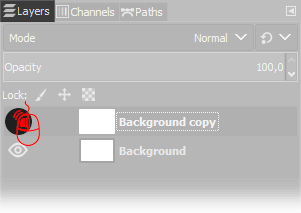
Hide the red layer by clicking the little eye icon on the left of the Background Copy layer, with the Left Mouse button so we can work on the lower layer.
Next step is to create a new blank layer: place your cursor on the Layer window, (press Ctrl+L if you can't find it) then click Right Mouse button and choose New Layer. Default settings are perfect, so simply press Ok when you have to choose the new layer properties.
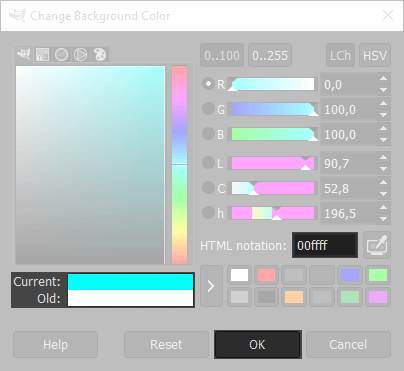
Select the Bucket Fill Tool, then click on the active foreground color to change it, and set 00ffff in the HTML notation, press Ok and click anywhere in the image to fill the New Layer with a plane cyano color.
Now we need to merge down the layer on the top: on the Layers Window select the upper layer, then choose Multiply as Blend mode, and leave opacity to 100%, then click with the right mouse button on the layer on the top and choose Merge down.
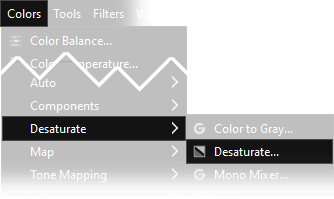
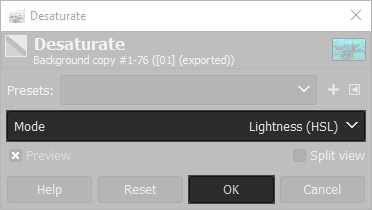
Now you have to desaturate the colors by clicking Colors → Desaturate → Desaturate.., select Lightness HSL as Mode, then press Ok. Attention: This step seems strange, why should you desaturate the cyan color you have just created? I know, it's strange, but is fundamental to get the two-strip technicolor.
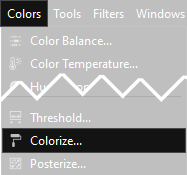
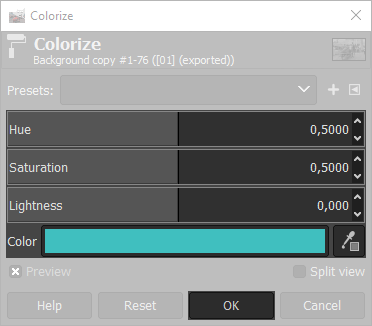
Now choose Colors → Colorize and press OK leaving everything as default.
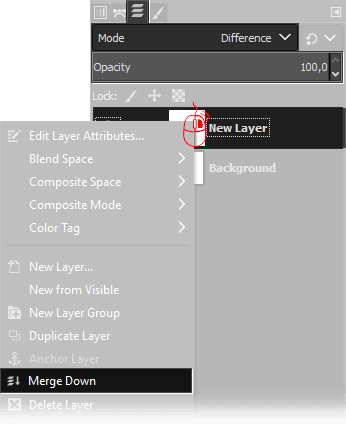
The last step for this two color technicolor tutorial is to unhide the Background copy Layer, clicking in the place where there was the little eye icon few steps above, then select Difference as Blend mode, leave 100% of opacity, then click with the right mouse button on the red layer and choose Merge down.
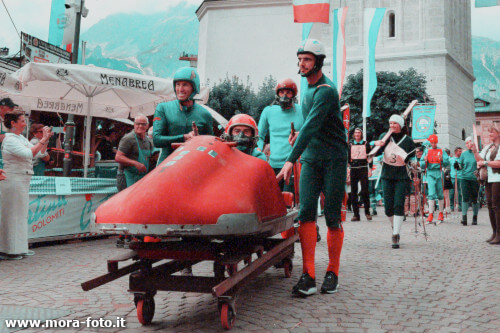
Next you can see the result you should get, notice that the green tones are completely gone. The result could be even better if you enhance the saturation of the image. I also duplicated the image, applied a Filter → Noise → RGB noise, then I blurred the image Filter → Blur → Gaussian Blur and merged the noise and blur layer at 30% of opacity, finally I contrasted the image with Colors → Auto → White Balance
If you liked this tutorial here you can find all the tutorials we have written for photo retouching with Gimp, or you can all the guides we have written for photographic technique. If you liked our work, you could consider to ❤support us: by clicking here you can see how.