"Che Guevara" effect, Gimp Tutorial
How to use Gimp to create a poster effect, in this tutorial you will learn how to create the famous "Che Guevara" effect with Gimp.

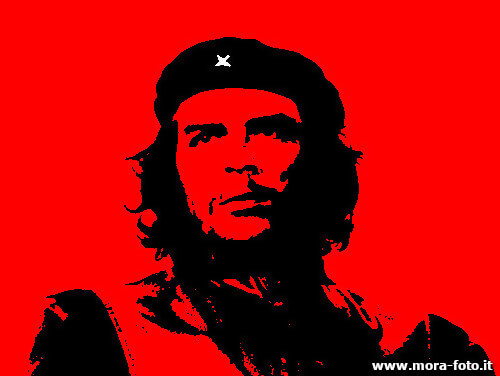
I was really undecided on how to name this effect, because it's extremely famous for one picture of Ernesto Che Guevara, but I don't want to make politics enter in this website, so consider that there is nothing political, the reason I named it "Che Guevara effect" is only because history decided that this photo is absolutely the most famous picture of this kind. Replicate the "Che Guevara" effect with Gimp is really easy, and could be a funny idea for a T-shirt, a joke or simply as a nice post production effect. If you change the red color with a different one, you will avoid any political repercussions. You can consider to fill the face with a white color. Again: there is no politics here, it's only a famous photo, known by everyone, that uses an effect that could be nice to reproduce.
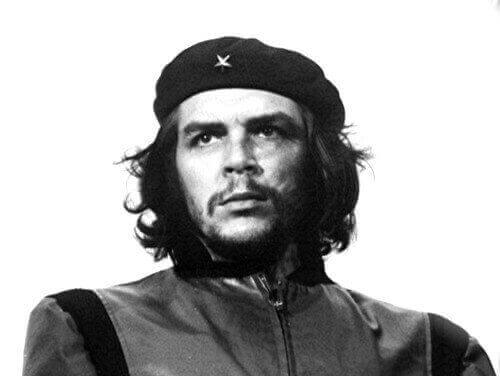
Open Gimp, then load the image that you want to modify. To stay in theme, I choosed a Che Guevara black and white portrait, but you can also use a colorized photo with the same results.
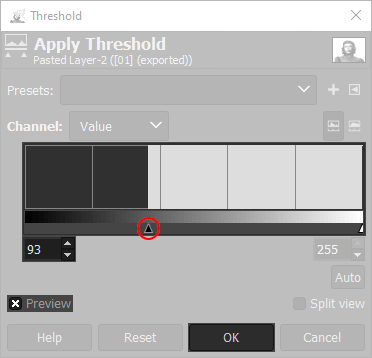
We need to use the Threshold Tool. Open Colors → Threshold, then move to the left or to the right the black cursor, highlighted with a red circle in the next picture, as you like. you can also write a numeric parameter. You will see a preview of the threshold result directly in the image, if the Preview chechbox is flagged. Remember that the mouth and the eyes should be clearly identifiable.

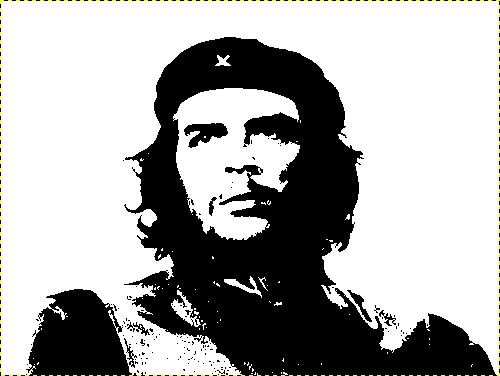
The result should be very similar to the picture below, with the elimination of all shades and colors only black and white. If the result is not convincing, move the cursor until you get a clear image.
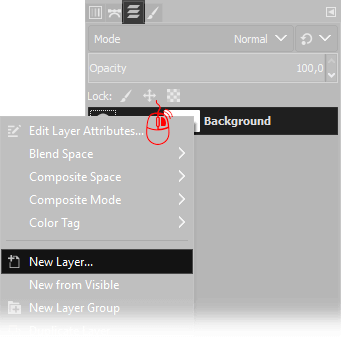
Next step is to create a new blank layer: place your cursor on the Layer window, (press Ctrl+L if you can't find it) then click Right Mouse button and choose New Layer. Default settings are perfect, so simply press Ok when you have to choose the new layer properties.
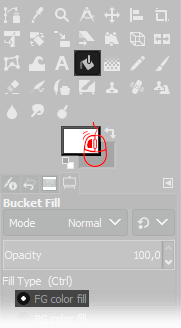
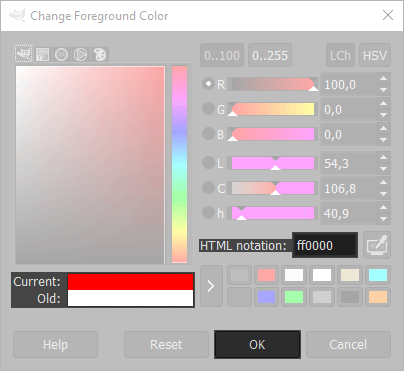
Select the Bucket Fill Tool, then click on the active foreground color to change it, and write ff0000 in the HTML notation, press Ok and click anywhere in the image to fill the New Layer with a plane red color.
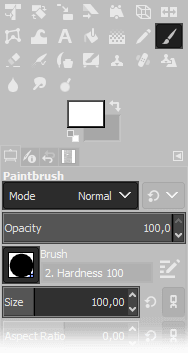
An optional step could be to select the Paintbrush Tool, set it up as the following image, and color in white the star on the hat, or even the whole face. This has to be done in the layer on the top, the red one.
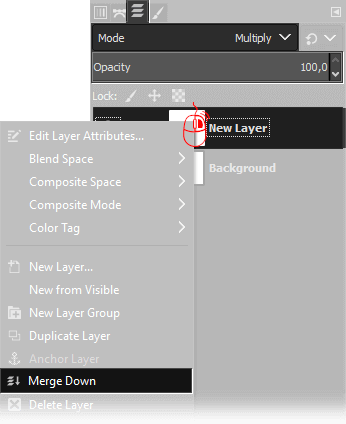
The last step is to merge down the layer on the top: on the Layers Window select the upper layer, then choose Multiply as Blend mode, and leave opacity to 100%, then click with the right mouse button on the layer on the top and choose Merge down.
Next you can see the result you should get. The tutorial for Poster effect (Che Guevara) with Gimp is finished, I hope it will be useful. If you like old photos you can also read my ehnanced black and white tutorial for Gimp.
If you liked this tutorial here you can find all the other guides we wrote about photo editing with Gimp, or you can go there to take a look to our photography tutorials. If you liked our work, you could consider to ❤support us: by clicking here you can see how.