Gimp Tutorial: Perfect black and white with Mono Mixer
How to use Gimp for black and white conversion, using the Mono Mixer tool.

Introduction
Gimp offers a really powerful tool to convert a photo in black and white. With Gimp Mono Mixer tool is possible to create a monochrome image, as in the "old school black and white photography", when coloured filters were added in front of the camera lens to get the a more contrasted and emotional monochrome photographs.
Black and white photography has a charm that traditional photography don't always has.
The magic of black and white is to reduce realism, forcing the observer to focus on the shapes, increasing the concentration necessary to translate the image in our brain, making it more suggestive.
Traditionally the monochrome photographers were using black and white films, but they also placed a colored filter in front of the lens, in order to filter the light. Each color created a different result,
by choosing the correct one, it was possible to obtain much better black and white photographs. In this tutorial we will see how to use Gimp to convert a photo in black and white,
using the Mono Mixer tool to simulate the coloured filters, for a perfect and emotional black and white conversion.
First of all, it is necessary to say that not all photographs are suitable for conversion to black and white. Many subjects, once the colors have been eliminated, blend in with the background and become chaotic.
A photo, to be interesting in black and white, must have a clear distinction between the subject and the background, an interesting texture and a strong presence of curved or diagonal lines, to give charm to the image.
With the help of this Gimp tutorial it will be possible to make your subject stand out from the background even more, applying the correct colour filter before black and white conversion.

Black and white conversion
It's really easy to convert a photo in black and white using Gimp, you just have to open Colors → Desaturate → Desaturate... and click ok. However, if you want a perfect result, the subject is much more complex, and in this tutorial we will deepen the topic, introducing and explaining the Mono Mixer tool, to get a perfect black and white. This tool is so much important because allows you to choose in which color channel you will apply the black and white conversion. It's not an easy subject to explain with few words, but we will try. If something is not clear, in the second part of this Gimp tutorial for black and white conversion we will see some photo examples, that will clarify.
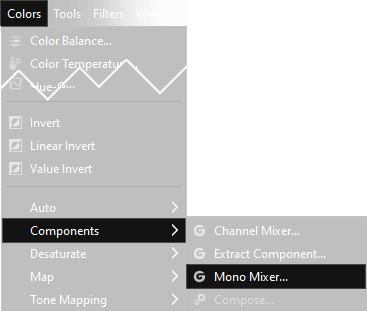
First of all you need to open the Mono Mixer tool, so click Colors → Components → Mono Mixer... and a window like the following will appear.

I would like to point out that the sum of the three color bars is 1,000 (0,333 red + 0,333 green + 0,333 blue). We can modify any of the three cursors, if the sum total remains of 1,000 then the image will maintain the same brightness, if the sum is lower the image will be darker, if the sum will be higher the image will be brighter than the starting one. But what changes if you are going to use one channel rather than another in black and white conversion?
Red Channel Multiplier (1,000 Red + 0,000 Green + 0,000 Blue):
In black and white landscape photography it creates a dramatic dark sky. Deep water appears almost black, vegetation becomes darker, the mountains have an exceptional contrast.
In the portrait, the red filter lightens brown and red hair and makes the skin milky, almost evanescent. Hides most skin defects
such as wrinkles and freckles. Ideal in glamor, combined with a wise use of the backlight and maybe a flou effect,
or an high key
Red channel enhance the contrast of the photo and lighten the skin.
Green Channel Multiplier (0,000 Red + 1,000 Green + 0,000 Blue):
In black and white landscape photography, it lightens the tones of vegetation and enriches the tonal range, leaving the sky and water unchanged.
In the portrait "tans" the skin, however it highlights the defects: wrinkles, moles and scars will be much more visible. Darkens blonde hair, brown reds and lips.
Suitable for dramatic portraits of old farmers or fishermen with gnarled hands and hollow faces, absolutely forbidden in glamor!
The green channel increases the "details" in portrait photography.
Blue Channel Multiplier (0,000 Red + 0,000 Green + 1,000 Blue):
In black and white landscape it makes sky and water brighter and makes the clouds almost disappear. It is used by architectural photographers, to prevent distractions
caused by an "interesting" sky that divert attention from the main subject. Increases the effect of fog.
In studio photography it reduces the excess red caused by tungsten lamps. In portraits is really invasive as it darkens a lot the skin. It also darken the green tones.
The blue channel also tends to increase the "digital noise" of the photograph.
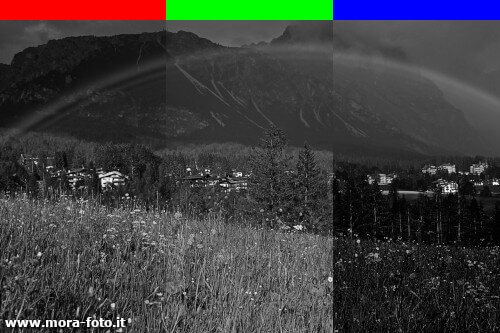
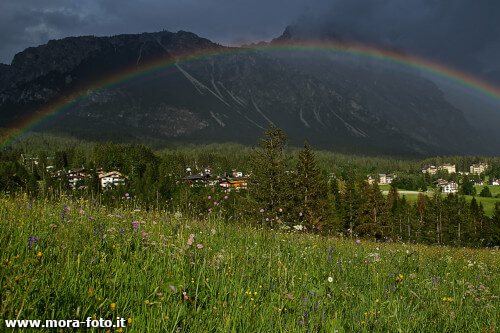
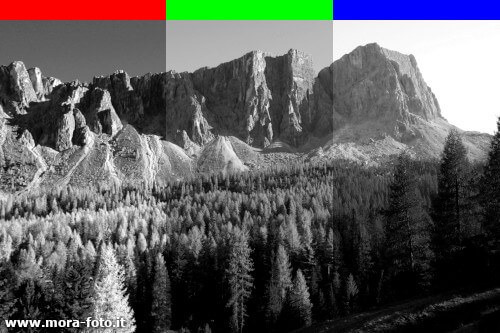
To simplify as much as possible, filtering a certain color while converting in black and white lightens the shades of that same color, going to darken those opposite to it. It is therefore evident that there is no perfect combination for all kind of black and white photographs: each image needs to be filtered with a different color to give its best. Although it is possible to select intermediate combinatios of color filters, let's first see some examples with the pure settings (one channel at 1, the other two at 0). On the left the photograph is divided in three, each part is in black and white filtered with the color you see on the top, on the right the colored photo:
Black and white landscapes
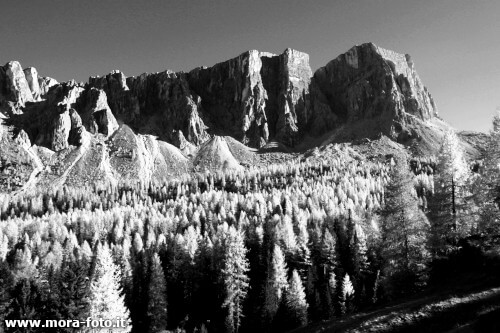
As first example we have a mostly green photo. As we explained above, a red channel Mono mixer makes sky darker, it also affects the mountain, because there is rain and mist above that gives an azure tone. The grass has a nice contrast.
Green channel is really balanced. The sky is brighter and grass is really similar to the red third, blue channel is completely different: sky becomes really bright but the grass becomes orribly dark. In "summer" landscapes you should use red and green filters for your Gimp black and white conversion.
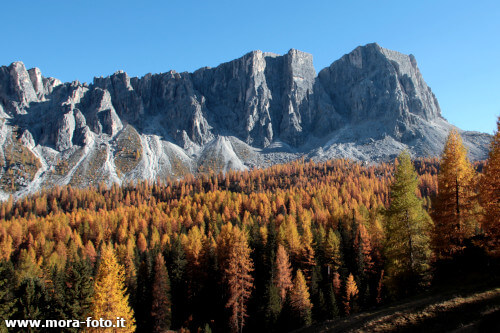
Similar discourse also for images with the typical shades of autumn, where orange is the main color. Red filter makes the trees almost white, and is absolutely the best version, green filter is not as good as before, because there is no green to affect, so the result is really flat. Blue filter makes a mess. In autumn landscapes there is no doubt: Red channel for your Gimp black and white conversion.
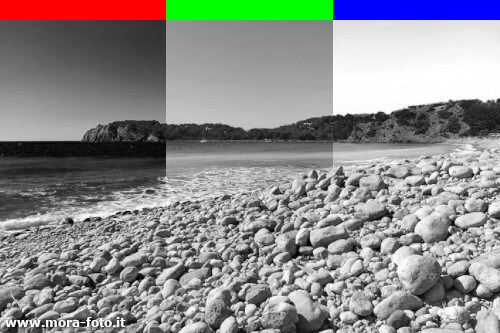
When we convert in black and white a picture taken on the sea, the roles are reversed. Red filter makes the photo extremely dark: blue water becomes almost black. If you are not looking for a particular effect, red channel should be avoided. Green filter is really good, image is really balanced, I like it. Blue filter makes water and sky really bright, the result is interesting. In landscapes with a lot of water, green channel mixer gives a natural result, blue and red are the opposite, that could be interesting in some black and white photographs.
Black and white portraits
In portrait photography you should consider what you want as result: The red lightens the skin tone and hides many skin defects. It is therefore perfect for black and white photographs of young people, green tends to darken the cutis and "does not forgive": every defect will be emphasized, it is therefore excellent for people with darker skin or for black and white portraits with more charisma. Blue has the same strengths and weaknesses of green tones, but even more emphasized.
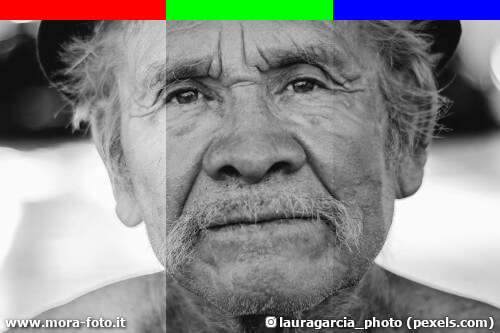
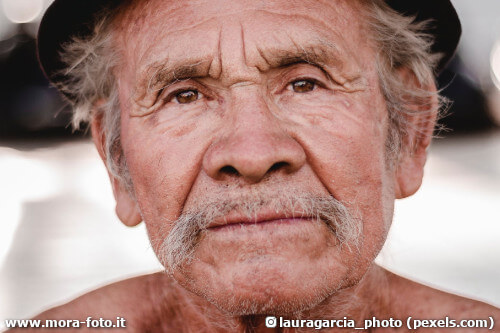
Another portrait photo, in this case the frame is filled with the face of the subject, to better understand the different black and white results we can achieve using different channels. Red makes skin lighter, and lowers the contrast, green darkens the tones and increases skin defects. Blue makes the same of green but even more enemphasized.
Don't stop to 1
Until now we have considered only full values, putting 1,000 for one channel and 0,000 for the other two channels, but obviously it is also possible to proceed in a different way, using any intermediate parameter. Another thing that we can do is to set values that, added together, are higher than 1,000 to get a higher brightness. It is not only possible, it is often advisable to set values greater than 1,000 because black and white is a kind of photography that behaves well with higher contrasts. Obviously you can also raise the contrast later, using the Gimp histogram, or adjusting the curves in Gimp, or in an even easier way setting the sliders for contrast and brightness, simply remember that an high contrast is almost always a good idea in black and white conversion with Gimp, the way you want to follow to achieve it, is up to you.
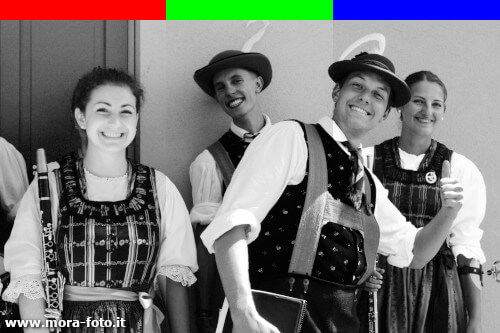
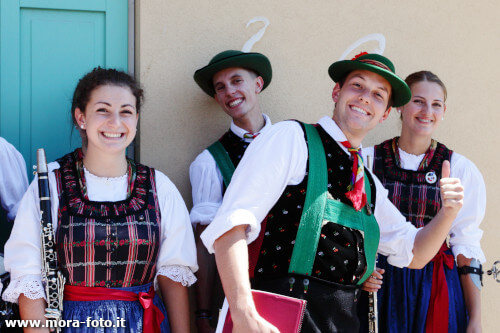
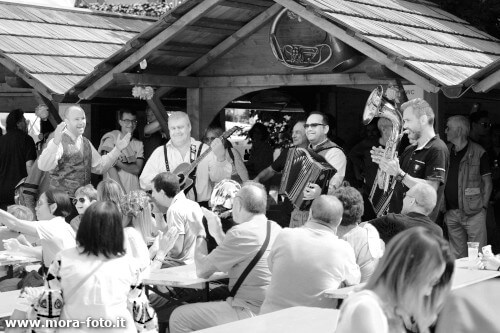
Let's see now another example of black and white photo, with two different setting of Gimp Mono mixer, to better explain the concept of intermdiate parameters for each channel. The photo was taken during the festival of the bands in Cortina d'Ampezzo.
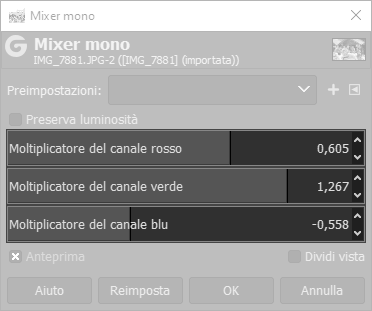
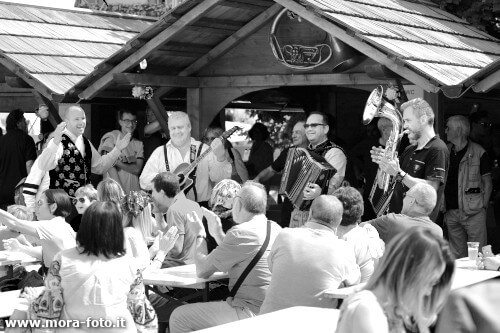
In this first example, the differences are more noticeable on the jacket of the band director (on the left, with raised hands), or the jacket of the accordion player, or on the shirts of sitted people. I personally prefer the first one.
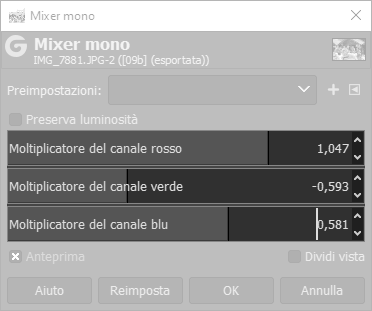
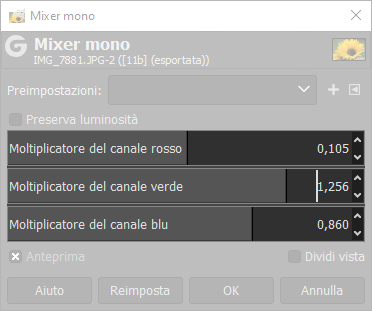
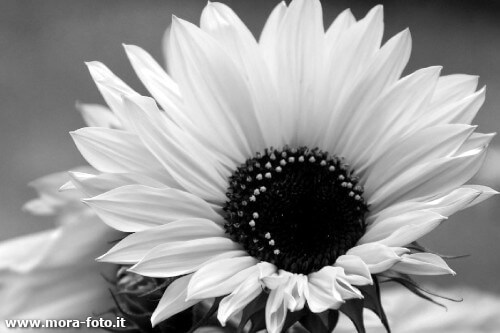
We have also another example that explains even better the differences between different settings of Mono mixer in Gimp black and white conversion. Left photo is completely different from the right one, simply because we choosed different parameters for the conversion of the photo in black and white. This is an image of a sunflower selected for its delicate shades of color.
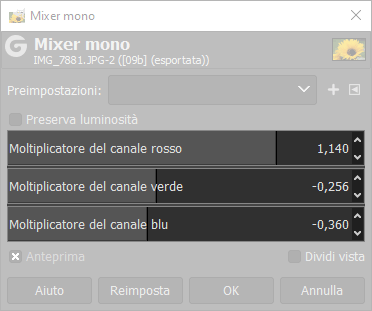

In this case first photo has a nice contrast between flower and background, but the shades on the petals are better on the right one. In this case I'd use the background of the first photo and the flower of the second, merging together the two photo as explained in this tutorial for photo blending with Gimp.
We have understood that, when we talk about black and white, we are not simply talking about a desaturated photo. There are a lot of things to consider before deciding which of the color channels we have to increase or decrease in black and white conversion. Do we want the sky to be darker? We will push the red. Do we want brighter skies? Let's raise the blue. Do we want our subject to have soft skin? Bet on the red. Do we want to emphasize wrinkles and charisma? Push on green and blue. Now you have all the information you need to get the best out of your black and white photos, you have only to try.
If you liked this tutorial here you can find all the tutorials we wrote about editing with Gimp, or you can all the guides we have written about photography in general. If you liked our work, you could consider to ❤support us: by clicking here you can see how.