Gimp tutorial: create an animated Gif
How to use Gimp to make an animated GIF or edit an existing animated GIF.

In this tutorial for animated GIF with Gimp we'll explain how to create or edit animations with Gimp and then how to export them in GIF format. The 256 colors animated GIFs were very popular at the dawn of the Internet, when the low bandwidth available forced users to use this type of file to make lightweight and funny animations. With the arrival of Youtube and fast connections, the GIF format became less common, but now animated GIFs are back and, thanks to social networks, have invaded our lives again.
Fun, colourful and better when looped, they mainly represent animals, dance moves and clips of famous movies. I could spend hours talking about GIFs that have made Internet and meme history, for example the famous Nyan Cat (Pop Tart Cat) by Chris Torres, but in this tutorial I'd like to explain how to create your own, or modify the ones you find online.
A GIF is basically a series of frames, one for each layer, that is played with a certain delay. GIFs files can have a maximum of 256 colors and support transparencies. Let's see in practice how to make a simple animation. If you don't know what is a layer you can read this tutorial.
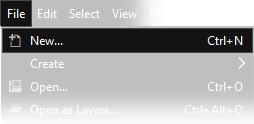
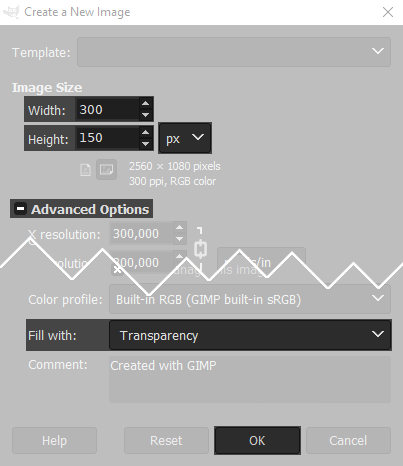
Let's open Gimp and create a new 300x150 image from File → New. Remember to check that the size is in pixels, px, from the drop-down menu. Now click on the Advanced options and set Fill with → Transparency. Confirm with Ok.
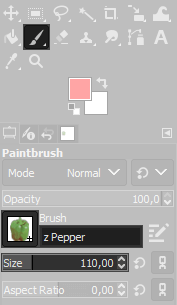
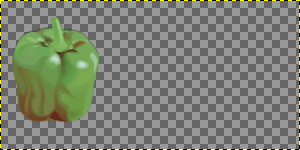
To make a very simple test, I'll move a pepper from left to right, on the transparent background. Draw a pepper on the left side. The pepper is a standard Gimp brush, I could have put a circle or anything else, but I liked the pepper better. Of course this is just an example, you can draw whatever you want.
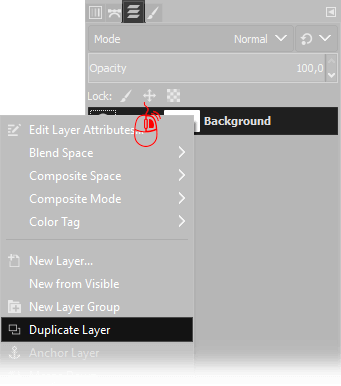
Now you need to duplicate the current layer. You have to move the mouse cursor over the actual layer on the Layers window (press Ctrl+L if you can't find it) then click Right Mouse button and choose Duplicate Layer.
Each layer is a different frame, and we are making an animation where the pepper goes to the right side of the image and back.
To do so, we have to move the pepper of the Copied Level to the right of a few pixels. To move the layer choose the Move tool
 ,
click on the pepper and press Right arrow on the keyboard a few times.
Keep the count of the number of moves, because we'll have to do it a few times, and we want the movement to be smooth.
,
click on the pepper and press Right arrow on the keyboard a few times.
Keep the count of the number of moves, because we'll have to do it a few times, and we want the movement to be smooth.
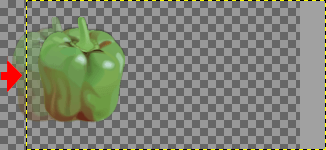
Personally I used Shift + Right Arrow to move 25 pixels in a time. Don't worry if you can see the other
layers behind, when we'll export the animated GIF it will work. Don't even worry about the border of the layer that exceeds the size of the canvass.
If the layer below distract you, you can hide them with the tiny eye icon
 on the side of each layer. Remember to make all layers visible again before exporting.
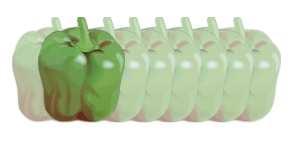
Repeat the operation as many times as necessary, until your pepper reach to the right side, then redo the same procedure from right to left. For my GIF animation I had to make eight frames to the right and then six to the left. Remember that GIFs are looped, so the last frame must be one step before the left side, otherwise you'll have two times the "first state" and the animation will result wrong.

At this point we must export our GIF animation to see the result. Pay attention because all the steps are fundamental for the success of your creation.
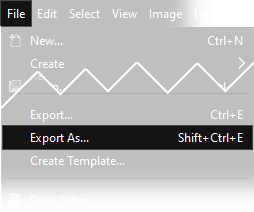
Click File → Export as..., select the destination folder and write the name, remembering to add the extension .gif
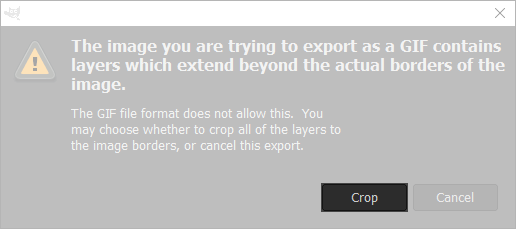
If your layers exceed the area of the canvas, as in our example, you'll get an error as shown in the image below, ignore it by clicking on the button Crop.
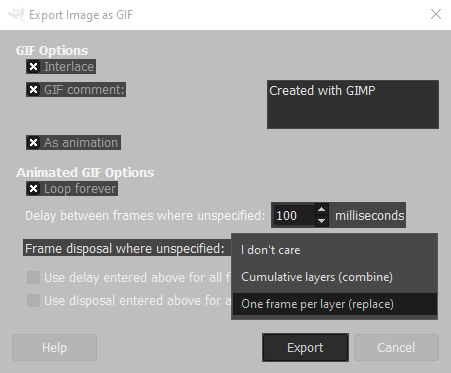
Once you get to the export window you'll see some options that could be checked. Remember to set everything as in the picture below. After the picture we will explain point by point what the less intuitive options are for.
- Interlace: an option designed for Internet publishing: it was important when modems were very slow, because it allows you to progressively display the image during loading. Even if it is a bit anachronistic, activate it
- GIF comment: You can write whatever you want: the author of the GIF or a comment, it only supports standard characters. If you enter a character not accepted, the function will automatically deactivate
- As animation: the fundamental option for an animated GIFs, in fact makes the gif an animation, needless to say that it is indispensable to select it
- Loop forever: Allows the gif to repeat itself infinitely. When it reaches the end, it starts again from the beginning, creating a continuous loop that never stops
- Delay between frames where unspecified The length of stay, in milliseconds, of each single frame (1000 = 1 second), the higher the value, the slower the animation will be
Once you've checked the options, go to the drop-down menu Frame disposal where not specified and set One frame per layer (replace). Since our layers use transparencies it is very important. If we had used opaque images we could have left I don't care. You can also use a static background and adding only the animations on the upper layers, is a rather complicated thing, but in that case we would have used cumulative layers.
The last two tick Use the delay entered above for all frames and Use disposal entered above for all frames should never be selected. If you are curious to know what they mean, I'll briefily explain: if you want you could enter the values of the delay or disposal for each individual frame in the name of the layer. If you select these items, all frames will be set as specified in the one at the top, ignoring the values below. I'd say we're not interested.
Once the animated GIF is exported, is better to open the image to check if the animation is correct or has any errors. In older versions of Windows GIFs are not shown as animated in the default viewer, in this case you must use an internet browser to view animated gifs. It means that you have to open the program you use for internet: drag and drop the GIF in the place where you normally see the websites, the GIF will be displayed correctly animated.
Remember that if you need to make any changes to the speed, or you need to tweak any export setting, you must always use the command File → Export as... and you never have to choose File → Export to example.gif because, in the second case, the GIF configurator would not open.
Now let's see some examples with different export parameters. The first image is the correct animation, with a delay 100 milliseconds. The second one has a longer delay, Delay 500 milliseconds. On the third one the Cumulative Layers (combine) option has been checked.


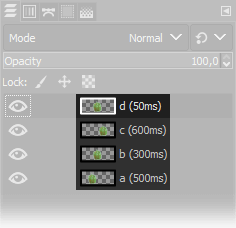
You can also specify a specific delay time, different for each frame. In this case it will be sufficient to write between parentheses the value in milliseconds of each frame, let's see another example:
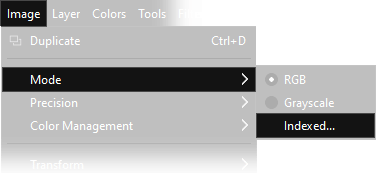
To conclude, remember that GIFs can handle a maximum of 256 colors, so if you use photographs, it would be better to do the image color conversion first. Go to Image → Mode → Indexed... and set a number of colors that seems correct. Remember that the greater the number of colors, the larger the size of the generated file. If you have many frames and you don't want to be with a gif that weights too much, try to reduce the number of colors as much as possible.
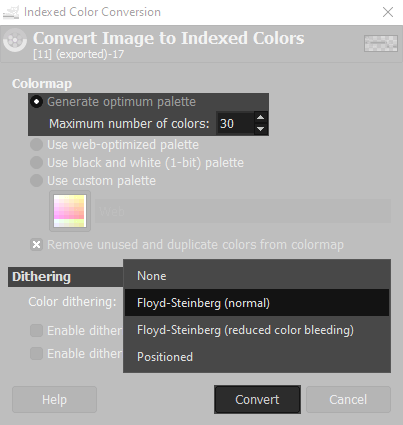
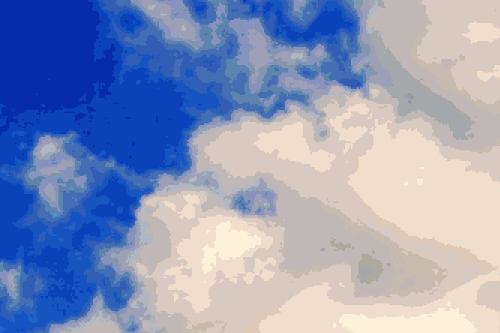
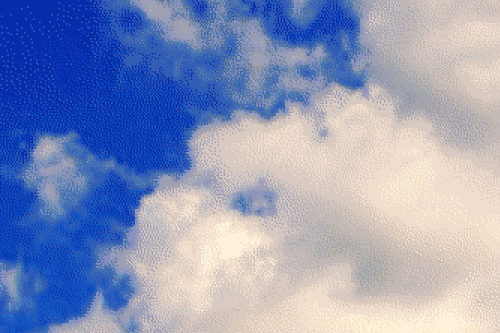
By changing the dithering of color you can try different ways to apply color conversion. In next example I converted a sky with a palette of 30 colors using two types of dithering and I enlarged the result by 200% to allow you to clearly see the differences.
If you do some animation tests following our tutorial you'll find that Gimp has some limitations in the creation of GIFs. If you have a small movie and you want to convert it, for example, it is much easier to use online services such as www.img2go.com/convert-video-to-gif, but if you need to create small animations with total control of what you are doing, or if you have some drawn frames that you want to animate, surely it is the ideal solution. Below you can see some more examples.
The first GIF was made using a free 8-bit sprite of a spinning coin. The second GIF was hand drawn. The idea was to represent (with poor results) a bouncing ball. I hope you appreciate the good intention and can see the potential for those who can draw freehand better than I do. It is a pen stroke on a white sheet of paper, but the colours have been inverted.
Next there are other two examples. First is a small loading icon (enlarged 10 times) that could be nice as animation in some websites, it has been done in 2 minutes. The second image is taken from Wikimedia and represents a quite advanced animation of a man dancing, showing that with a bit of practice and skill you can get fairly convincing results.

It could be a good idea to download the GIFs of this tutorial and open them with Gimp, to see how the various frames were made and try to export them yourself by changing the different export parameters analysed in the previous chapters to see what happens.
If you liked this tutorial here you can find all the other guides we wrote about photo editing with Gimp, or you can go there to take a look to our photography tutorials. If you liked our work, you could consider to ❤support us: by clicking here you can see how.