Simulate the Bokeh with Gimp
In this Gimp tutorial we'll see how to emulate the bokeh in the background.

The bokeh is the Blur in the out of focus areas of an image. Generally this low details areas are in the background of the picture and are typical of telephotos and low aperture lenses. This effect is really easy to simulate with Gimp. If you will shoot a photo which have a focused subject and a blurred background the subject will be highlighted, this gives a nice look to many kinds of photos, as portraits.
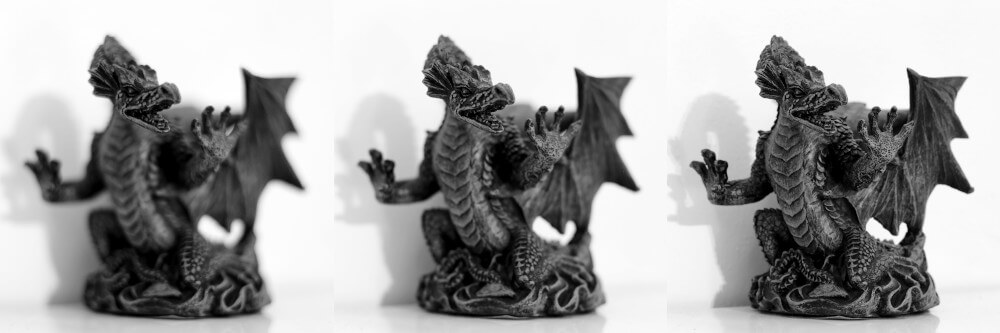
Below you can see an example taken with my camera. The focus point in on the mouth of the dragon, and with lower aperture values the wings goes completely out of focus. The blurred wings are the thing we want to try to simulate in this Bokeh emulation tutorial for Gimp.
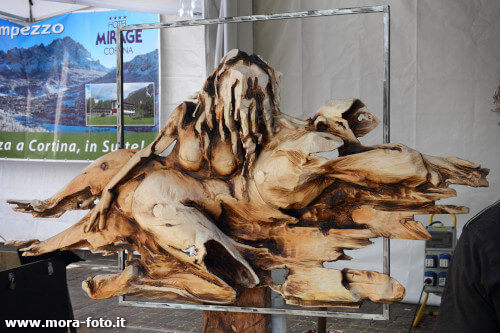
First of all, find an image suitable for this tutorial. You need a clear subject in the foreground and a relatively far background. I chose this photo, that has been taken during a wood sculpture event in my village. I think that this image is ideal, because the background and the foreground are very separed, the background is really ugly and a bokeh effect will make the subject more visible hiding the unpleasant background.
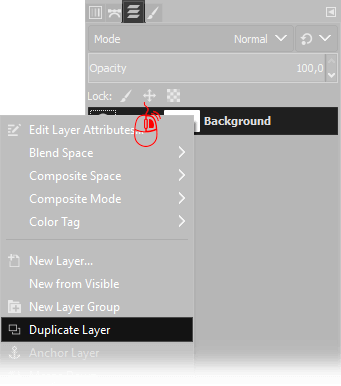
First you need to duplicate the current layer. You have to move the mouse cursor over the actual layer on the Layers window (press Ctrl+L if you can't find it) then click Right Mouse button and choose Duplicate Layer.
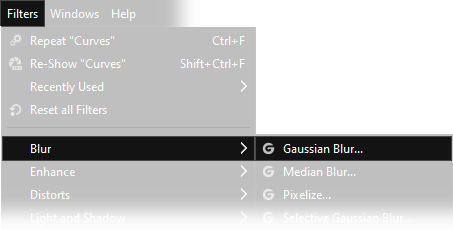
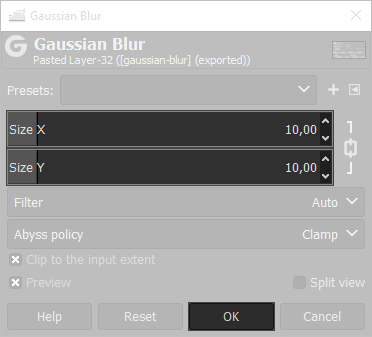
Now we need to apply a gaussian blur: open Filters 🠞 Blur 🠞 Gaussian Blur and set a correct amount. The value you have to choose depends on the image resolution. You should be able to distinguish the main shapes, but any detail has to be indistinguishable, for medium/high resolution images 25/30 pixels should be a correct amount, feel free to try different settings.
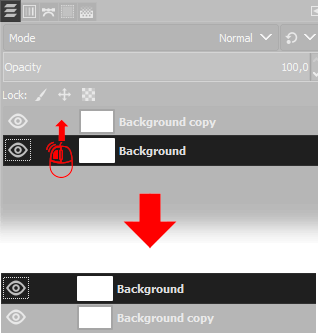
Now you must move the Background Layer above the Background Copy layer. You just have to click and hold left mouse button on the Background layer, then move it above the Copied layer and release.
Now we need to delete all the background from the sharp layer. You have different options: you can use the Eraser Tool, in the same way as you can see in this double exposure tutorial, or you can use the Selections, as I've made. In the next screenshot you can see the result of my selection. I've done it manually, using the Free Select tool and then I've delete the background with the Del button on the keyboard. If you'd like to use selections too, but you don't know how, here you can read a tutorial about the selection tools of Gimp.

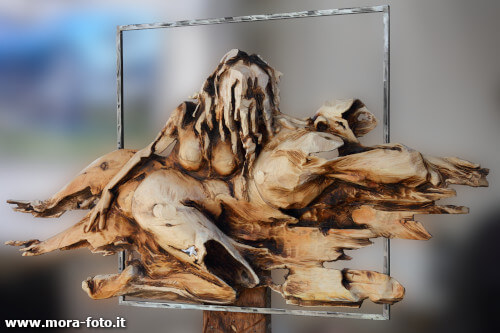
Next you can see the result on the right with the original picture on the left. I hope you liked this tutorial about faking the bokeh with Gimp.
If you liked this tutorial here you can find all the tutorials we have written for photo retouching with Gimp, or you can all the guides we have written for photographic technique. If you liked our work, you could consider to ❤support us: by clicking here you can see how.