Gimp Tutorial: Cross Processing
How to use Gimp to create Cross Processing effect: in this tutorial we will bleach colors: dark become blueish and bright turns yellowish with Gimp.

In this Gimp tutorial we will create the Cross Processing. It is also known with the name X-Pro. Cross Processing is a technique that has born in traditional photography. It has been discovered accidentally, by developing a positive film with a chemical solution for negative. It is possible to simulate X-Pro effect easily with Gimp and few steps. Cross Processing can give interesting results in street photography and give the better results with bright pictures with an high contrast. Traditional X-Pro give always an unpredictable result, that is impossible to obtain with digital manipualtion, so feel free to change any parameter of this Gimp Tutorial as you want, there is nothing wrong when you cross process a photo.
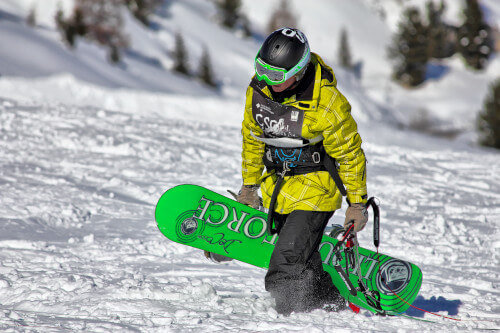
I'll use a photo that I've taken during the Cortina d'Ampezzo Snowkite Contest, but you can also have great results if you shoot in the city.
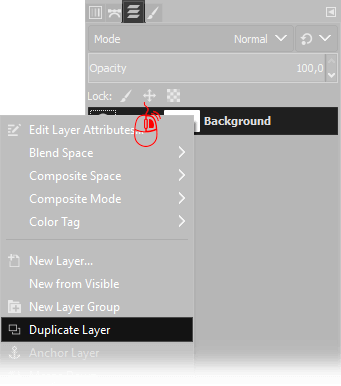
Open the photo in Gimp, then duplicate the current layer. You have to move the mouse cursor over the actual layer on the Layers window (press Ctrl+L if you can't find it) then click Right Mouse button and choose Duplicate Layer.
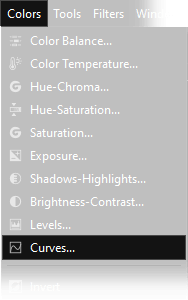
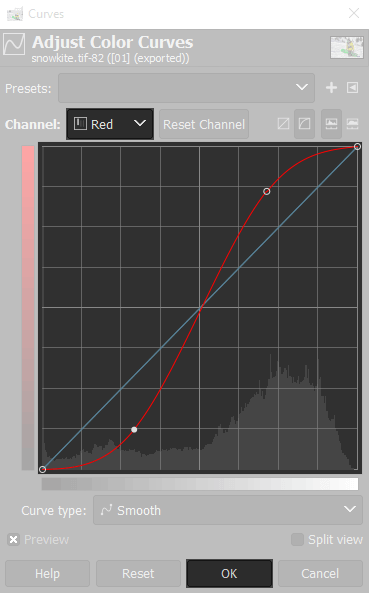
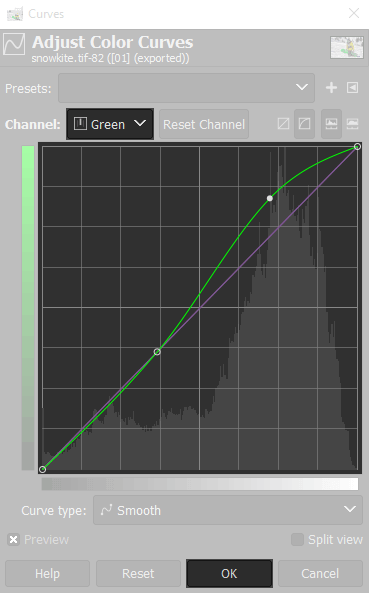
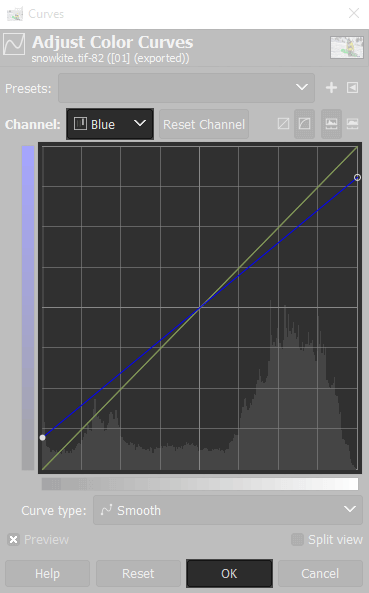
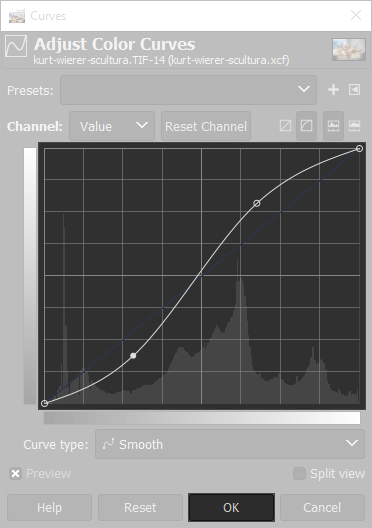
Open Colors → Curves and setup all the three color channels before press OK. You must change the colors on the Channel dropdown menu. Be sure that you are working on the upper layer.
In this step you will change color curves three times, one for each color channel. Each one of the following settings can be tuned as you like, as I said above Cross processing effect is really unpredictable. Anyway I suggest you to follow our parameters as a general rule: If a curve has a shape, you can do it more or less steep, but you should keep a similar shape.
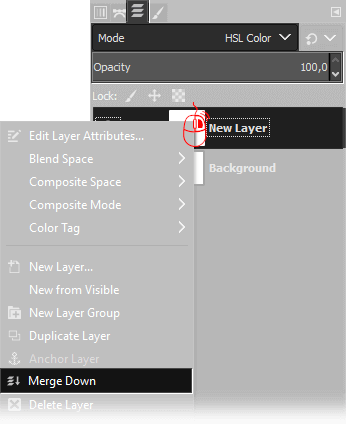
The next step in this Cross Processing tutorial for Gimp is to merge down the layer on the top: on the Layers Window select the upper layer, then choose HSL Color as Blend mode, and set opacity to 100%, then click with the right mouse button on the layer on the top and choose Merge down.
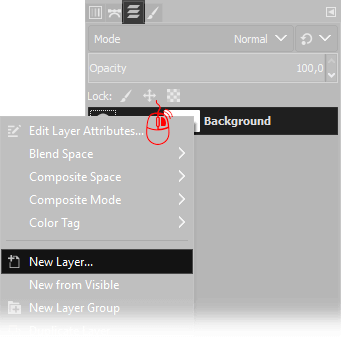
Next step is to create a new blank layer: place your cursor on the Layer window, (press Ctrl+L if you can't find it) then click Right Mouse button and choose New Layer. Default settings are perfect, so simply press Ok when you have to choose the new layer properties.
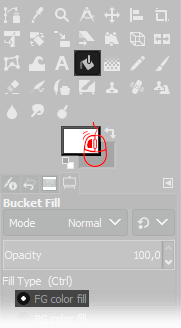
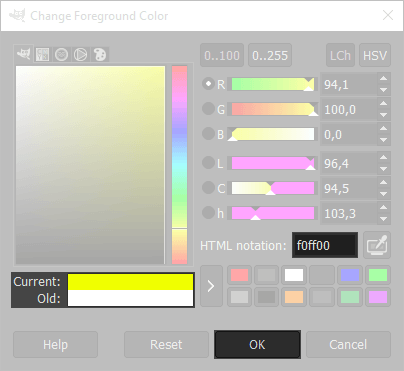
Select the Bucket Fill Tool, then click on the active foreground color to change it, and set f0ff00 in the HTML notation, press Ok and click anywhere in the image to fill the New Layer with a plane yellow/green color.
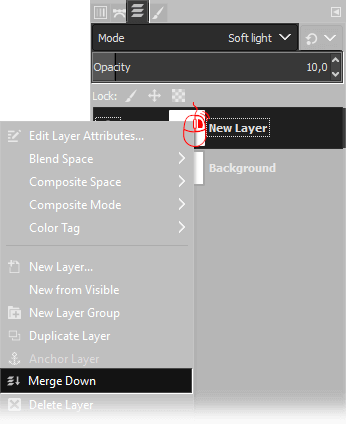
Now we need to merge down the layer on the top: on the Layers Window select the upper layer, then choose Soft Light as Blend mode, and set opacity to 10%, then click with the right mouse button on the layer on the top and choose Merge down.
At this point we need to increase the contrast using Gimp's curves tool. Open Colors → Curves and set a curve similar to the next one. You should increase contrast, take inspiration from the following one but feel free to change the curve as you prefer. If you want to better know how curves works you can read this Gimp's curves tutorial.
Next step is to create a new blank layer: place your cursor on the Layer window, (press Ctrl+L if you can't find it) then click Right Mouse button and choose New Layer. Default settings are perfect, so simply press Ok when you have to choose the new layer properties.
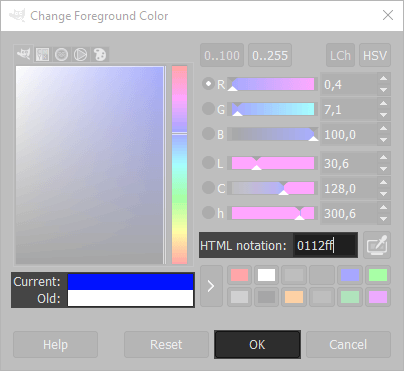
Select the Bucket Fill Tool, then click on the active foreground color to change it, and set 00aeef in the HTML notation, press Ok and click anywhere in the image to fill the New Layer with a plane cyano color.
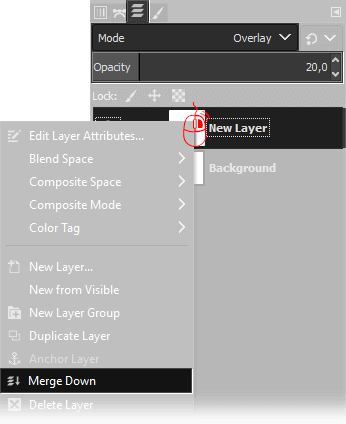
Now we need to merge down the layer on the top: on the Layers Window select the upper layer, then choose Overlay as Blend mode, and set opacity to 20%, then click with the right mouse button on the layer on the top and choose Merge down.
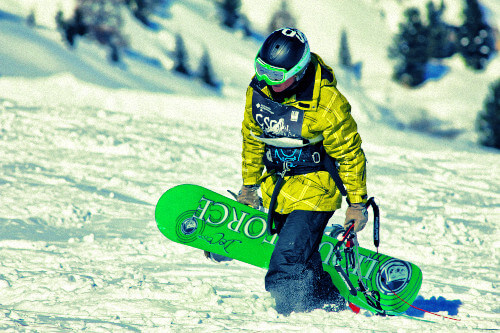
Now the cross effect is finished, If you want a more oldschool effect, you can add an HSV Noise (Filters → Noise → HSV noise). If you like this effect you could also be interested in Two-Strip Technicolor effect for Gimp.
If you liked this tutorial here you can find all the other guides we wrote about photo editing with Gimp, or you can go there to take a look to our photography tutorials. If you liked our work, you could consider to ❤support us: by clicking here you can see how.