Flou effect (aka Soft Focus), Gimp Tutorial
Soft Focus is an amazing effect to reduce skin defects or to give a "dream effect".

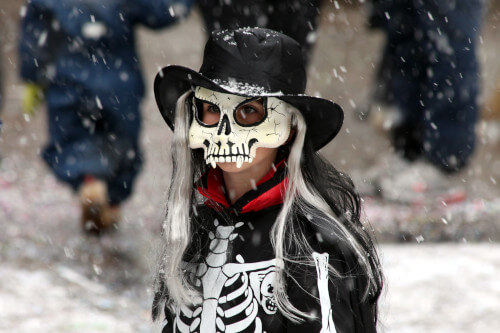
The Flou effect, also known as soft focus, is mainly used in portraits, both of human subjects and animals. It is more appropriate with female subject and fluffy animals. It softens the image, hides imperfections and makes details less sharp. Applied on a female face hides wrinkles, makes the gaze brighter and creates an angelic glow around the subject. In landscape photography, it makes the atmosphere unreal and dreamlike.

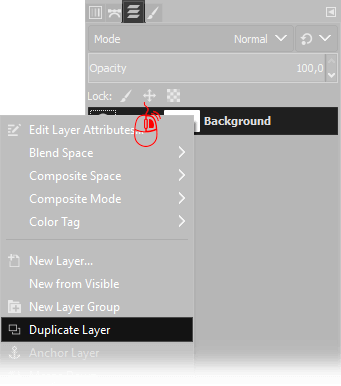
First step of soft focus effect, is to duplicate the current layer. You have to move the mouse cursor over the actual layer on the Layers window (press Ctrl+L if you can't find it) then click Right Mouse button and choose Duplicate Layer.
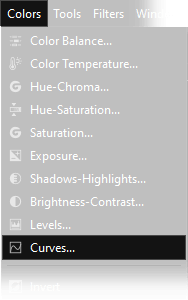
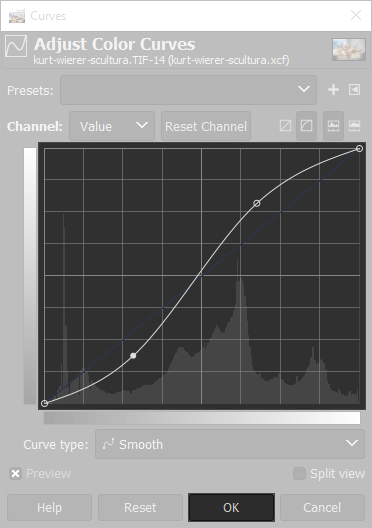
At this point we need to increase the contrast, we will use Gimp's curves tool. If you want to better understand how curves work, you can read this tutorial. Open Colors 🠞 Curves and set a curve similar to the next one. You should increase contrast, take inspiration from the following one but feel free to change the curve as you prefer.
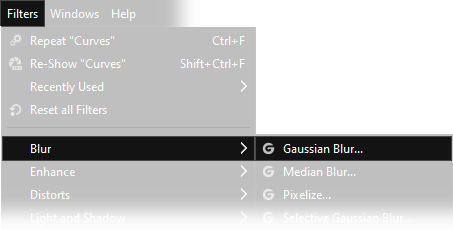
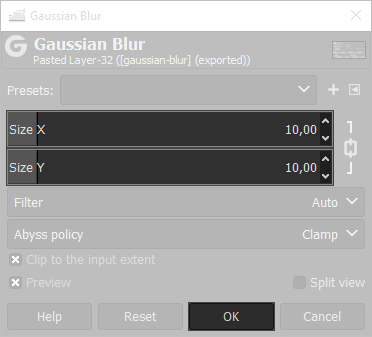
Now we need to apply a gaussian blur: open Filters 🠞 Blur 🠞 Gaussian Blur and set a correct amount. The value you have to choose depends on the image resolution. You should be able to distinguish the main shapes, but any detail has to be indistinguishable, for medium/high resolution images 10/15 pixels should be a correct amount, feel free to try different settings.
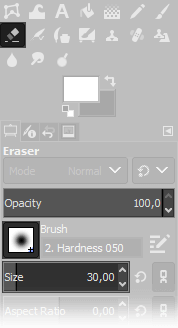
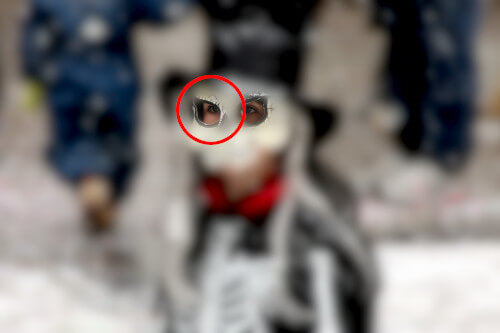
To get a perfect Flou effect, we need to leave the eyes of the subject perfectly sharp becasue otherwise our photo will seem an out of focus image. Select the Eraser tool, choose a smooth brush, set the correct size and delete the subject's eyes from the blurred layer.
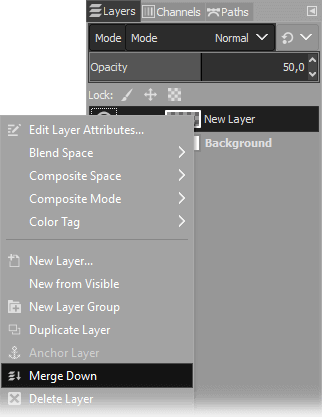
Finally we need to merge down the layer on the top: on the Layers Window select the upper layer, leave Normal as Blend mode, but set the opacity to 50%, then click with the right mouse button on the layer on the top and choose Merge down.
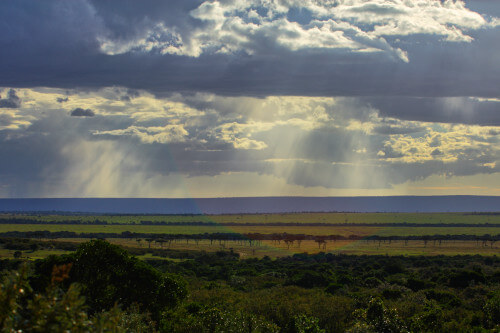
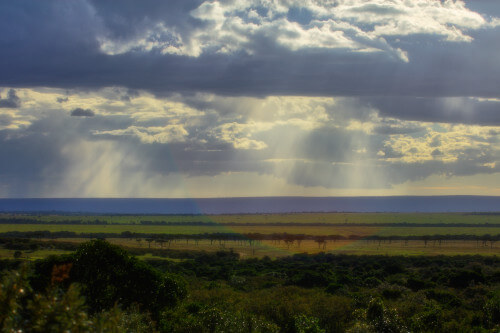
If you followed all the steps correctly, the result should be very similar to the pictures below on the right. We also added a second example with a panorama, but we suggest you to try with one of your photo, because the resolution we used to publish it on the site does not do justice to the result.
Most often the flou effect is applied to photographs with human subjects or panoramic images. Below is the same effect applied to a photograph with a more naturalistic theme.
If you liked this tutorial here you can find all the other guides we wrote about photo editing with Gimp, or you can go there to take a look to our photography tutorials. If you liked our work, you could consider to ❤support us: by clicking here you can see how.