Gimp Tutorial: Sharpen an image
How to use Gimp to increase the sharpness of a picture with Unsharp Mask and High Pass filter.

Blurred photographs can cause serious frustration. Gimp offers different tools to try to sharpen an image, but two of them offer better results than the others: Unsharp Mask and High Pass filter. The use of economic lenses, too much aperture or the blur caused by the photographer's movements on long shutter speed can give our images an unsatisfactory results. To overcome this annoying drawback Gimp helps us with two filters: the Sharpen (Unsharp Mask) and the High Pass. Obviously these filters cannot correct a photo that is completely blurred or out of focus, but allows you to add a bit of sharpness to a photograph that is good enough, but not perfectly clear.
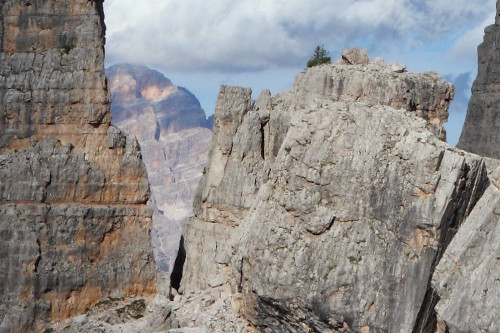
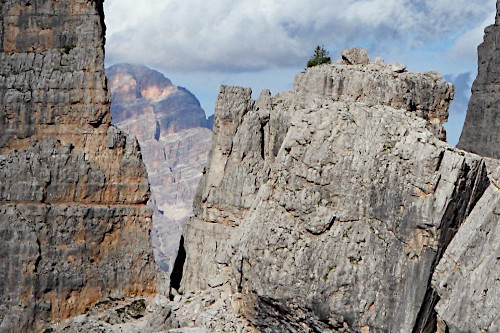
Let's take, as example, this photo of the "Cinque Torri", an Italian montain. The name could be transalted as: "The Five Towers". It was a really sunny day, so shutter speed was ideal. The lens was a Tamron 17-40 f/2.8, a decent lens, but not the best one. Even if I closed the aperture to f/5.6, the result was a little "soft", the details was sharp, but not as sharp as I wanted. Let's see two different ways to increase the sharpness using Gimp.

First way: Sharpen Filter (Unsharp Mask)
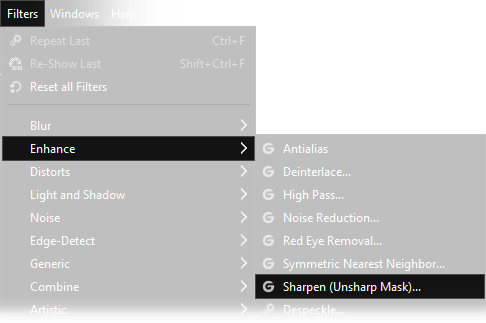
The first way is really easy and fast, the best for who want a good result with the minimum effort: Sharpen Filter. Unsharpen mask has been invented to sharpen the scan of books, because in the '90 the quality of the scanner was not so good, so it's fast and simple, but the results in photography are not ideal, because this technique was invented for another purpose. Remember to go easy on the sliders. You simply have to open Sharpen (Unsharp Mask) and set something like this:
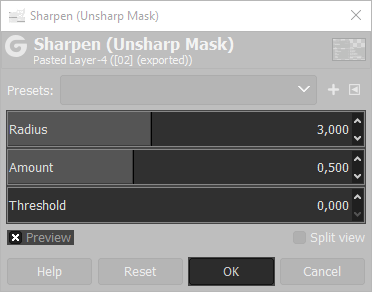
The Unsharp Mask acts mainly where there are strong chromatic differences, so is better if you concentrate on a portion of the photograph with highly contrasted outlines to evaluate
which is the right amount of Unsharp Mask to apply. To see the preview, remember to tick the Preview box at the bottom.
The Radius parameter must be proportional to the resolution of the photograph. The larger the image, the more the cursor must be moved to the right. This setting defines
the number of pixels that will be used to calculate the contrast. In a 5000 horizontal pixel photo I suggest a radius of 4, but you can find your favourite.
The Amount defines how much Sharpness we want to apply to the photo. This parameter must be set according to the conditions of the image. If you exaggerate
with the amount, digital noise would be really visible and contours would become too strong.
Threshold slider allows you to make the effect more smooth where there are soft contrasts, as example a wall or a person's skin would be smoother, but the borders will be contrasted.
Obviously there are also negative sides in using this filter, the result may appear unrealistic and any digital noise (or compression) is heavily emphasized. You need to find out how to dose the cursors and observe the image as a whole. It could also be a good idea to duplicate the layer, add a strong Sharpen Filter and then blend the contrasted layer over the original one with only a fraction of the opacity.
High Pass Filter
If you need more control than the Unsharp Mask, you have a second way to sharpen a photo: the High Pass Filter. In this second case
we will create a layer that will be used to sharpen the image in a second step. Dividing the procedure in two separate steps, you'll be allowed to better define
every parameter in order to get a more controllable result. Let's see how to proceed.
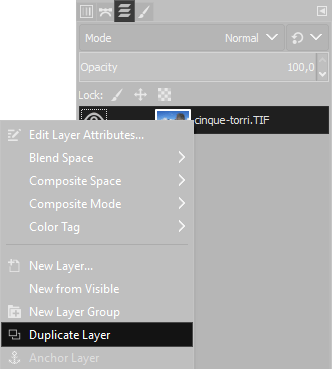
First of all you need to create a copy of the image on a New Layer. Click on the layer with the Right mouse button → Duplicate Layer,
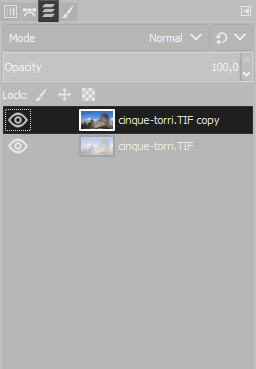
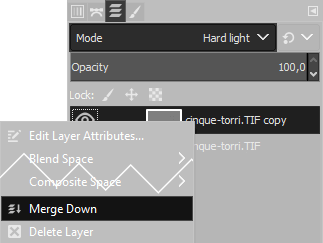
now select the layer above, in this case cinque-torri.TIF copy.
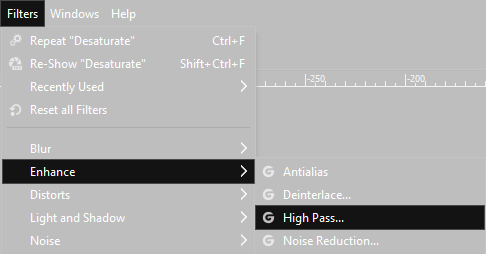
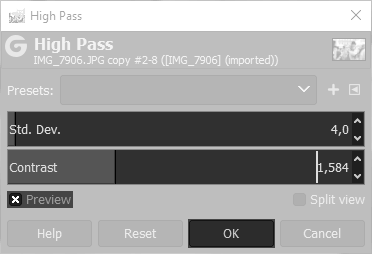
Now we have to apply the High Pass Filter on the layer we have just created. Click on Filters → Enhance → High Pass and set the sliders as you need. The Dev. Std. cursor defines the radius of the filter. Higher values means a larger area interested by the contrast mask around the borders. Default value is 4, generally is more than enough, but you can set any number you want. The Contrast slider is used to increase the sharpness, but pay attention to don't exxagerate because the result will bee a mess. Generally I leave 1,000. If moving the cursor some burned areas appears, the result will be uncorrect, so I suggest to never exceed a value of 1,400 if you want a realistic image.
Once you have applied the High Pass Filter the result will be a gray image with borders of strange colors, it's ok.
Choose the filtered layer and change the blend mode to Hard Light with an opacity of 100%
If the result is too intense you can reduce the opacity of the later, or choose Soft Light as blend mode.
If you want a more intense sharpness you can duplicate the layer as much times as you want, with any combination of hard and soft light you decide.
It could be a good idea, to keep the digital noise levels low, to reduce the noise on the highpassed layer using G'Mic before merging the layers.
If you need a tutorial for noise reduction with G'Mic, click here.
Now you only need to merge down the upper layer or layers, click with the Right mouse button → Merge down.
If you have a lot of different layers it will be faster to choose Flatten Image.
No one of these two tools can make miracles: if you picture is completely out of focus, or really blurred, or the digital noise is too high, it will be almost impossible to get something decent sharpness. If you picture needs only an enhance, results will be amazing.
If you liked this tutorial for sharpen an image with Gimp, here you can find all the tutorials we wrote about editing with Gimp. If you like take picture, here you have all the guides we have written about photography in general. If you liked our work, you could consider to ❤support us: by clicking here you can see how.