High-Key and Low-Key with Gimp
Easy, step by step, Gimp tutorial for both colours and monochrome 'High Key' and 'Low Key' portraits.

There are two styles in photography that are the opposite of each other: High key and Low Key. These effects can be applied both to coloured and black and white photos,
but gives the best results in monochrome images.
High key and Low Key effects are achievable in post productions, but it would be better to choose a photo with the correct
atmosphere.
- High key photography need photos with a lot of white and light tones, shadows has to be smooth, black has to be only a tiny fraction of the image. It's an "optimistic" effect, that is perfect with newborns, portraits, weddings and fashion photography. It could also be good in a snowy panorama
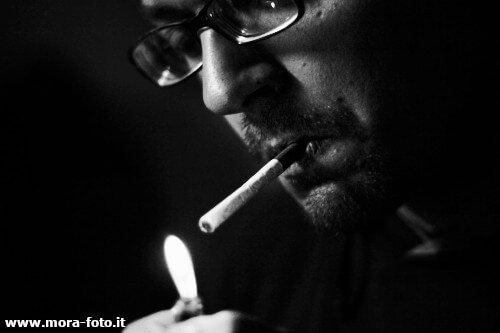
- Low Key photography is really dark and dramatic. It needs a lot of shadows, dark tones, low lights and high contrast with only a tiny fraction of white in the image. It is perfect for dark and "emotional" portraits, fashion photography, highly emotional actions. It could also be good in the photo of a gloomy forest
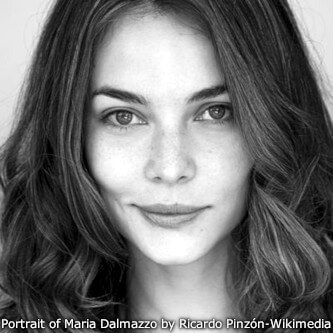
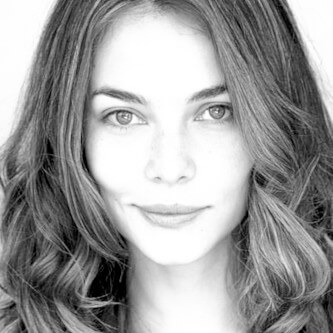
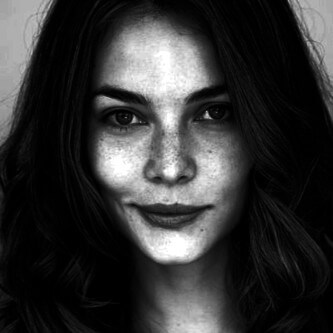
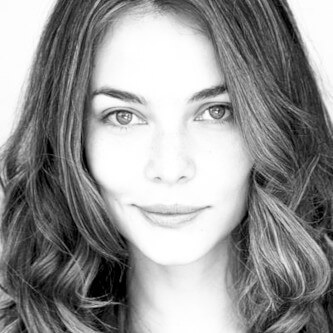
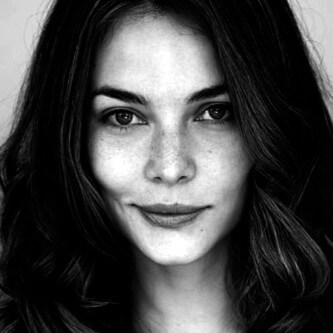
Originally High key and Low Key has been used in cinema, referring to the lights used on the set, so it's important to undestand that this effect should be used to emphasize something that is already on the lighting of the photo. This is not possible in this tutorial, because we need a photo that can be edited both in High key and Low Key, so we've found an amazing portrait on Wikimedia with neutral lighting, that is perfect for this tutorial. On the left, you can see the normal photo, in the center the high key and on the right the low key.
Gimp tutorial for High Key
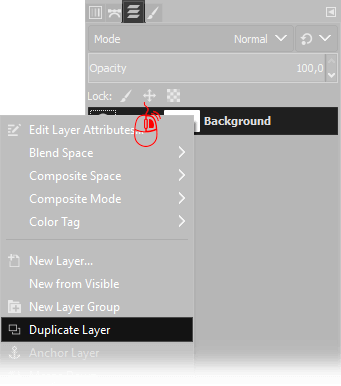
Let's see how to make an High Key photograph: first of all you need to duplicate the current layer. You have to move the mouse cursor over the actual layer on the Layers window (press Ctrl+L if you can't find it) then click Right Mouse button and choose Duplicate Layer.
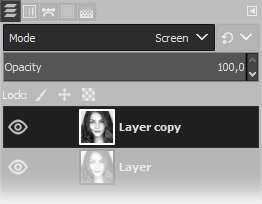
Select the layer on the top, then choose Screen as Blend mode, and leave opacity to 100%. Ok, it's done. Now you have an High Key portrait and you could already save the photo.
It's an high key, but not a perfect one. It's really good but we can try to make the nose more visible and try to balance the contrast. Now you have to try different settings to find out the perfect result: you can work on the layer above, or below, or both. You can use the Colors → Brightness Contrast tool, but I always think that curves offers more freedom. So let's go to Colors → Curves. If you don't know how to use a curve, you must read this tutorial, because it's a tool that's so powerful that, once learned, you won't use anything else.
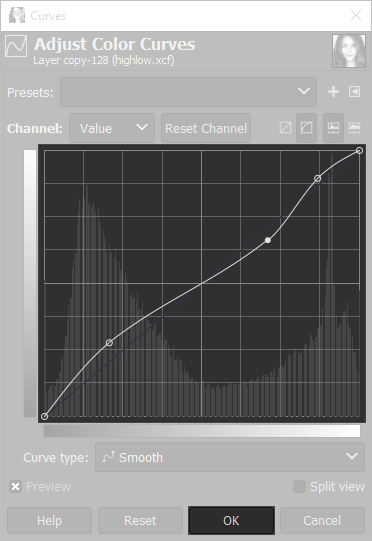
We want brighter hairs, brighter skin, but we don't want to lose the shape of the nose... Ok, a curve like the following one will do the trick. I'll apply it only to the layer above. In High Key photography a curve like the following should always be good, but remember that any photo is a different story, so you should try to find the best settings for your photo. Remeber that you can also try with more powerful settings and a lower opacity.
Gimp tutorial for Low Key
Let's see how to make a Low Key photograph: first of all you need to duplicate the current layer. You have to move the mouse cursor over the actual layer on the Layers window (press Ctrl+L if you can't find it) then click Right Mouse button and choose Duplicate Layer.
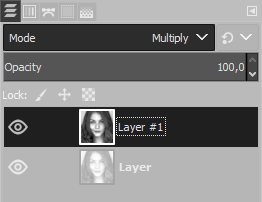
Select the layer on the top, then choose Multiply as Blend mode, and leave opacity to 100%. Ok, it's done. Now you have a Low Key portrait and you could already save the photo.
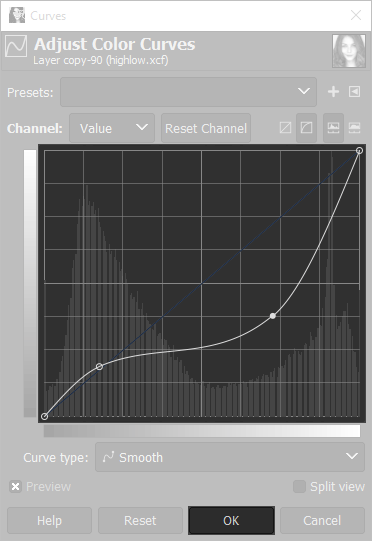
Alse here, you have a Low Key, but not a perfect one. Contrast is not enough, expecially in the skin on the face. There is too much white. We'll use a curve on the layer above again. This photo has almost no shadows, that are really important in Low Key photography, but let's try to make it work anyway. Open Colors → Curves and setup a curve as the following, that will darken the light areas leaving a little of details in the hairs. Remeber that you should always search the best curve for your photo, and that you can also try with more powerful settings and a lower opacity.
Other examples
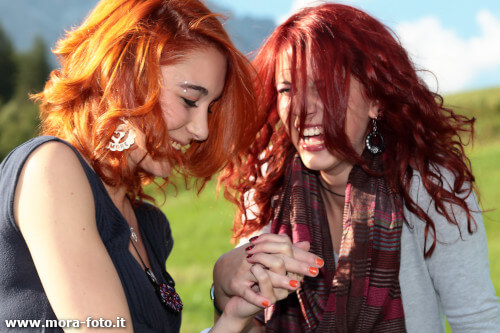
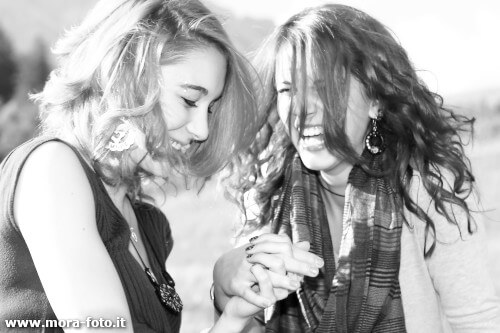
We want to show you other two examples: first is an High Key photography of two girls laughing under the sun. The second is a darker photo, with more prensent and defined shadows, that is better suited for Low Key photography. Another important thing to say is that the black and white conversion is really important, you shoud read our tutorial for the perfect black and white with Gimp.

If you liked this tutorial here you can find all the other guides we wrote about photo editing with Gimp, or you can go there to take a look to our photography tutorials. If you liked our work, you could consider to ❤support us: by clicking here you can see how.